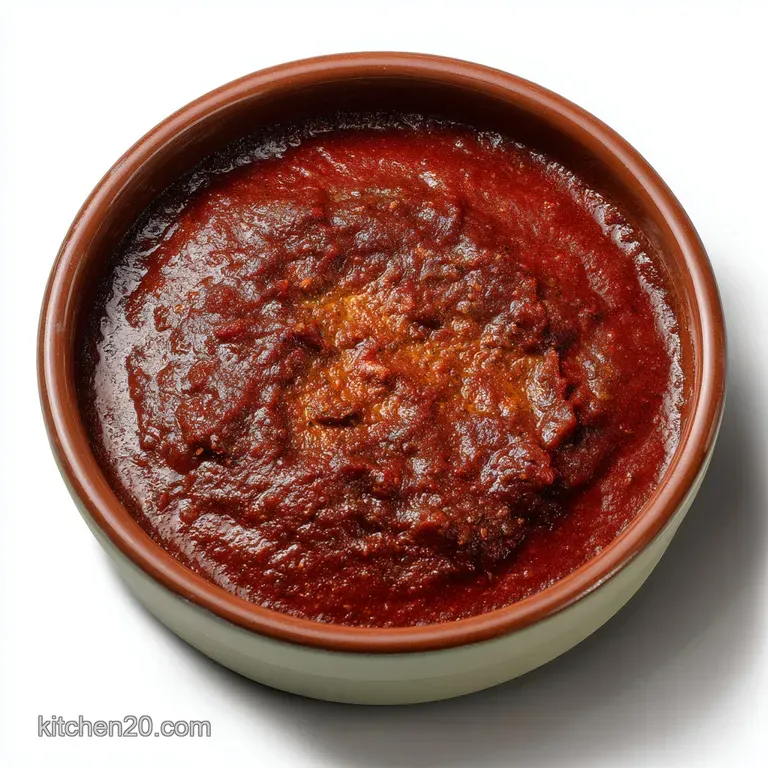
Enchilada Sauce: Deep Velvety Homemade Red Sauce
- Crafting the Ultimate Red Chile Sauce: Why Homemade Always Wins
- Dried Chiles and Pantry Staples: Your Shopping Guide
- Step-by-Step: Transforming Dried Pods into Rich Red Sauce
- Mastering Depth and Texture: The Science Behind a Superior Sauce
- Troubleshooting Your Batch: Pro Techniques for Perfect Results
- Extending the Shelf Life of Your Homemade Sauce
- Beyond Enchiladas: Creative Ways to Use This Versatile Sauce
- Recipe FAQs
- 📝 Recipe Card
Crafting the Ultimate Red Chile Sauce: Why Homemade Always Wins
You know how your kitchen smells incredible when you're making gravy? Multiply that by ten and add the deep, earthy scent of roasted paprika and dried fruit. That rich aroma is exactly what hits you when you start this Enchilada Sauce recipe.
It’s not just a coating; it’s the backbone of your entire meal.
I know, I know, opening a can is easier. But seriously, ditch the dull, metallic flavour of commercial sauces. Making this definitive, deep red sauce from scratch is shockingly simple and totally transforms your dish, elevating it from weeknight filler to weekend feast.
Trust me, once you taste real, homemade Enchilada Sauce , you won’t look back at the store-bought stuff again.
So, let’s skip the lazy route. We are going to harness the power of dried chiles and a simple roux to create a velvety, complex, and utterly superior Enchilada Sauce recipe . Let’s crack on!
Tinned vs. Toasted Chilies: The Flavor Divide
The key difference between a flat, boring sauce and one that sings is the quality of the chili base. Most canned sauces use powdered spices, which are fine, but they lack depth. We are using actual dried chili pods Ancho and Guajillo which contain natural oils.
Toasting those pods releases those oils, giving you an unparalleled earthiness and complexity. You simply can't fake that taste.
Understanding the Medium Difficulty Level Justification
Why is this a medium difficulty? Because it requires attention, not skill. You need to focus intensely during two stages: toasting the chilies (a thirty second lapse can ruin the whole batch) and building the roux. If you respect the heat and the timing, this process is incredibly rewarding.
If you rush it, you end up with either bitter, burnt chilies or a grainy sauce.
The Essential Role of the Roux in Velvety Texture
A roux is just fat and flour cooked together, but it is pure magic. It serves three functions here: it thickens the sauce beautifully, preventing it from being watery; it prevents the chili solids from separating; and cooking the flour in the fat eliminates that unpleasant raw flour taste.
It is what gives this Enchilada Sauce its luscious, velvety texture, unlike the thin, gloppy nature of that las palmas enchilada sauce you might be used to.
Dried Chiles and Pantry Staples: Your Shopping Guide
Starting with the right ingredients is half the battle. This isn't just a basic gravy; it's a foundation built on subtle spice, earthiness, and brightness. When shopping for your chilies, look for pods that are pliable, not brittle, and have a beautiful, deep red colour.
Deciphering the Chilies: Ancho and Guajillo Notes and Roles
We use a classic 1:1 ratio. The Ancho chilies provide deep, slightly smoky, raisin like earthiness, acting as the base note. The Guajillo chilies are essential for that bright, fruity tang and the gorgeous, intense red colour of the final Enchilada Sauce . They work together perfectly.
| Ingredient | My Recommendation | Substitute If Needed |
|---|---|---|
| Ancho Chilies | Deep, earthy | Pasilla Negro (darker, slightly smoky) |
| Guajillo Chilies | Bright, fruity | New Mexico Red Chilies (mild, slightly less fruity) |
| Chicken/Veg Stock | Low Sodium, high-quality | Water + 2 tbsp Better Than Bouillon |
Swapping Chilies: Alternatives for Heat and Flavor Profile
If you want a deeper smokiness and a little more heat in your Enchilada Sauce , try adding one or two dried Chipotle Morita chilies to the mix before toasting and steeping.
If you can only find one type of chili, you can use all Anchos, but be warned: the sauce will be darker and lack that bright, fruity edge the Guajillos provide.
Essential Aromatics and Building the Rich Gravy Base
Don't skip the onion and garlic! They cook down in the oil, infusing sweetness and savoriness into the fat before the roux is even formed. This layer of flavour is critical. When the garlic hits the hot oil and your kitchen smells incredible, you know you’re building a rich base for your Enchilada Sauce (I promise, it’s not just chili flavour we are after).
step-by-step: Transforming Dried Pods into Rich Red Sauce
Toasting and Hydrating the Dried Chilies for Maximum Flavor
This step is crucial. Heat your dry pan over medium heat. Drop the stemmed and seeded chillies in batches. Toast them for 30 60 seconds per side, until they smell nutty, toasty, and fragrant. Never let them smoke or burn.
I once charred a whole batch and the resulting Enchilada Sauce was so bitter I had to toss it. Learn from my rookie mistake! Once fragrant, transfer the pods to a bowl and cover them with simmering stock.
Let them steep for 30 minutes until they feel soft and pliable, ready for blending.
Achieving the Silkiest Purée: Straining is Non-Negotiable
This is where you earn your stripes. Take the softened chilies and the steeping liquid, along with the sautéed aromatics (we will cover the aromatics next), and blend them until they are totally smooth . I mean, blast that blender for a full 60 seconds.
But even a high powered blender won't get everything. Now, set a fine mesh strainer over your saucepan and push the thick liquid through. Press hard on the remaining pulp to extract every last drop of the glorious liquid.
Discard the fibrous skins they are the enemy of a perfect Homemade Red Enchilada Sauce .
Building the Roux and Tempering the Chile Liquid Correctly
In your saucepan, cook the oil, onion, and garlic. Once soft, whisk in the flour to create the roux. Cook this for 2– 3 minutes, until it looks like light peanut butter and you can no longer smell raw flour. This creates the thickener. Next, add your spices (cumin, oregano, paprika).
Blooming them in the hot fat for 30 seconds makes the flavours absolutely explode.
Then, here’s the trick: When adding the chile liquid (which is still in the blender with the onions), pour it in slowly while continuously whisking the hot roux. This tempering prevents lumps and ensures your Enchilada Sauce remains flawlessly smooth.
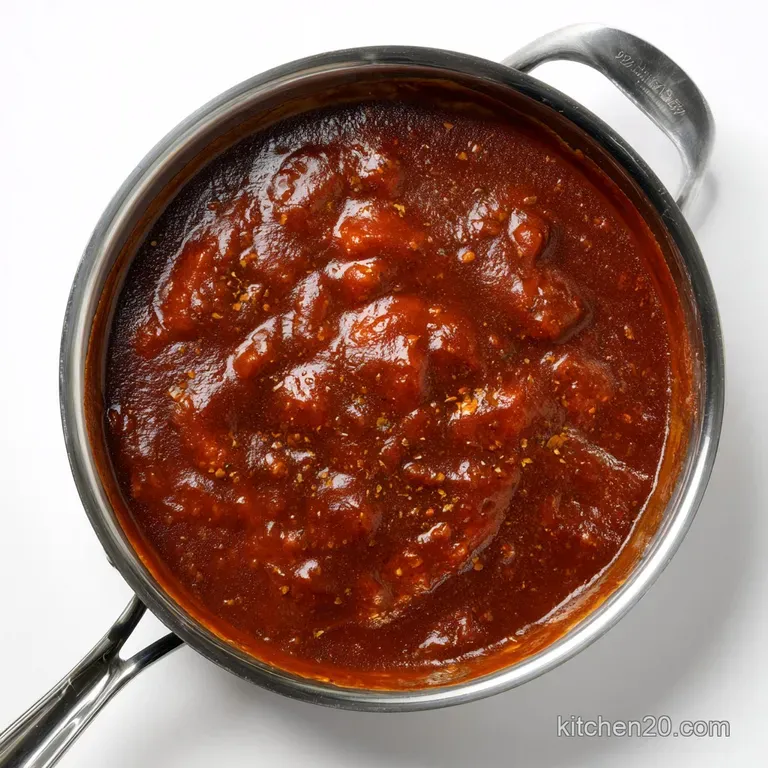
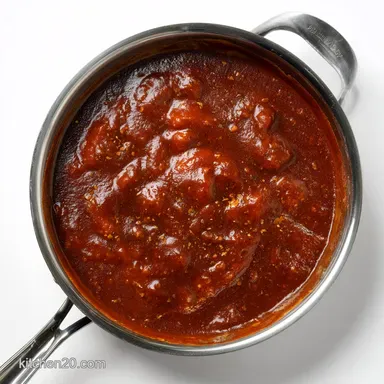
Final Simmering, Seasoning, and Adjusting Consistency
Bring the strained sauce to a slow, gentle simmer. This is where the magic happens. Simmer it, uncovered, for 5– 10 minutes. It will deepen in colour and thicken perfectly.
Stir in the optional teaspoon of apple cider vinegar at the end; that little hint of acid wakes up all the spice notes and prevents the sauce from tasting flat. Season generously! Remember, this sauce needs to stand up to fillings, so it should taste almost too salty on its own.
Mastering Depth and Texture: The Science Behind a Superior Sauce
The reason this Enchilada Sauce recipe works so well is the marriage of fat (from the oil/lard) and liquid (the stock and chile liquid) bound by the starch (the flour roux).
This emulsification process creates a stable, consistent sauce that won’t break or separate, which is often what happens if you skip the roux and just blend the chilies with powder. This methodical approach is the difference between a functional sauce and an extraordinary one.
Troubleshooting Your Batch: Pro Techniques for Perfect Results
Avoiding the Bitter Sauce Blunder During Toasting
If you were distracted during the toasting stage and the chilies developed scorch marks, your Enchilada Sauce will taste bitter. The fix? If it’s only slightly bitter, you can stir in 1/2 teaspoon of brown sugar or honey to try and balance the flavour.
If it tastes truly acrid, you’ll sadly need to start over with a fresh batch of chilies, focusing solely on fragrance, not charring.
Too Thick or Too Thin? Adjusting the Final Consistency
Sometimes the sauce comes out too thick, especially if you used a lot of flour in your roux or simmered too long. Just whisk in a little more hot stock until you reach your desired consistency it should lightly coat the back of a spoon.
If it's too thin, whisk together a teaspoon of cornstarch with a tablespoon of cold water (a slurry) and whisk it into the simmering sauce. It will thicken almost immediately. This makes for a perfect, easy Enchilada Sauce .
Extending the Shelf Life of Your Homemade Sauce
Since we aren't loading this beautiful sauce up with stabilizers, you need to store it correctly.
Chef's Note: Homemade sauces, unlike the store-bought palmas enchilada sauce , lack heavy preservatives. Always cool them completely before storing to prevent bacteria growth.
- Refrigeration: Store leftover Enchilada Sauce in an airtight container for up to 5 days.
- Freezing: This sauce freezes brilliantly! Pour it into freezer safe containers, leaving about an inch of headspace (it expands!). It keeps well for up to 4 months. To reheat, thaw overnight in the fridge and warm gently in a saucepan, adding a splash of stock if needed to restore the ideal texture.
Beyond Enchiladas: Creative Ways to Use This Versatile Sauce
Don't let the name fool you; this is a seriously versatile red chili gravy. I love using this deeply flavoured base as a substitute for boring tomato sauce in other contexts. It makes an incredible dipping sauce for thick cut fries, or you can use it to smother savory tamales. It’s definitely spicier and earthier than my Peanut Sauce: The Ultimate Silky Smooth Dipping Sauce , but equally addictive.
The Perfect Chili Ratio: Balancing Ancho Earthiness and Guajillo Brightness
The 1:1 ratio used in this specific Authentic Enchilada Sauce Recipe is intentional. It ensures the deep, smoky notes don’t overwhelm the brighter, fruitier elements. This balance is key to achieving that restaurant quality depth that makes people ask for the recipe.
How to Build a Velvety Smooth (Never Grainy) Enchilada Base
I can't stress this enough: blending and straining are your best friends. If you skip either step, your sauce will feel slightly gritty due to the remaining chilli skin fibres. Dedicate the 5 minutes to straining and you will be rewarded with a velvety, smooth texture that truly defines a superior Enchilada Sauce .
Developing Complexity Through Time: The Essential Simmer
The final simmer isn't just about thickening the sauce; it’s about melding the disparate spices into one cohesive, complex flavour profile. The flavors need time to marry and bloom fully. Don’t rush this ten minutes!
Enhancing Umami: Should You Add a Touch of Vinegar or Sugar?
Yes! If, after tasting, the sauce feels heavy or flat, the optional teaspoon of apple cider vinegar provides an amazing lift, enhancing the umami and making the flavour brighter. If your chili pods were slightly old or you worried about the toasting, a tiny pinch of sugar can smooth out any residual bitterness, perfecting this definitive Enchilada Sauce .
Enjoy every drop!

Recipe FAQs
My sauce tastes bitter. How can I prevent this in the future?
Bitterness in chili sauces usually stems from scorched chilies or failure to remove the veins and seeds completely. Ensure that when you dry-toast the chillies, you only heat them for 30 seconds per side until fragrant, not burnt.
If the sauce is already bitter, try stirring in a teaspoon of brown sugar or a splash of vinegar to balance the flavor.
My sauce is too thick or too thin. How do I adjust the consistency?
If the sauce is too thick, simply whisk in additional broth (chicken or vegetable) 1/4 cup at a time until the desired velvety consistency is reached. If the sauce is too thin, simmer it uncovered for an extra 10 to 15 minutes to allow the liquid to reduce, or dissolve a teaspoon of cornstarch in cold water and whisk the slurry into the hot sauce.
What if I cannot find Ancho or Guajillo chillies? What are good substitutions?
For the Guajillo’s fruity notes, you can substitute New Mexico or California chillies, which offer similar mild heat and flavor. If you cannot find Ancho, which provides the deep, earthy base, Pasilla chillies are a decent substitute, though they may result in a darker, slightly less sweet sauce.
Always check the heat level of your substitutes before adding them all at once.
Can I make this recipe vegan or gluten-free?
Yes, this recipe is easily adaptable to both dietary requirements. For a vegan version, simply use vegetable oil or vegan butter for the roux and swap the chicken broth for vegetable broth.
To ensure it is gluten-free, substitute the all-purpose flour in the roux with certified gluten-free flour or use masa harina (corn flour), which adds a pleasant authentic flavor.
How long can I store this homemade enchilada sauce, and does it freeze well?
This sauce stores very well; when kept in an airtight container, it will remain fresh in the refrigerator for 5 to 7 days. It is also excellent for long term storage and can be poured into freezer safe containers or heavy duty zip-top bags and frozen for up to 6 months.
Thaw it overnight in the refrigerator before reheating gently on the stovetop.
Is it necessary to use a roux, or can I just skip the flour thickening step?
The roux is a crucial element that contributes to both texture and flavor development. Skipping it will result in a thin, watery sauce lacking that classic velvety body that the flour provides.
Furthermore, the fat in the roux helps bloom the spices and chili powder, deepening their aromatic presence before the liquid is introduced.
Homemade Red Enchilada Sauce
Ingredients:
Instructions:
Nutrition Facts:
| Calories | 215 kcal |
|---|---|
| Protein | 6.9 g |
| Fat | 15.9 g |
| Carbs | 6.6 g |
