Rosca De Reyes Con Sabor Y Tradición Para Toda La
- Time: Active 45 minutes, Passive 2 hours 20 mins, Total 3 hours 5 mins
- Flavor/Texture Hook: Zesty, buttery brioche style bread with a shatter crisp sugar topping
- Perfect for: Epiphany celebrations, festive family brunches, and tradition seekers
- The Science of Why it Works
- Essential Breakdown of Key Performance Ingredients
- Selecting Quality Elements for Better Bread
- Tools Required for a Successful Bake
- Step by Step Method for Perfection
- Resolving Common Dough and Texture Issues
- Creative Ways to Customize the Flavor
- Keeping Your Bread Fresh and Useful
- Beautiful Presentation for Your Feast
- Realities of Baking This Iconic Bread
- Rosca de Reyes FAQs
- 📝 Recipe Card
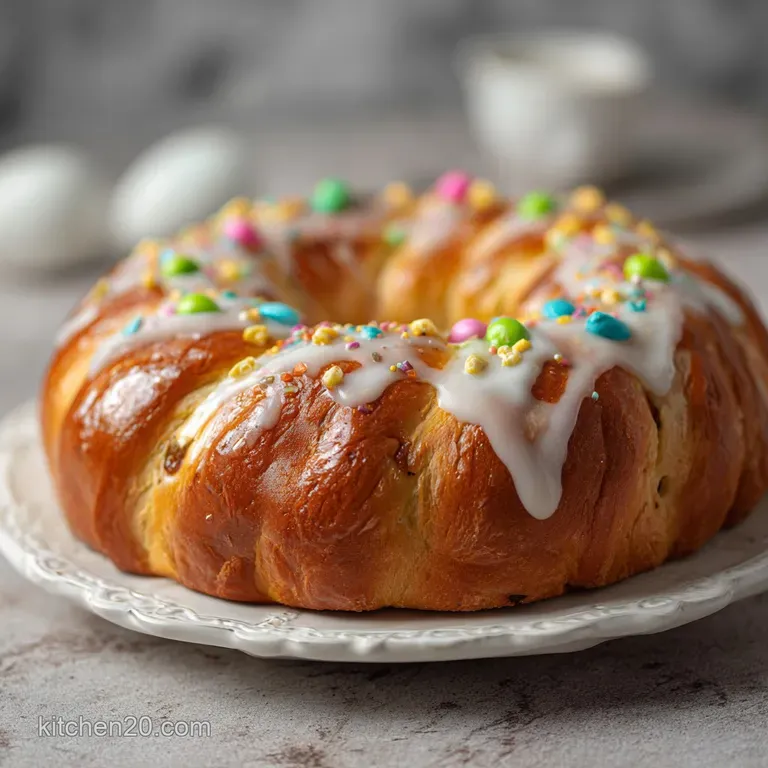
Nothing beats the vibrant aroma of orange zest and warm yeast filling the kitchen on a cold January morning. It's a scent that instantly brings back memories of gathering around the table, waiting to see who finds the hidden figure. Bake a flavorful and traditional Rosca de Reyes your whole family will adore.
I've spent years tweaking this dough because, let's be honest, many store versions are dry enough to need a gallon of milk. This version is different. We are going for a rich, buttery texture that feels more like a brioche than a plain roll.
We'll focus on getting that specific "costra" (sugar crust) just right, so it doesn't melt away in the oven. It's about capturing that contrast between the soft bread and the firm candied fruits. Let's get into the details so you can nail this on your first try. Rosca de Reyes con Sabor y Tradición para Toda la
The Science of Why it Works
The high fat content from 150g of unsalted butter and 3 large eggs creates a barrier around the flour proteins, which limits gluten development for a tender, velvety crumb. Plus,, the orange blossom water acts as a surfactant, helping to distribute flavors evenly throughout the dough's moisture.
Chef's Tip: To get a truly vibrant flavor, rub the 1 tbsp of orange zest into the 150g of granulated sugar with your fingertips before mixing. This releases the essential oils directly into the sugar, ensuring every bite is infused with citrus.
Hydrating for a Feather Light Crumb
Water is the enemy of shelf life in bread, but fat is its best friend. By using lukewarm whole milk and plenty of butter, we ensure the starch molecules stay hydrated and soft even after the bread cools.
Stabilizing the Sugar "Costra"
The sugar crust relies on a 1:1:1 ratio of flour, powdered sugar, and vegetable shortening. Using shortening instead of butter here is vital because shortening has a higher melting point, preventing the decorative strips from sliding off the ring during the bake.
Essential Breakdown of Key Performance Ingredients
| Ingredient | Science Role | Pro Secret |
|---|---|---|
| All purpose flour | Provides the structural framework | Always weigh it; 500g is exactly 500g, no "heaping cups." |
| Instant dry yeast | Biological leavening agent | Mix with lukewarm milk (110°F) to wake it up instantly. |
| Unsalted butter | Softens the gluten strands | Use "pliable" butter that's cool to the touch but leaves a fingerprint. |
| Orange blossom water | Flavor and aroma infusion | A little goes a long way; don't exceed 1 tbsp or it tastes like soap. |
Getting the temperature of your milk right is one of those precision checkpoints that changes everything. If it's over 120°F, you'll kill the yeast. If it's under 90°F, the dough will take forever to rise, and you'll lose that airy texture we're after.
Selecting Quality Elements for Better Bread
You don't need a pantry full of specialty items, but the quality of your fats and aromatics determines the final vibe of the bread.
- 500g All purpose flour: Provides the perfect protein balance for a soft yet sturdy loaf.
- Substitute: Bread flour for a chewier, more "stretchy" texture.
- 150g Granulated sugar: Feeds the yeast and sweetens the dough.
- Substitute: Cane sugar for a slight molasses undertone.
- 11g Instant dry yeast: No need to bloom, just toss it in.
- Substitute: 33g fresh yeast if you want a more old school bakery smell.
- 120ml Whole milk: Adds richness and keeps the crumb moist.
- Substitute: Heavy cream for an even more decadent, fatty crumb.
- 3 Large eggs: These provide structure and that golden internal color.
- Substitute: 1/4 cup of unsweetened applesauce per egg (note: will be much denser).
- 150g Unsalted butter: Makes the bread melt in-your mouth tender. Why this? Butter provides a superior flavor and mouthfeel compared to margarine or oil.
- 1 tbsp Orange blossom water: The signature scent of a traditional Rosca.
- Substitute: Vanilla extract (note: loses the floral traditional profile).
- 150g Candied fruit strips: Provides the classic "jeweled" look.
- Substitute: Dried cranberries or apricots for a modern twist.
Tools Required for a Successful Bake
A stand mixer such as KitchenAid is your best friend here because enriched dough is very sticky. You can do it by hand, but prepare for a workout. You'll also need a large baking sheet, a silicone mat or parchment paper, and a plastic bench scraper to handle the dough without adding too much extra flour.
I also recommend a digital thermometer. Checking the internal temperature of the bread is the only way to ensure it's not doughy in the center without drying out the exterior. We are aiming for exactly 190°F.
step-by-step Method for Perfection
Preparing the Scented Dough
- Whisk the 500g flour, 150g sugar, 11g yeast, and 1/2 tsp salt in your mixer bowl. Note: This ensures the yeast is evenly distributed before liquids are added.
- Add the 120ml lukewarm milk, 3 eggs, 1 tbsp orange blossom water, and 1 tbsp orange zest to the dry ingredients.
- Knead on low speed for about 5 minutes until a shaggy dough forms and pulls away from the sides.
- Incorporate the 150g softened butter one tablespoon at a time while the mixer is running. Note: Adding fat gradually allows the gluten to develop before it gets coated in grease.
- Increase speed to medium and knead for another 10 minutes until the dough is silky, elastic, and passes the windowpane test.
Controlling the First Rise
- Place the dough in a greased bowl and cover with a damp cloth.
- Proof in a warm spot (ideally 75°F to 80°F) for 1 hour 30 mins until it has doubled in size and looks puffy.
Shaping the Ring and Hiding the Figures
- Punch the air out and transfer the dough to a floured surface.
- Roll the dough into a long log (about 30 inches) and join the ends to form a large oval on your baking sheet.
- Tuck your plastic figurines into the underside of the dough at random intervals. Note: Make sure the dough is sealed well so they don't pop out during baking.
Decorating and Baking
- Mix the 100g powdered sugar, 100g flour, 100g shortening, and 1 yolk until a thick paste forms for the crust.
- Brush the entire ring with the beaten egg wash and arrange the sugar paste strips, 150g candied fruits, and 30g almonds on top.
- Bake at 350°F for 35 minutes until the crust is golden and the bread sounds hollow when tapped.
| Feature | Fresh Homemade | store-bought Shortcut |
|---|---|---|
| Texture | Velvety and moist | Often dry or crumbly |
| Aroma | Natural citrus and butter | Artificial flavorings |
| Shelf Life | Best within 2 days | Contains preservatives for weeks |
The homemade version has a significantly higher fat content, which is why it tastes so much better. However, because it lacks commercial dough conditioners, you really want to eat it within the first 48 hours for the best experience.
Resolving Common Dough and Texture Issues
If your dough feels like a sticky mess that won't come together, don't panic. Enriched doughs take longer to develop. Resist the urge to dump in more flour; just keep kneading. The butter will eventually emulsify into the flour.
Why Your Rosca is Too Dense
Usually, this happens because the milk was too hot and killed the yeast, or the dough didn't get enough time for the second rise after shaping. Enriched dough is heavy, so it needs that extra time to lift all that butter and sugar.
Fixing a Cracked Surface
Cracking usually means the dough skin dried out during the proofing stage. Always cover your dough with a damp cloth or plastic wrap. If it still cracks, your oven might be too hot, causing the inside to expand faster than the crust can stretch.
Preventing a Dry Crumb
Overbaking is the primary culprit here. Even five extra minutes can turn a soft brioche into a dry roll. Use a thermometer to hit that 190°F mark, and then pull it out immediately.
| Problem | Root Cause | Solution |
|---|---|---|
| Sugar crust melts | Used butter instead of shortening | Switch to vegetable shortening for the paste |
| Dough won't rise | Milk was too hot (>120°F) | Use a thermometer; keep milk lukewarm |
| Fruit falls off | Didn't use enough egg wash | Brush generously before placing decorations |
Creative Ways to Customize the Flavor
If you want to shake things up, try swapping the orange blossom water for a tablespoon of dark rum or bourbon. It adds a deep, smoky undertone that pairs beautifully with the candied figs. You can also sprinkle the sanding sugar more heavily over the fruit sections to create a sparkling, jeweled effect.
For a completely different texture, try adding 1/2 cup of chocolate chips into the dough during the last minute of kneading. This works remarkably well if you are also serving this with a thick Mexican hot chocolate. If you enjoy playing with seasonal flavors, you might find inspiration in this Flaky Pumpkin Scones recipe, which uses similar spice and citrus notes to create a festive bake.
| Variation | Modification |
|---|---|
| a crunchier topping | use coarse pearl sugar instead of regular sanding sugar |
| a richer dough | swap one of the whole eggs for two egg yolks |
| a faster rise | place the dough in an oven that is turned off but has a bowl of boiling water on the rack below it |
Keeping Your Bread Fresh and Useful
Storage: Wrap the Rosca tightly in plastic wrap or store it in an airtight container at room temperature for up to 2 days. If you still have leftovers after that, move it to the fridge for up to 5 days, but you'll definitely want to toast it.
Freezing: This bread freezes beautifully. Slice it first, wrap each piece in foil, and place them in a freezer bag. It will stay fresh for up to 2 months. Thaw at room temperature and warm in a 300°F oven for 5 minutes.
Zero Waste: If the bread goes stale, don't toss it! It makes the absolute best French toast or bread pudding. The high sugar and butter content means it caramelizes like a dream in a skillet. You can even dry out thin slices in a low oven to make "Rosca biscotti" for dipping in coffee.
Beautiful Presentation for Your Feast
Tradition dictates that the Rosca should be the center of the table. I like to serve mine on a large wooden board surrounded by extra pieces of candied fruit and small bowls of pecans. The contrast of the golden bread against a rustic backdrop looks stunning in photos.
When it comes to pairings, this bread is designed to be dipped. A frothy Mexican hot chocolate (the kind made with a molinillo) is the classic choice. If you are serving this as part of a larger Three Kings Day feast, it balances the spice of savory dishes perfectly. It actually pairs quite well with the savory sweet profile found in a Mexican Chicken and recipe, providing a soft, sweet finish to a vibrant meal.
Realities of Baking This Iconic Bread
There are a few "rules" people talk about with Rosca that aren't actually true. Let's clear those up so you can bake with confidence.
Myth: You must bloom instant yeast in water first. Truth: Instant yeast is designed to be mixed directly into the dry ingredients. In fact, blooming it can sometimes weaken its lifting power in heavy, enriched doughs.
Myth: The hidden figurine will melt in the oven. Truth: Traditional "muñequitos" are made of over high heat resistant food grade plastic or ceramic. As long as you use figures specifically sold for Rosca de Reyes, they will be perfectly fine at 350°F.
Myth: Kneading by hand is better for the texture. Truth: While it's more "authentic," a stand mixer is actually superior for this specific recipe.
It allows you to develop the gluten structure without adding the extra flour that usually happens when kneading a sticky dough on a countertop. More flour equals a drier bread.

Rosca de Reyes FAQs
What makes this Rosca de Reyes recipe so special compared to store-bought versions?
It's the richness and texture. This recipe uses a high fat content from butter and eggs, combined with a long fermentation, to create a velvety, brioche like crumb that store-bought versions often lack.
How can I achieve the perfect sugar crust ("costra") on my Rosca de Reyes?
Use a specific paste ratio and shortening. The crust is made with a 1:1:1 ratio of flour, powdered sugar, and vegetable shortening. Shortening has a higher melting point than butter, which helps the decorative strips stay put during baking.
What's the best way to prepare the dough for a light and airy Rosca?
Ensure your milk is lukewarm and knead thoroughly. Use lukewarm milk (around 110°F) to activate the yeast, and knead the dough until it's silky and elastic, passing the windowpane test, which indicates proper gluten development.
Can I make the Rosca de Reyes dough ahead of time?
Yes, it enhances the flavor. You can prepare the dough through the first rise and then refrigerate it overnight. This slow fermentation develops deeper, more complex flavors.
How do I prevent my Rosca de Reyes from drying out?
Avoid overbaking and ensure proper hydration. The key is to bake until the internal temperature reaches exactly 190°F and no further, and to use whole milk and butter to keep the crumb hydrated. If you master temperature precision here, you can apply it to our Green Chili Bacon Cheese Egg Breakfast Souffle: Ultimate Brunch Upgrade for perfect results every time.
What should I do if my Rosca dough is too sticky to handle?
Resist adding too much extra flour. Enriched doughs are meant to be sticky; continue kneading and allow the butter to emulsify into the flour. Excessive flour will result in a drier bread.
What are some creative flavor variations for Rosca de Reyes?
Experiment with different aromatics and additions. Try swapping orange blossom water for dark rum or bourbon for a smoky undertone, or incorporate chocolate chips for a richer taste, similar to how you might adapt flavors in our My Amazing Easy Quorn Chilli Con Carne: 20-Minute Family Favorite.
Rosca De Reyes Tradicional
Ingredients:
Instructions:
Nutrition Facts:
| Calories | 396 kcal |
|---|---|
| Protein | 6.4 g |
| Fat | 17.1 g |
| Carbs | 54.2 g |
| Fiber | 1.6 g |
| Sugar | 21.5 g |
| Sodium | 92 mg |
