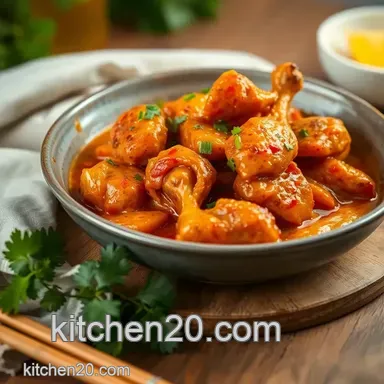
Street Style Yellow Chili Chicken

- Prep10 Mins
- Cook15 Mins
- Servings4
- Time: 10 min active prep + 15 min cook
- Flavor/Texture Hook: Zesty, spicy glaze with tender crisp chicken
- Perfect for: Busy weeknights or a quick fusion dinner
You don't need a professional wok or a four-hour soaking period to achieve that signature slippery, tender texture found in takeout. While many assume chicken breast inevitably dries out during a stir fry, the right method prevents that entirely.
I once believed that achieving a thick, lustrous sauce required long simmering, but that often led to overcooked meat. The real secret lies in the heat of the pan and the precise timing of the cornstarch slurry.
This Yellow Chili Chicken offers a vibrant, zesty spice profile that stands apart from traditional red chili recipes. It's a quick process requiring few tools that delivers great results on your very first attempt.
Yellow Chili Chicken Quick Stats
This dish is all about speed. You can have this on the table in 35 minutes total, which is faster than the delivery driver can find your house. The flavor is a sharp balance of honey sweetness and the punch of yellow chilies.
The goal is to get the chicken seared and the vegetables just barely softened. You want a bit of crunch in the peppers to contrast the tender meat. If you overcook the veg, you lose that fresh, street style vibe.
Since it's a over high heat recipe, you'll want everything prepped and sitting in bowls before you even touch the stove. Once the oil shimmers, things move fast.
Everything You'll Need
The coating relies on a combination of cornstarch and egg to shield the meat. As for the sauce, honey balances the heat and bright color provided by the yellow chili sauce.
The Chicken Coating
- 1.5 lbs boneless skinless chicken breast, cubed into 1 inch pieces
- 2 tbsp cornstarch Why this? Forms a protective "velvet" coating
- 1 large egg, beaten Why this? Ensures the cornstarch adheres to the meat
- 1/2 tsp salt
- 1/4 tsp white pepper
The Glaze and Aromatics
- 3 tbsp yellow chili sauce Why this? Gives the dish its characteristic color and spice
- 2 tbsp soy sauce Why this? Contributes saltiness and richness
- 1 tbsp rice wine vinegar Why this? Balances the sugar
- 1 tbsp honey Why this? Creates a shimmering glaze
- 1 tsp toasted sesame oil Why this? Adds a toasted, nutty scent
- 1 tbsp cornstarch dissolved in 2 tbsp water Why this? Rapidly thickens the sauce
- 3 tbsp neutral oil (canola or vegetable)
- 1 medium yellow onion, diced
- 1 medium yellow bell pepper, diced
- 3 cloves garlic, minced
- 1 tbsp fresh ginger, grated
- 2 stalks spring onions, chopped
Simple Substitutions
| Original Ingredient | Substitute | Why It Works |
|---|---|---|
| Yellow Chili Sauce | Sriracha + pinch of Turmeric | Mimics the color and heat. Note: Sriracha has a more acidic profile |
| Honey | Brown Sugar | Similar in sweetness and viscosity. Note: Misses the distinct floral notes |
| Chicken Breast | Chicken Thighs | Offers more moisture and flavor. Note: Result is juicier but less "silky" |
| Rice Wine Vinegar | Apple Cider Vinegar | Comparable acidity levels. Note: Adds a slight fruitiness |
Certain fresh ingredients can be replaced with quicker alternatives to save time. I prefer fresh ginger, but a paste is a great backup.
| Fresh Item | Shortcut | Trade off |
|---|---|---|
| Grated Ginger | Ginger Paste | Quicker preparation; slightly more processed flavor |
| Diced Onion | Frozen Onion | Eliminates chopping; slightly less crunch |
| Fresh Garlic | Garlic Powder | Extremely fast; lacks the bite of fresh cloves |
Minimal Tools Required
Creating Yellow Chili Chicken doesn't require specialty equipment. While a wok is traditional, a large non-stick skillet or cast iron pan is an excellent alternative. Just ensure your pan can withstand high temperatures and provides ample space to sear the meat without overcrowding.
For the velveting stage, I prefer a basic stainless steel bowl and a small whisk for the slurry. Should a whisk be unavailable, a fork is a great substitute for smoothing out cornstarch lumps.
Grab a wide spatula for the stir-fry. Since you'll be tossing the chicken and vegetables quickly, a broader tool prevents ingredients from flying out of the pan during the process.
From Prep to Plate
Phase 1: Velveting the Protein
In a medium bowl, mix the cubed chicken breast with the beaten egg, cornstarch, salt, and white pepper. Stir until each piece is coated in a thin, slick film. Let it rest for 10 minutes. This creates a protective layer that keeps the lean breast meat juicy during the high-heat sear.
Phase 2: The High-Heat Sear
Heat neutral oil in a wok over high heat until it shimmers. Add the chicken in a single layer and sear without stirring for 2 minutes until golden and crusty. Stir-fry for another 2-3 minutes until cooked through, then remove and set aside.
Phase 3: Aromatics and Sauce Emulsion
In the same pan, sauté the diced onion and bell pepper for 2 minutes until edges slightly char. Stir in the minced ginger and garlic, cooking for 30 seconds. You should smell the garlic immediately; avoid letting it turn brown.
Phase 4: The Final Glaze
Pour in the yellow chili sauce mixture along with the cornstarch slurry. Stir constantly as the sauce bubbles and thickens. Return the seared chicken to the wok. Toss rapidly on high heat for 1-2 minutes until the sauce is silky and clings to the chicken.
Garnish with chopped spring onions.
Chef Note: Don't add the slurry too early. Wait until the sauce is bubbling to prevent cornstarch clumps from forming.
Fixes for Common Issues

A common frustration is a sauce that remains too thin. This usually stems from a pan that wasn't hot enough to activate the cornstarch or a slurry that wasn't blended well. If the sauce is watery, simply whisk an additional teaspoon of cornstarch with a little water and stir it in for 30 seconds.
Rubbery chicken is another frequent pitfall. This happens when the pan is overcrowded; the temperature drops and the meat steams instead of browning. If your pan is small, cook the meat in two batches.
If the garlic burns, it will develop a bitter taste, something I've experienced often. To avoid this, add the vegetables first to provide a buffer, or stir the garlic constantly.
Solving Sauce and Texture Problems
| Problem | Root Cause | Solution |
|---|---|---|
| Watery Sauce | Low pan temperature | Raise the heat and add a small cornstarch slurry |
| Rubbery Meat | Crowded pan | Cook chicken in batches to maintain high heat |
| Bitter Taste | Burnt garlic/ginger | Add aromatics last and cook for only 30 seconds |
| Sauce Clumping | Slurry not mixed | Whisk cornstarch and water thoroughly before adding |
Simple Flavor Swaps
You can easily tweak this recipe to fit your taste. For those who want more heat, try adding a teaspoon of sriracha or a few dried red chili flakes. If you want it more tangier, a squeeze of fresh lime juice at the very end does wonders.
If you're looking for a veggie heavy version, you can replace the chicken with firm tofu or cauliflower florets. For a different vegetable profile, try using chopped carrots or snap peas. If you enjoy other vegetable forward dishes, my stuffed bell peppers recipe is a great way to use similar produce.
Quick Adjustments
- Extra heat? → Add 1 tsp sriracha
- More tang? → Fold in 1 tsp lime juice
- Thicker sauce? → Add 1/2 tsp more cornstarch to the slurry
To make this a Chilli Chicken Recipe Gravy, simply double the amount of soy sauce, vinegar, and honey, and add a half cup of chicken broth. This creates a pourable sauce that's great over rice.
Storage and Leftovers
Keep your Yellow Chili Chicken in a sealed container in the cooler for up to 3 days. The sauce will thicken as it cools, which is normal.
When reheating, avoid the microwave if you can. A microwave often makes the chicken rubbery. Instead, toss it back into a hot skillet for 2-3 minutes with a splash of water or broth. This loosens the sauce and brings back the texture.
This dish doesn't freeze well because the cornstarch slurry can break down, leaving the sauce grainy. I recommend eating it fresh or within the first few days.
To avoid waste, save your onion and ginger scraps in a freezer bag. Once the bag is full, boil them with some water and peppercorns to make a quick vegetable stock. Any leftover Yellow Chili Sauce can be used as a glaze for grilled shrimp or tofu.
Best Pairings and Sides
This dish is bold, so it needs a neutral side to balance the heat. Steamed jasmine rice is the classic choice, but for something with more flavor, pair this with some Chinese fried rice.
If you want something lighter, serve it alongside steamed bok choy or sautéed spinach. The bitterness of the greens cuts through the sweetness of the honey in the glaze.
For a complete meal, a simple cucumber salad with rice vinegar and sesame seeds provides a cooling contrast to the spicy Yellow Chili Chicken.
Why the Texture Works
The most important part of this recipe is the velveting. By coating the meat in egg and cornstarch, we create a physical wall. This wall prevents the proteins from tightening too much when they hit the high heat, which keeps the inside moist.
Using a over high heat sear for 2 minutes undisturbed is also key. This creates a crust that holds onto the sauce. According to USDA guidance, the safe internal temperature for chicken is 165°F, and this fast sear method reaches that without drying out the meat.
The slurry works through a process where cornstarch granules swell and burst, trapping water and creating a thick, glossy emulsion. This is why the sauce clings to the meat rather than pooling at the bottom of the plate.
Common Beliefs Debunked
The Wok Myth: Many think you need a carbon steel wok to get "wok hei" or charred flavor. While helpful, any heavy bottomed pan that gets very hot will work.
The Breast Meat Myth: People assume only thighs are tender in stir fry. Velveting allows breast meat to stay incredibly soft, often beating out thighs in texture.
The Long Marinade Myth: You don't need to marinate for hours. The 10 minute velveting process is purely about texture, not deep flavor penetration, so a short rest is all you need.
Very High in Sodium
1180 mg 1180 mg of sodium per serving (51% 51% of daily value)
The American Heart Association recommends a daily limit of no more than 2,300mg of sodium to reduce the risk of high blood pressure and heart disease.
Tips to Reduce Sodium
-
Switch Soy Sauce-30%
Replace regular soy sauce with low-sodium soy sauce or coconut aminos for a significant reduction in salt content.
-
Eliminate Added Salt-25%
Remove the 1/2 tsp of salt from the chicken coating entirely, as the sauces provide enough seasoning.
-
Adjust Chili Sauce-20%
Use a low-sodium yellow chili sauce or substitute with a blend of fresh minced chilies, lemon juice, and a touch of honey.
-
Enhance Aromatics
Increase the amount of fresh ginger, garlic, and spring onions to build bold flavor profiles without needing extra salt.
Recipe FAQs
How to reduce the spice level?
Decrease the amount of yellow chili sauce in your mixture. Adding a little extra honey can also help balance the heat.
Is it true that chicken thighs are required for tenderness?
False. The velveting process ensures that chicken breast remains juicy and tender during high-heat cooking.
What is the best way to reheat leftovers?
Toss the chicken back into a hot skillet for 2-3 minutes with a splash of water. This loosens the sauce and restores the original texture.
Can this recipe be made in a rice cooker?
Avoid using a rice cooker for this dish. You need a high-heat sear in a wok to achieve the golden color and proper texture.
Why does the chicken need to sit for 10 minutes?
This allows the cornstarch and egg to fully coat the meat, creating a barrier that prevents it from drying out. If you enjoyed mastering this velvet texture, see how the same precision applies to our homemade ramen noodles.
Yellow Chili Chicken
Ingredients:
Instructions:
Keep Cooking

Classic stuffed bell peppers with a zesty twist - Family Favorite!
My family’s favourite saucy stuffed bell peppers recipe! Filled with beef, rice & a zesty tomato…

Easy Homemade Blue Corn Tortillas - A Vibrant, 3-Ingredient Delight!
Discover the magic of homemade blue corn tortillas! These stunning tortillas are simple to make…

Homemade Tomato Soup
Many tomato soups taste bland or require hours of simmering. This Homemade Tomato Soup uses…

Homemade Salsa Recipe: Easy Fire-Roasted Fresh Tomato Dip
Skip the jar. Our best Homemade Salsa recipe uses fresh tomatoes and a simple roasting method to…

Phonomenal: How To Make Pho, The Easy Way
Craving authentic How To Make Pho? The easy way! Ditch the takeout.
