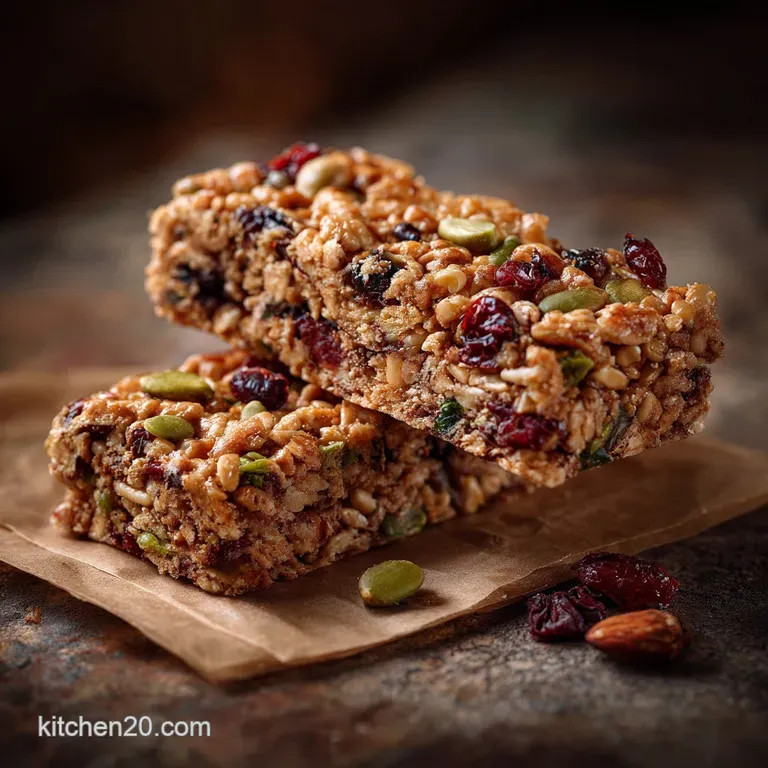
Soft and Chewy Granola Bars: the Ultimate Homemade Cereal Bar Recipe
- Mastering the Soft and Chewy Granola Bars: An Overview
- The Science of Chew: Why These Bars Stay Perfectly Soft
- Essential Ingredients for Structuring Soft and Chewy Granola Bars
- Step-by-Step Method: Baking Your Perfect Batch
- Maximizing Freshness: Storage and Freezing Guide
- Versatility Beyond the Snack Drawer: Serving Suggestions
- Recipe FAQs
- 📝 Recipe Card
Mastering the Soft and Chewy Granola Bars: An Overview
When these homemade marvels are baking, the smell alone is enough to make you weak at the knees. It’s that deep, nutty aroma of toasted oats mingling with caramelized butter and rich honey pure heaven, mate. You know exactly what I mean when I talk about that perfect kitchen scent.
Seriously, forget the sad, dry bricks you find wrapped in plastic at the store. This recipe for Soft and Chewy Granola Bars is my absolute life hack for keeping the snack drawer stocked, saving me a fortune on expensive grab and go options.
They are ridiculously easy, incredibly versatile, and honestly, they taste like a satisfying hug.
I spent years trying to figure out how to keep them from crumbling; my first few batches were just edible gravel. Now I’ve nailed the perfect binding ratio, ensuring every single bar is gloriously, impossibly soft. Let's crack on and get this done.
The Science of Chew: Why These Bars Stay Perfectly Soft
Making a truly chewy granola bar is less about baking skill and more about understanding basic binding chemistry. We are essentially building a sticky matrix that locks the oats in place, preventing structural failure later. This is the ultimate Chewy Granola Bar Secrets .
Why Homemade Beats store-bought Crumblers
The biggest difference is moisture and fat content. store-bought bars have to be shelf stable for months, meaning they are often dehydrated and rely on cheap corn syrup binders that eventually crystalize.
Our Homemade Granola Bars Recipe uses proper butter and thick sweeteners, which keep the final product lush and moist. They are a proper, substantial snack, not an overly processed calorie filler.
The Critical Role of Binding Agents in Texture
Honey and maple syrup are our heroes here. When gently heated with butter, the sugars in the syrup become slightly inverted and stickier than plain granulated sugar alone. That small simmer ensures the binder is potent enough to coat everything perfectly, creating the necessary structural glue.
Equipment Check: Essential Baking Tools for Success
You really don't need fancy gadgets for this. The most important tool is your 8x8 inch baking pan, lined with parchment, and something heavy and flat. A sturdy measuring cup or the bottom of a drinking glass is absolutely essential for the next step.
Achieving the Perfect Caramelized Binder (Butter & Honey)
I use half butter and half honey, which provides the perfect balance of richness and stickiness. Pro Tip: For a next level, sophisticated flavor, take the time to brown your butter first. Cook the butter until the milk solids turn golden brown and smell nutty before adding the honey.
This simple step elevates the bar dramatically.
The Low-Temperature Baking Method (Underbaking for Moisture)
We are baking these low and slow at 350°F (175°C). The goal is not to cook them until they are crispy like a biscuit. We are aiming for set edges but a slightly pale, soft center.
That underbaked center is what guarantees moisture retention, leading directly to that signature chewy texture we crave.
Using the Right Oats: Rolled vs. Quick Cooking
Always use Old-fashioned, whole rolled oats for this specific recipe. Quick oats are cut finer and absorb moisture too fast, which often results in a drier, crumblier bar. You need the heft and structure of the rolled oat flake to provide that satisfying chew.
Essential Ingredients for Structuring Soft and Chewy Granola Bars
This recipe thrives on simplicity, but smart substitutions are key to making it work for your pantry. Remember, the ratio of dry to wet ingredients is gospel here!
| Ingredient Category | Ingredient (Required) | Viable Substitution | Why It Works |
|---|---|---|---|
| Oats | Old-fashioned Rolled Oats | Puffed Rice Cereal (use 4 cups) | Adds bulk and texture, but bars will be less dense. |
| Binder | Unsalted Butter | Solid Coconut Oil (Use the same measure) | Creates a rich base; use refined oil if you want less coconut flavour. |
| Sweetener | Honey | Maple Syrup or Agave Nectar | Provides the necessary viscosity and binding properties. |
| Add-In | Brown Sugar | Granulated Sugar + 1 tsp Molasses | Molasses adds the needed moisture that brown sugar naturally contains. |
| Bulk | Chopped Nuts/Seeds | Pretzels or Cereal Pieces | Maintains crunch if you need a Granola Bars Without Nuts option. |
Liquid Sweeteners: Honey, Maple Syrup, and Molasses Notes
I prefer honey for its deep, rich flavor and excellent binding power. Maple syrup works beautifully, especially if you’re making a vegan version, but it is slightly thinner, so you might need to simmer the binder for an extra 30 seconds. Molasses is a great addition, especially in the winter (it makes a great spiced bar, similar to our Pumpkin Cream Cheese Cookies: Ultra Soft Pillowy Fall Treat ).
Choosing Your Signature Add-Ins (Nuts, Seeds, and Dried Fruit Ratios)
Keep your total add-ins nuts, seeds, chocolate chips, and dried fruit to around one cup combined. I love a mix of sunflower seeds and chopped pecans. Make sure anything you add is small enough to pack down tightly. If you use dried cranberries or cherries, chop them roughly.
Prepping the Dry Ingredients: To Toast or Not to Toast?
I skip pre-toasting the oats for this particular recipe because the low baking time won’t toast them much anyway, and browning the butter gives us that nutty flavor profile we want. If you are using raw nuts, however, a quick 5 minute toast in the oven or dry pan really boosts their flavor!
Troubleshooting the Binder Ratio (Preventing Dry or Crumbly Mixes)
If your mixture looks too dry after mixing, it means you either measured your oats incorrectly, or you didn't heat your binder long enough. If it looks dry, add just one extra tablespoon of honey and mix again until every single oat glistens.
If it looks like soup, add a tablespoon of quick oats (just this once!) to soak up the excess liquid.
step-by-step Method: Baking Your Perfect Batch
Creating the Lush Binder Base on the Stovetop
- Melt the butter completely in a small saucepan over medium low heat.
- Once melted, stir in the honey (or syrup).
- Bring the mixture to a gentle bubble. Crucial: Simmer it for exactly 60 seconds, stirring. This boiling ensures the sugars bind strongly.
- Remove from heat, wait 30 seconds, and stir in the vanilla extract.
Incorporating Dry Ingredients: The Mixing Process
- Combine the rolled oats, brown sugar, salt, and any nuts/seeds in a large bowl and mix them well.
- Pour the hot binder mixture straight over the dry ingredients.
- Mix vigorously with a sturdy spatula until you can’t see a single dry oat flake. Everything must look sticky, wet, and cohesive.
- Let the mixture cool for 5 minutes before adding chocolate chips or sensitive dried fruit; otherwise, they’ll melt into a muddy mess.
The Power of Tight Packing into the Pan
This is the non-negotiable step to avoid crumble.
Chef's Note: Use the back of a metal measuring cup or the bottom of a glass. Press down on the mixture with your full body weight seriously, you cannot over pack these. If they feel squishy, they will certainly crumble later. Press until the surface is flat, dense, and uniform.
Identifying the 'Set But Not Brown' Bake Point
Bake for 20 to 22 minutes at 350°F (175°C). The edges should be golden, firm, and pulling away slightly from the parchment paper. The center should still look pale and soft. Pull them out immediately when you see that slight color change around the perimeter.
Why Skipping the Chill Time is a Disaster
You must resist the urge to cut warm bars. The sugar binder needs time to completely cool and re-solidify into a strong, chewy structure. If you cut them warm, they will fall apart, guaranteed. You've been warned!
The Exact Moment to Slice the Bars
Let them cool on a rack in the pan for 1 hour at room temperature. Then, transfer the whole pan to the refrigerator for at least 60 minutes. Once fully chilled, use the parchment overhang to lift the entire slab out and use a large, sharp chef’s knife to cut them into clean, 12 bar rectangles.
Maximizing Freshness: Storage and Freezing Guide
These Easy Homemade Snack Bars are a perfect meal prep item because they keep so well. They are robust and sturdy enough to handle daily lunchbox abuse.
Short Term Airtight Storage at Room Temperature
Once cut, wrap each bar individually in plastic wrap or parchment paper (this prevents sticking). Store them in an airtight container at room temperature for up to 5 days. If it's very hot or humid where you live, transfer them to the fridge to prevent the chocolate from melting and the oats from softening too much.
Successfully Freezing and Thawing Individual Bars
Yes, they freeze beautifully! This is how I always ensure I have a ready supply. Wrap each bar tightly in plastic wrap, then place the wrapped bars into a large freezer bag, squeezing out any excess air. They will stay fresh for up to 3 months.
When you want one, just pull it out and let it thaw on the counter for 30 minutes.
Enhancing Your Bars: Dipping and Toppings
If you want to feel fancy, melt some dark chocolate chips with a tiny bit of coconut oil and drizzle it over the chilled bars. A dusting of flaky sea salt on top of the chocolate is truly divine. For holiday baking, try adding a little cinnamon to the drizzle it’s excellent.
Versatility Beyond the Snack Drawer: Serving Suggestions
These are fantastic for grabbing straight out of the freezer, but they also shine when paired with other things. They are a great alternative to heavy baked goods.
Ideal Pairings for Breakfast, Lunchboxes, and Hiking
For breakfast, chop a bar and scatter the pieces over Greek yogurt with some fresh berries instant granola parfait perfection. They are obviously ideal for lunchboxes, as they hold their shape better than almost any other Homemade Cereal Bar .
And honestly, when you're hiking or just need a quick fuel blast, these provide dense, satisfying energy that lasts.

Recipe FAQs
Why are my granola bars dry and crumbly instead of soft and chewy?
Overbaking is the primary culprit for dry bars. The key to chewiness is removing them from the oven while they still appear slightly soft and pale in the center, as they will continue to set as they cool. Also, ensure you are using enough binder (honey/fat mixture), as this is what locks the oats together.
My bars won't hold together when I try to cut them. What went wrong?
The bars must be completely cooled before cutting; ideally, chilling them in the refrigerator for 30 minutes helps the binder fully solidify. If the problem persists, you may not have adequately heated the binding mixture, which needs to reach a low boil for a minute to activate its stickiness.
Can I make these granola bars vegan or dairy-free?
Yes, substitute the butter with an equal measure of vegan butter or refined coconut oil, ensuring it is melted thoroughly into the binder. Replace the honey with pure maple syrup or brown rice syrup, as these provide excellent adhesive qualities needed for structure.
Can I use quick oats instead of old-fashioned rolled oats?
It is strongly recommended to stick to old-fashioned rolled oats, as their larger, flatter surface area provides better texture and structure. Quick oats absorb liquid too rapidly, potentially resulting in a mushy or dense bar rather than a satisfyingly chewy one.
How should I store these granola bars, and can I freeze them?
Store the cut bars in an airtight container at room temperature for up to one week, separating layers with parchment paper to prevent sticking. They freeze exceptionally well; wrap each individual bar tightly in plastic wrap, then place them in a freezer bag for up to three months.
I don't have honey. What is the best liquid sweetener substitute for binding?
Pure maple syrup works well, but for maximum chewiness, brown rice syrup is often superior due to its thicker, extremely sticky consistency. If you use a runnier syrup like agave, slightly reduce the other liquid fat ingredient (butter or oil) to maintain proper moisture balance.
When should I add mix-ins like chocolate chips or dried fruit?
Mix-ins that melt, like chocolate chips, should be added immediately after the bars come out of the oven or pressed into the surface. Dried fruits can be added to the main mixture before baking, but be sure to chop larger fruits finely so they distribute evenly and don't interfere with the bar's structure.
Soft Chewy Homemade Granola Bars
Ingredients:
Instructions:
Nutrition Facts:
| Calories | 567 kcal |
|---|---|
| Protein | 5.8 g |
| Fat | 28.6 g |
| Carbs | 71.7 g |
