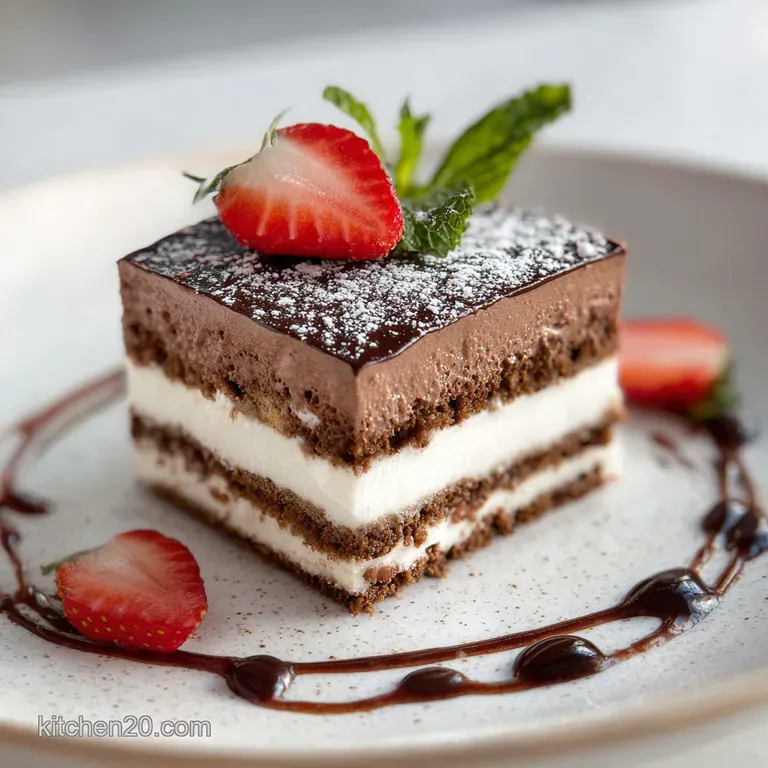
Valeria Recipe Dessert with Chocolate: Silky Ricotta Center
- Time: Active 20 minutes, Passive 50 minutes, Total 1 hours 10 mins
- Flavor/Texture Hook: Silky ricotta custard meets "shatter proof" moist chocolate sponge.
- Perfect for: Anniversary dinners, social gatherings, or when you need a crowd pleaser that holds up beautifully.
- Valeria Recipe Dessert with Chocolate
- Why This Cake Is Revolutionizing
- Component Analysis Deep Dive
- Sourcing Elements For Balanced Flavor
- Modern Gear For Perfect Textures
- Step-By-Step Assembly Of Layers
- Avoiding Failures And Quick Fixes
- Customizing Your Chocolate Experience
- Scaling For Crowds Or Couples
- Keeping Freshness And Reducing Waste
- Serving Partners For Social Events
- Recipe FAQs
- 📝 Recipe Card
Valeria Recipe Dessert with Chocolate
The first time I pulled this tray out of the oven, I was convinced I had failed. I had carefully poured a heavy ricotta mixture over a thin chocolate batter, expecting it to stay on top like a frosting.
Instead, as the heat worked its magic, the kitchen filled with the aroma of blooming cocoa and sweet cream, and the layers literally traded places. The chocolate rose to the top, while the ricotta sank to form a velvety, cheesecake like foundation. It felt like a glitch in the culinary matrix.
That "magic" is why this Valeria Recipe Dessert with Chocolate has become a staple in my rotation. It is not just a cake; it is a conversation piece. We have all made standard brownies or sponges, but this dish acts as a platform for different textures that shouldn't work together but absolutely do.
Whether you call it a Sicilian love cake or a chocolate love cake, the result is always a silky, decadent experience that feels far more technical than it actually is. Trust me, watching those layers invert is a total thrill.
Why This Cake Is Revolutionizing
The beauty of this dessert lies in the chemistry of density and leavening. We are essentially creating a biological and physical "swap" inside the pan.
- Density Inversion: The ricotta layer is physically heavier (denser) than the cake batter, but as the cake heats, its leavening agents create air pockets that force it upward while the ricotta settles.
- Acid Base Equilibrium: Using 1 tsp white vinegar with baking soda creates immediate CO2 bubbles, ensuring the chocolate layer stays light enough to float.
- Starch Gelatinization: The 4 oz pudding mix in the topping creates a stabilized, velvety finish that keeps the whipped cream from "weeping" into the cake.
- Hydroscopic Balance: The 1 cup (240ml) warm brewed coffee dissolves the 35g cocoa powder better than water, creating a "bloom" effect for a deeper mahogany color.
| Method | Total Time | Texture | Best For |
|---|---|---|---|
| Fast (Cake Mix) | 55 minutes | Fluffy/Sweet | Last minute guests |
| Classic (Scratch) | 1 hours 10 mins | Deep/Complex | Special occasions |
| Chilled (Overnight) | 12 hours | Fudgy/Custard like | Meal prep/Parties |
This specific recipe is a total platform for flavor, much like the technique used in our Homemade German recipe. By making the base from scratch, you control the richness and ensure the chocolate isn't overshadowed by the sugar.
Component Analysis Deep Dive
| Ingredient | Science Role | Pro Secret |
|---|---|---|
| 900g Ricotta | Structural Foundation | Drain for 2 hours to prevent a soggy bottom. |
| 240ml Coffee | Flavor Intensifier | Warm liquid "blooms" cocoa solids for better dispersion. |
| 1 tsp Vinegar | Leavening Catalyst | Reacts with soda to provide the lift needed for the "swap." |
Sourcing Elements For Balanced Flavor
To get that Italian Love cake with mascarpone style richness, quality matters. Don't grab the low-fat ricotta; we need the fat content for that velvety mouthfeel.
- 1.5 cups (190g) All purpose flour: The structural spine. (Sub: 1:1 gluten-free flour blend) Why this? Provides enough protein to hold the air pockets during the layer swap.
- 1 cup (200g) Granulated sugar: For the cake base. (Sub: Light brown sugar)
- 0.33 cup (35g) Dark Dutch processed cocoa: For a deep mahogany hue. (Sub: Natural cocoa + 1/4 tsp extra soda)
- 1 tsp Baking soda: Our primary lift. (Sub: 3 tsp baking powder, but omit vinegar)
- 0.5 tsp Kosher salt: Enhances the chocolate notes. (Sub: Fine sea salt)
- 1 cup (240ml) Warm brewed coffee: Liquid gold for chocolate. (Sub: Warm water or black tea)
- 0.33 cup (80ml) Vegetable oil: Ensures a moist crumb. (Sub: Melted coconut oil)
- 1 tsp White vinegar: The "float" insurance. (Sub: Apple cider vinegar)
- 1 tsp Pure vanilla extract: Aromatic backbone. (Sub: Vanilla bean paste)
- 32 oz (900g) Whole milk ricotta cheese: The heart of the dish. (Sub: Mascarpone/Cream cheese blend)
- 0.75 cup (150g) Granulated sugar: For the ricotta layer. (Sub: Monkfruit sweetener)
- 4 Large eggs: Binding and lift. (Sub: 1 cup unsweetened applesauce, though layers may not swap as cleanly)
- 4 oz Instant chocolate pudding mix: For the silky topping. (Sub: Cook and-serve pudding, must be cooled)
- 1 cup (240ml) Cold whole milk: To hydrate the pudding. (Sub: Oat milk)
- 8 oz Whipped topping: The final polish. (Sub: 2 cups heavy cream whipped with 1/4 cup powdered sugar)
Modern Gear For Perfect Textures
You don't need a high tech lab, but a few specific tools make this Valeria Recipe Dessert with Chocolate much easier to execute. I always use a 9x13 inch metal baking pan because it conducts heat more evenly than glass, which is vital for the layer inversion.
A stand mixer (like a KitchenAid) or a sturdy hand mixer is essential for the ricotta layer. You want to beat those eggs and sugar into the cheese until it's completely smooth. If you leave it lumpy, you'll end up with a "grainy" texture instead of a velvety custard. Also, keep a fine mesh strainer handy.
Draining your ricotta for even 20 minutes can be the difference between a firm cake and a puddle.
step-by-step Assembly Of Layers
1. The Foundation and the "Bloom"
Whisk 1.5 cups (190g) flour, 1 cup (200g) sugar, 35g cocoa, 1 tsp baking soda, and 0.5 tsp salt in a large bowl. Pour in 240ml warm coffee, 80ml oil, 1 tsp vinegar, and 1 tsp vanilla. Whisk until the batter is smooth and dark.
Pour this into your greased 9x13 pan; it will look thin, but that is intentional.
2. The Ricotta Heart
In a separate bowl, beat 900g drained ricotta with 0.75 cup (150g) sugar, 4 eggs, and 1 tsp vanilla. Mix for 2-3 minutes until the texture is light and pale. Note: This aeration helps the layer settle evenly without crashing through the cake batter.
3. The Controlled Pour
Gently spoon the ricotta mixture over the raw chocolate batter. Do not stir. You want the ricotta to sit on top like a blanket. It will naturally migrate downward during the bake.
4. The Heat Transformation
Bake at 350°F (175°C) for 50 minutes until a toothpick in the center comes out clean. The chocolate cake should now be on top, looking slightly domed and springy.
5. The Cooling Platform
Let the cake cool completely in the pan. This is non negotiable. The ricotta needs to "set" as the temperature drops, or it will be too soft to slice.
6. The Finishing Polish
Whisk 4 oz chocolate pudding mix with 240ml cold milk for 2 minutes until it starts to thicken. Fold in 80% of the whipped topping. Spread this over the cooled cake, then top with the remaining whipped cream for a marbled look.
Avoiding Failures And Quick Fixes
Why did my layers not swap?
This usually happens if the cake batter is too thick or the ricotta is too light. If you use extra flour in the chocolate base, it becomes too buoyant to let the ricotta sink. Also, make sure your eggs are at room temperature; cold eggs can make the ricotta mixture too dense to move through the batter smoothly.
Why is my cake grainy?
Graininess is almost always due to the ricotta. Some brands are more "curdy" than others. To fix this, run your ricotta through a food processor for 60 seconds before mixing it with the eggs and sugar. It creates a silky, "Sex In A recipe" style finish that is much more refined.
| Problem | Root Cause | Solution |
|---|---|---|
| Soggy Bottom | Excess moisture in ricotta | Drain ricotta in a sieve for 30 mins before using. |
| Cake Sunken | Oven door opened too early | Do not open the oven until at least 40 mins have passed. |
| Pudding is Runny | Milk wasn't cold enough | Use cold from the fridge whole milk and whisk vigorously for 2 mins. |
Chef's Tip: Add a pinch of espresso powder to the ricotta mixture. It doesn't make it taste like coffee, but it revolutionizes the way the chocolate flavors pop.
Common Mistakes Checklist
- ✓ Don't skip the vinegar: It is the "engine" that lifts the chocolate layer.
- ✓ Avoid over mixing the cake batter: Whisk just until the flour streaks disappear to keep it tender.
- ✓ Temperature Check: Ensure your eggs are room temp so they emulsify perfectly with the cheese.
- ✓ Patience is Key: Let the cake chill for at least 4 hours before slicing for the best "layered" visual.
- ✓ Drain the Cheese: Even if it looks dry, 900g of ricotta holds a lot of hidden whey.
Customizing Your Chocolate Experience
If you want to take this Valeria Recipe Dessert with Chocolate into new territory, consider a "Mexican Chocolate" version. Add 1 tsp cinnamon and a tiny pinch of cayenne to the chocolate batter. The heat from the pepper connects beautifully with the cool, creamy ricotta.
For a more traditional Simple Valeria Recipe Dessert with Chocolate, you can swap the chocolate pudding topping for a simple dusting of powdered sugar or a ganache. However, the pudding layer acts as a moisture seal, keeping the cake fudgy for days. If you're looking for another layered delight, our Sex In A recipe offers a similar creamy meets crunchy profile that guests adore.
- If you want a firmer center
- Add 2 tbsp of cornstarch to the ricotta mixture.
- If you want a darker cake
- Use 100% Dutch processed cocoa and replace the water with double strength coffee.
- If you want a lighter topping
- Use stabilized whipped cream (heavy cream + gelatin) instead of whipped topping.
Scaling For Crowds Or Couples
Scaling Down (1/2 Recipe): Use an 8x8 inch square pan. Reduce the bake time to 35-40 minutes. For the 4 eggs, beat them in a bowl and use exactly 1/2 cup (about 2 large eggs).
Scaling Up (Double Recipe): Do not try to bake this in one massive deep pan. Use two separate 9x13 pans. This ensures the heat can reach the center of the ricotta layer effectively without burning the chocolate edges.
Keep the salt and vinegar at 1.5x rather than doubling to avoid a metallic aftertaste.
Keeping Freshness And Reducing Waste
Storage: This cake is a fridge dweller. Store it covered in the refrigerator for up to 5 days. Because of the ricotta and pudding, it does not sit well at room temperature for more than 2 hours.
Freezing: You can freeze the baked and cooled cake before adding the pudding/whipped topping. Wrap it tightly in plastic wrap and foil; it lasts for 2 months. Thaw overnight in the fridge before adding the final layers.
Zero Waste: If you have leftover ricotta that didn't make it into the 900g measurement, whisk it with a little honey and lemon zest for a quick morning toast spread.
If the cake edges get a bit dry after a few days, crumble them into a bowl and serve with a scoop of vanilla bean ice cream it's like a deconstructed chocolate love cake sundae.
Serving Partners For Social Events
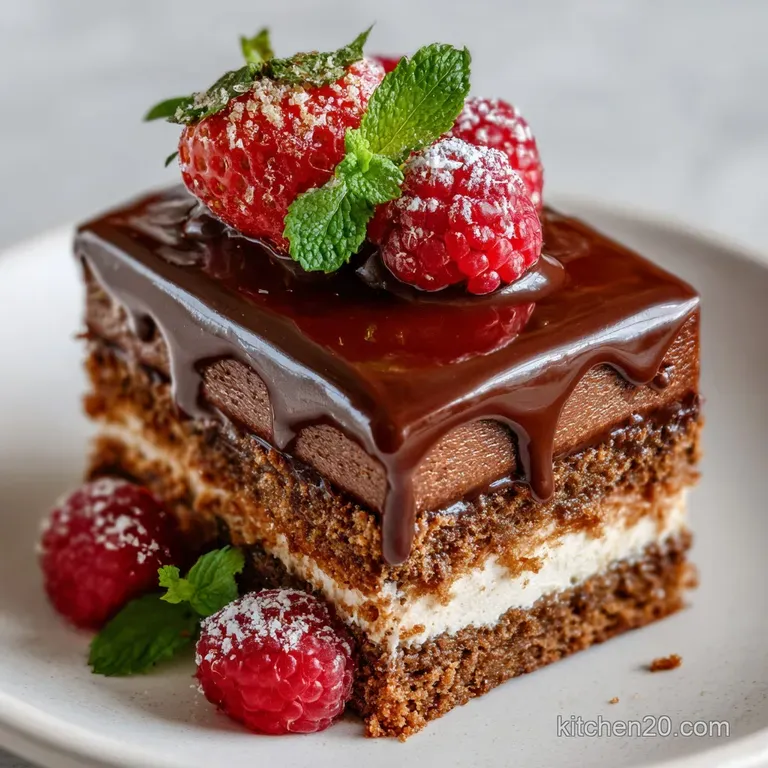
When serving this at a party, I love to lean into the Italian theme. A side of fresh raspberries or macerated strawberries provides a sharp acid hit that cuts through the richness of the mascarpone style center.
For beverages, a cold glass of Vin Santo or a bitter Espresso martini is the ultimate platform for this dessert. The bitterness of the coffee connects perfectly with the dark cocoa in the sponge, creating a sophisticated finish to any meal.
Honestly, don't even bother with low-fat accompaniments this cake is an indulgence, and it's best enjoyed with full fat cream or a rich dessert wine. Everyone will be asking you "how did the layers flip?" you can tell them it's magic, or you can tell them it's science. Either way, they'll want the recipe.

Recipe FAQs
Can I substitute whole milk ricotta with part skim?
No, stick to whole milk ricotta. Part skim releases excess moisture, which often results in a soggy bottom because the fat content isn't high enough to create the necessary velvety texture.
How do I ensure the chocolate layer rises above the ricotta layer during baking?
Whisk the cake batter until smooth but stop immediately before overmixing. The immediate lift from the baking soda/vinegar reaction needs a lighter batter to push against the denser ricotta mixture.
What is the secret to getting the distinct, separated layers in this dessert?
The secret is density inversion driven by temperature. As the cake heats, the leavening creates air pockets, forcing the chocolate layer up while the heavier ricotta sinks, a principle similar to how you manage lift in a Classic British Victoria recipe.
Is it true I must use instant pudding mix for the topping?
No, this is a common misconception, but instant is recommended. Instant pudding sets faster and yields a lighter topping that won't compress the cake layers; cook and-serve pudding requires cooling first, which adds time.
How to prevent the ricotta layer from becoming grainy before baking?
Process the ricotta cheese in a food processor for 60 seconds first. This breaks down any large curds, ensuring the eggs and sugar blend completely, resulting in that desired silky, custard like finish.
Can I make this dessert ahead of time?
Yes, it is best made a day ahead. Assembling and baking the cake up to 24 hours prior allows the complex flavors to meld; simply wait until serving to apply the pudding topping.
How to achieve a deep, dark chocolate color in the sponge?
Bloom the cocoa powder using warm liquid. Stir the cocoa into the warm brewed coffee until fully dissolved before mixing it into the dry ingredients for maximum flavor and color dispersion.
Valeria Chocolate Dessert Magic

Ingredients:
Instructions:
Nutrition Facts:
| Calories | 481 calories |
|---|---|
| Protein | 13g |
| Fat | 21g |
| Carbs | 57g |
| Fiber | 1.5g |
| Sugar | 38g |
| Sodium | 385mg |
