Grandmas Gold Standard Deeply Flavoured Homemade Elderberry Syrup
- The Immune-Boosting Brew: Classic Homemade Elderberry Syrup Unveiled
- Why Crafting Your Own Elderberry Remedy Beats Store-Bought
- Essential Components for Perfect Homemade Elderberry Syrup
- Step-by-Step Guide to Simmering Your Potent Syrup
- Maximizing Shelf Life and Enjoyment of Your Brew
- Variations and Flavor Enhancements for Your Homemade Syrup
- Recipe FAQs
- 📝 Recipe Card
The Immune Boosting Brew: Classic Homemade Elderberry Syrup Unveiled
There is a profound satisfaction that comes from preparing your own pantry staples, especially when those staples are rooted in natural wellness traditions. Creating Homemade Elderberry Syrup is far more than just mixing fruit and sugar; it’s an act of thoughtful self care.
This deep, ruby red elixir, steeped with warming spices, offers a comforting ritual during times when our bodies need a little extra support. We are aiming for a syrup that is richly flavoured, slightly tart from the berries, and balanced perfectly with the sweetness of honey.
This isn't just a seasonal remedy; it's a delicious component to add to your everyday wellness routine, and the Homemade Elderberry Syrup Recipe we are diving into today is designed for maximum flavour and potency.
Why Crafting Your Own Elderberry Remedy Beats store-bought
When browsing the shelves, it’s easy to grab a bottle of commercially prepared syrup, but achieving superior results starts right in your kitchen. The control you gain over ingredients, extraction time, and sweetness levels is unparalleled when you make your own.
A Centuries Old Tradition for Modern Wellness
Elderberries (Sambucus nigra) have been utilized across various cultures for centuries, not just for their reputed Elderberry Benefits but also for their vibrant colour and flavour.
From traditional European folk remedies to Native American uses, the consistent thread is the belief in these potent little dark berries. By brewing this at home, you honor that long tradition, using high-quality components that you trust implicitly.
Setting the Stage: What Makes This Recipe Exceptional
Our approach focuses on a slow, gentle simmer to coax the maximum amount of beneficial compounds from the fruit without compromising the integrity of the ingredients. This particular iteration which yields approximately 2 cups uses readily available pantry spices to create a flavour profile that is warming, complex, and deeply satisfying.
This is truly the Best Elderberry Syrup Recipe for those who appreciate depth in their home remedies, achieving a potent concentration that commercial versions often dilute for longer shelf stability.
Understanding the Power Behind the Berries
While we focus on flavour, it's important to acknowledge the compounds that make these berries famous. Elderberries are packed with antioxidants, particularly anthocyanins, which give them their deep purple hue. When combined with supporting ingredients like ginger and cinnamon, we create a synergistic tonic.
If you choose to make this batch using the Homemade Elderberry Syrup with Fresh Berries , be aware that the cooking time might need minor adjustments, though our primary focus here leans toward the convenience of dried fruit for consistent results year round.
Essential Components for Perfect Homemade Elderberry Syrup
Before we turn on the heat, gathering our materials is crucial. A successful brew depends on quality sourcing and having the right tools prepared and sterilized. This preparation phase should take about 15 minutes of your total time.
The Core Trio: Berries, Sweetener, and Spice Selection
The foundation of a great DIY Elderberry Syrup rests on three pillars. First, the elderberries themselves; for reliability and ease of sourcing, we rely on high-quality dried berries. Second, the sweetener must be chosen carefully.
We opt for raw honey, incorporated after the cooking process to preserve its natural enzymes this results in a superior Elderberry Honey infusion.
Finally, the spices ginger root, cinnamon stick, and whole cloves add warmth and complexity, enhancing the overall profile beyond a simple fruit infusion.
Ratios That Matter: Precise Measurements for Potency
To achieve a concentrated elixir, we start with a significant water-to-berry ratio that allows for substantial reduction. Specifically, we combine 1 cup of dried elderberries with 4 cups of filtered water.
This ratio ensures that after the simmering process, we are left with a concentrated liquid ready to be sweetened with 1 to 1 ½ cups of honey, depending on your preference for tartness versus sweetness.
Sourcing high-quality Dried vs. Fresh Elderberries
While Homemade Elderberry Syrup with Dried Elderberries is our featured method due to consistent availability and potency, if you happen to harvest Homemade Elderberry Syrup with Fresh Berries , ensure they are fully ripe and cooked thoroughly before consumption, as raw elderberries can be mildly toxic.
Dried berries, which are already heat treated, are safer and more predictable for home preparation, making them an excellent choice for your first few batches.
Necessary Kitchen Equipment for Syrup Creation
You’ll need a medium, heavy bottomed saucepan to prevent scorching during the long simmer. Crucially, you must have a fine mesh sieve lined with cheesecloth or a nut milk bag. This specialized straining setup is what separates a gritty, cloudy mixture from a smooth, glossy finished product.
Related Recipes Worth Trying
- Easy Homemade Pickled Beets Recipe Sweet Sour Flavor — Make the best homemade pickled beets This easy recipe uses simple spices for a vibrant tangy flavour perfect for salads and cheese boards Full instructions...
- The King of Southern Spreads Easy Homemade Pimento Cheese — Forget the storebought stuff Learn how to make authentic creamy Pimento Cheese Spread with just 15 minutes of prep Its the ultimate comfort food dip
- Easy Homemade Blueberry Cobbler Recipe Buttery Topping — The best Blueberry Cobbler from scratch This easy recipe features jammy berries and a tender sconelike topping Perfect for summer Get the foolproof method here
step-by-step Guide to Simmering Your Potent Syrup
With our ingredients laid out, the actual cooking process is wonderfully straightforward, requiring about 45 to 60 minutes of gentle, hands off simmering.
Initiating the Infusion: Combining Ingredients and Initial Heat
In your saucepan, combine the 1 cup of dried elderberries, 4 cups of water, thinly sliced ginger root (no need to peel that 2 inch piece), one large cinnamon stick, a teaspoon of whole cloves, and optionally, two whole star anise pods. Place this mixture over medium high heat and bring it up to a full boil.
Achieving Optimal Extraction Through Slow Simmering
As soon as a rolling boil is reached, immediately reduce the heat to the lowest possible setting just enough to maintain a gentle, steady simmer. Keep the pot loosely covered to allow steam to escape, encouraging evaporation. Allow this mixture to cook slowly for 45 to 60 minutes.
The visual cue you are looking for is significant liquid reduction, aiming to lose about a third to half of the initial water volume. This extended, slow heat is essential for proper extraction and flavour melding.
The Crucial Straining Process: Ensuring Smooth Consistency
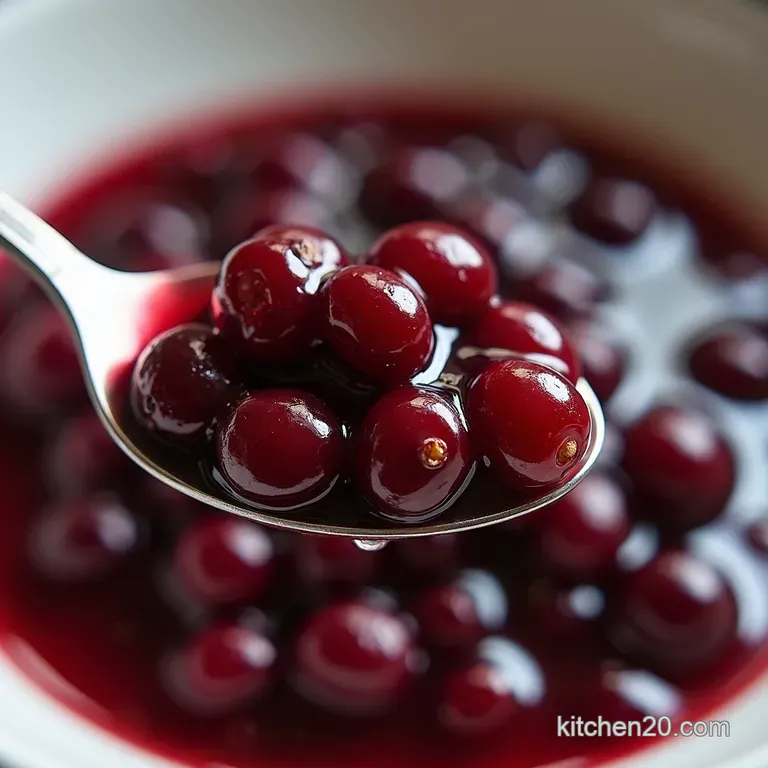
Once the liquid has reduced and the mixture has cooled for about 20 minutes (making it safe to handle), it’s time to strain. Line your fine mesh sieve with a double layer of clean cheesecloth and position it over a large bowl. Carefully pour the berry mixture through the lined sieve.
Resist the urge to violently squeeze the pulp; instead, let gravity do the work to ensure the Homemade Elderberry Syrup Shelf Life isn't shortened by introducing fine particulate matter that can spoil faster. Discard the spent solids after straining.
Sweetening and Bottling Your Fresh Batch
This is the moment to add your sweetener. Wait until the strained liquid has cooled down to merely warm before stirring in your 1 to 1 ½ cups of raw honey. Honey integrates smoothly when the liquid is warm, not hot, protecting its natural integrity.
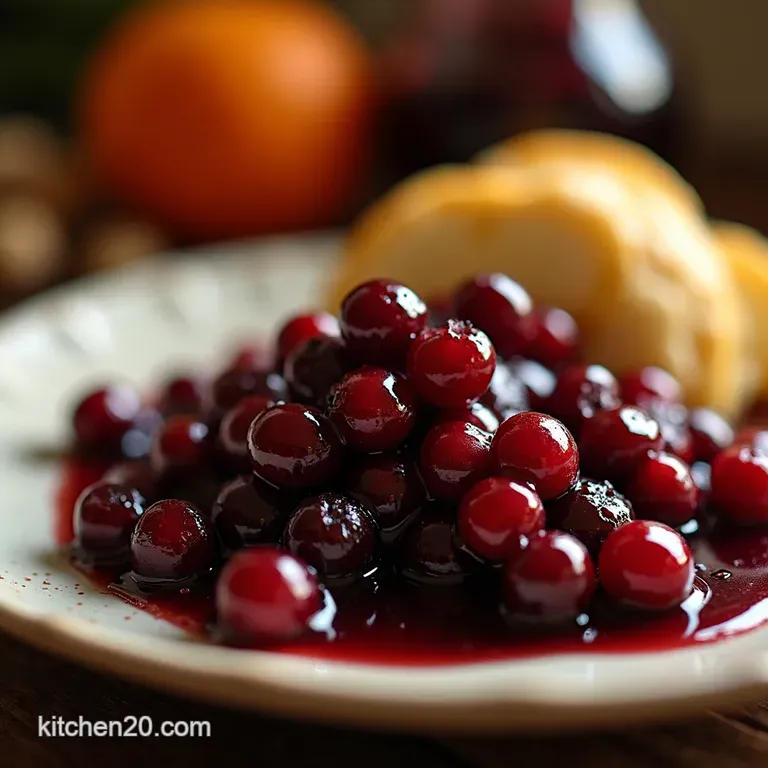
Stir until every last bit of honey has dissolved completely into the rich elderberry infusion. Then, funnel your finished elixir into sterilized, airtight glass jars or bottles.
Maximizing Shelf Life and Enjoyment of Your Brew
Once bottled, you need to know how to properly care for your creation to enjoy its benefits over time. Handling the storage and dosage correctly ensures you get the most from your efforts in making this Homemade Elderberry Syrup .
Storage Protocols: Refrigeration Times and Freezing Options
Because we avoid high heat when adding honey and we are not using industrial preservatives, proper storage is paramount for the Homemade Elderberry Syrup Shelf Life . Always seal the bottles tightly and store them immediately in the refrigerator.
Properly prepared syrup should remain fresh and potent for about three to four weeks when kept consistently chilled. For longer storage, you can safely freeze portions in ice cube trays; once frozen, transfer the cubes to a freezer safe bag, where they will keep well for several months.
Dosage Guidelines: How Much to Take Daily
The recommended Homemade Elderberry Syrup Dosage is generally prophylactic, taken preventatively during cold and flu season, or reactively when symptoms begin. A common preventative dose is about 1 teaspoon daily for adults and half a teaspoon for children over the age of one.
If symptoms arise, this dose can typically be increased two to three times a day, taken straight or mixed into tea.
Variations and Flavor Enhancements for Your Homemade Syrup
While the classic recipe is superb on its own, the flexibility of this base allows for exciting experimentation, turning a simple tonic into a gourmet seasonal addition.
Elevating the Flavor Profile: Herbs Beyond the Basics
To explore further, consider adding other supportive herbs during the simmering stage. A tablespoon of dried rosehips will boost the Vitamin C content and add a pleasant tartness, while a small sprig of fresh rosemary or a few dried calendula petals can introduce subtle floral or earthy undertones, showcasing the versatility of your DIY Elderberry Syrup .
Troubleshooting Common Syrup Consistency Issues
If your finished syrup seems too thin more like a weak juice than a true elixir it usually means you didn't reduce the liquid enough during the simmer. Next time, allow it to cook longer.
If it’s too thick or crystallizing prematurely, you likely added too much honey, or perhaps the honey was incorporated while the liquid was too hot. For a quick fix in the current batch, gently warm a small amount and stir in a splash of filtered water until the desired viscosity is achieved.

Recipe FAQs
How long will my Homemade Elderberry Syrup actually last in the fridge?
If you’ve followed the sterilization process correctly and kept it sealed tight, your syrup should keep happily in the refrigerator for about three to four weeks. Think of it like a good bottle of artisanal jam; always use a clean spoon to scoop it out to avoid introducing any unwanted bacteria.
Can I use fresh elderberries instead of dried ones for this recipe?
While fresh berries are lovely, you'll need to adjust the measurements significantly as they contain much more water. If you must swap, generally use about double the weight of fresh berries to match the dried quantity, and you might need to simmer for a longer period to achieve the same reduction.
Why is it so important not to boil the honey when making Homemade Elderberry Syrup?
It's a bit like treating high-quality tea; boiling honey can destroy some of those beneficial, natural enzymes people often seek in this remedy. Always wait until the berry infusion has cooled down to a warm temperature where you can comfortably dip your finger in before stirring in your honey to dissolve.
My syrup looks a bit cloudy; is this batch ruined?
Not at all! Cloudiness usually comes from pressing the solids too hard during the straining process or using ground spices rather than whole ones. It’s perfectly safe, just less visually appealing than a crystal clear batch. For next time, try using two layers of cheesecloth and let gravity do the work!
I'm making this for my kids; how much should they take daily?
For a general daily maintenance dose, most people find 1 teaspoon suitable for older children and adults, though it’s always best to check with your paediatrician first, especially if you are using it preventatively.
Remember, this syrup is sweet, so treat it as a treat or tonic rather than a replacement for a balanced diet.
Classic Homemade Elderberry Syrup

Ingredients:
Instructions:
Nutrition Facts:
| Calories | 740 kcal |
|---|---|
| Protein | 9.6 g |
| Fat | 13.8 g |
| Carbs | 87.7 g |
| Fiber | 21.4 g |
| Sodium | 1313 mg |
