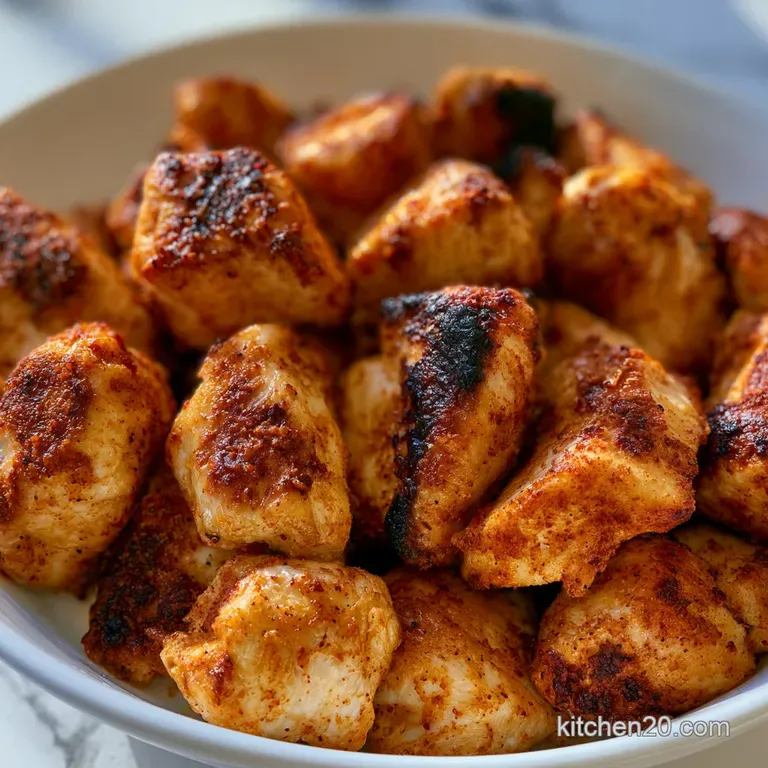
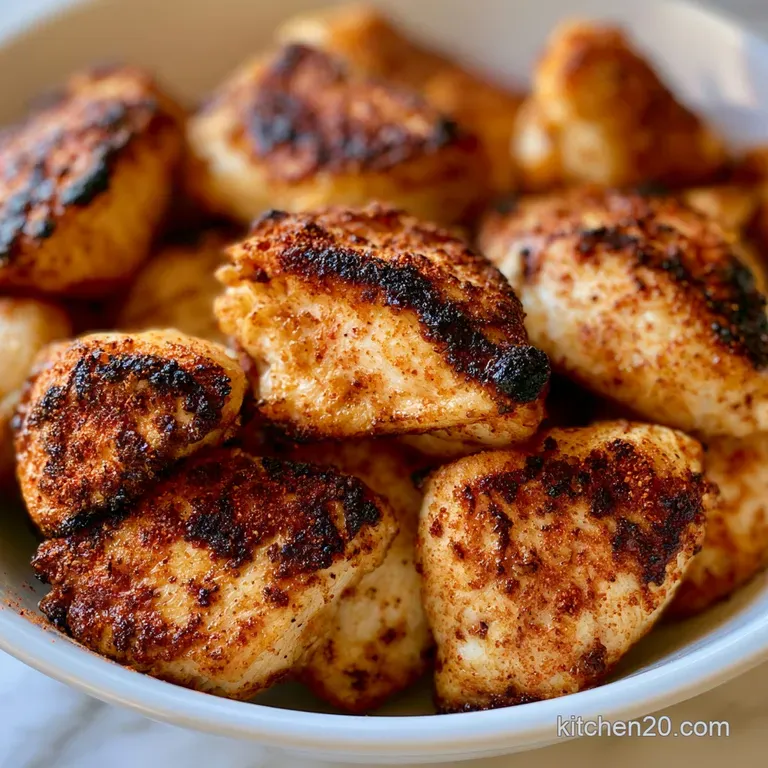
Easy Garlic Chicken Bites: Golden and Crispy
- Time: 10 min active + 10 min cook = Total 20 minutes
- Flavor/Texture Hook: Golden brown crust with a velvety garlic butter glaze
- Perfect for: Busy weeknight dinners or high protein snacks
- The Best Easy Garlic Chicken Bites
- Essential Recipe Specs
- The Pantry Checklist
- Tools For The Job
- Bringing It All Together
- Solving Common Kitchen Glitches
- Creative Twists and Swaps
- Adjusting Your Portion Size
- Debunking Cooking Myths
- Storage and Zero Waste
- Pro Presentation Tips
- High in Sodium
- Recipe FAQs
- 📝 Recipe Card
That sound of chicken hitting a smoking hot cast iron pan is basically my favorite song. There is this specific, aggressive sizzle that tells you exactly when the pan is ready, and if you miss it, you end up with steamed, grey meat instead of golden nuggets.
I used to think you needed to soak chicken in a marinade for six hours to get any real flavor, but that is a total myth.
Forget everything you've heard about long prep times for juicy poultry. The real secret is all about the heat and the timing of the butter. If you put the butter in too early, it burns and tastes like a campfire. If you wait until the end, you get a silky, rich coating that clings to every side of the meat.
You can expect these easy garlic chicken bites to be ready in the time it takes to boil a pot of water. We're talking about high speed cooking that doesn't sacrifice the texture. It's a fast, creative way to handle chicken breast without it turning into rubbery eraser bits.
The Best Easy Garlic Chicken Bites
Right then, let's get into why this actually works. Most people fail here because they crowd the pan, which drops the temperature and ruins the sear. When you give each piece of chicken its own space, the moisture evaporates instantly, leaving behind a crispy, savory crust.
According to Serious Eats, the key to a great sear is ensuring the surface of the meat is dry before it hits the oil. Since we're using a dry rub of paprika and garlic powder, we're already ahead of the game. The oil handles the high heat, and the butter brings the richness at the very end.
Logic Behind The Flavor
High Smoke Point: Avocado oil doesn't break down at high temperatures, allowing the chicken to sear without the oil smoking or tasting bitter.
Surface Area Maxing: Cutting chicken into 1 inch cubes creates more edges for the garlic butter to cling to, giving you more flavor per bite.
The Acid Finish: A tiny splash of lemon juice at the end cuts through the heavy butter, waking up the garlic and brightening the whole dish.
Butter Basting: Adding butter after the sear prevents the milk solids from burning while creating a velvety emulsion that coats the meat.
| Method | Time | Texture | Best For |
|---|---|---|---|
| Stovetop | 20 mins | Crispy/Velvety | Quick dinner |
| Oven | 30 mins | Uniform/Tender | Large crowds |
Component Analysis
| Ingredient | Science Role | Pro Secret |
|---|---|---|
| Avocado Oil | Heat Stabilizer | Prevents the "burnt oil" taste at 400°F+ |
| Garlic Powder | Base Layer | Creates a crust that fresh garlic can't achieve |
| Unsalted Butter | Flavor Carrier | Use unsalted so you can control the seasoning |
| Lemon Juice | Flavor Balancer | Stir in at the very end to keep the zing fresh |
Essential Recipe Specs
For this to work, you need to stick to the ratios. We're using 1.5 lbs of chicken breast. If you go too lean with the oil, you'll get sticking; too much, and you're basically deep frying. The goal is a thin shimmering layer that covers the bottom of your 12 inch skillet.
Trust me on the cast iron part. A heavy bottomed pan holds heat much better than a thin non stick one. When you add the cold chicken, a thin pan will drop in temperature instantly, and you'll lose that golden crust. Keep the heat on medium high and don't be afraid of the sizzle.
The Pantry Checklist
Get everything measured out first. This recipe moves fast, and you don't want to be chopping garlic while your chicken is overcooking in the pan.
- 1.5 lb boneless skinless chicken breast, cut into 1 inch cubes Why this? Consistent size means even cooking
- 1 tsp salt Why this? Essential for moisture retention
- 1/2 tsp black pepper Why this? Adds a subtle woody heat
- 1 tsp garlic powder Why this? Infuses flavor deep into the meat
- 1 tsp paprika Why this? Adds a deep golden color
- 2 tbsp avocado oil Why this? High smoke point for searing
- 4 tbsp unsalted butter Why this? Creates the velvety glaze
- 4 cloves garlic, minced Why this? Fresh punch of flavor
- 1 tbsp fresh parsley, chopped Why this? Freshness and color contrast
- 1 tsp lemon juice Why this? Cuts through the fat
If you don't have avocado oil, grapeseed oil is a solid swap. Avoid extra virgin olive oil here as it can smoke and turn bitter at the temperatures we need for these easy garlic chicken bites.
| Original Ingredient | Substitute | Why It Works |
|---|---|---|
| Avocado Oil (2 tbsp) | Grapeseed Oil (2 tbsp) | Similar high smoke point. Note: Neutral flavor profile |
| Chicken Breast | Chicken Thighs | More fat and flavor. Note: Needs 2-3 mins more cook time |
| Fresh Parsley | Dried Parsley (1 tsp) | Similar look. Note: Less fresh, add during the butter stage |
| Lemon Juice | Apple Cider Vinegar | Similar acidity. Note: Adds a slight sweetness |
Tools For The Job
You don't need a professional kitchen for this. In fact, the fewer tools, the better. I just use a medium bowl for the seasoning and a 12 inch cast iron skillet. If you don't have cast iron, a heavy stainless steel pan works, but avoid the thin "dollar store" pans.
A meat thermometer is the one tool I won't let you skip. According to USDA Food Safety, chicken must reach 165°F. Overcooking chicken breast by even two minutes can turn it from juicy to cardboard. It's the difference between a great meal and a chore to chew.
Bringing It All Together
Let's crack on. Follow these steps exactly, and you'll get that restaurant style finish every time.
- Toss the chicken cubes in a medium bowl with salt, pepper, garlic powder, and paprika. Note: Ensure every cube is coated for a consistent crust
- Heat avocado oil in a 12 inch skillet over medium high heat until it shimmers.
- Add chicken in a single layer. Sear undisturbed for 3–4 minutes until a deep golden crust forms.
- Flip the chicken and sear the other side for 3 minutes until internal temp hits 165°F.
- Reduce heat to medium. Slide chicken to one side of the pan.
- Add butter to the empty space. Once it foams, stir in minced garlic and sauté for 30 60 seconds until fragrant.
- Toss chicken back into the garlic butter to coat.
- Remove from heat immediately.
- Stir in chopped parsley.
- Stir in lemon juice. Note: Adding lemon at the end keeps the flavor bright
Chef's Tip: If the butter starts to brown too quickly (turning dark brown), pull the pan off the heat for 10 seconds before adding the garlic.
Solving Common Kitchen Glitches
The biggest issue people have with these easy garlic chicken bites is the texture. If the chicken feels rubbery, you've likely pushed it past 165°F. Chicken breast has very little fat, so it doesn't have much room for error.
Another common gripe is the garlic. Garlic burns in a heartbeat. If you add it to the oil at the start, it will be bitter and black by the time the chicken is done. That's why we add it at the end with the butter.
The Chicken is Rubbery
This happens when the internal temperature exceeds 170°F. The muscle fibers tighten and squeeze out all the juice. Use a thermometer and pull the meat off the heat exactly at 165°F.
The Garlic Tastes Bitter
You likely overheated the garlic or didn't use enough butter to protect it. Ensure the heat is reduced to medium before the garlic hits the pan.
No Golden Crust
This is usually caused by "crowding the pan." If the pieces are touching, they steam instead of sear. Cook in two batches if your pan is small.
| Problem | Root Cause | Solution |
|---|---|---|
| Grey Meat | Pan not hot enough | Wait for oil to shimmer before adding meat |
| Burnt Butter | Heat too high during baste | Reduce heat to medium before adding butter |
| Bland Taste | Under seasoned rub | Be generous with salt and garlic powder |
Common Mistakes Checklist
- ✓ Did you dry the chicken before seasoning?
- ✓ Is there enough space between cubes in the pan?
- ✓ Did you wait for the butter to foam before adding garlic?
- ✓ Did you remove the pan from heat before adding lemon juice?
- ✓ Did you check the internal temp with a thermometer?
Creative Twists and Swaps
Once you've nailed the base recipe, you can pivot this in a few directions. If you're in the mood for something smokier, a homemade BBQ sauce works a treat as a glaze. Just toss the seared chicken in the sauce for the last 60 seconds of cooking.
For a zesty finish, double the lemon juice and add a pinch of lemon zest. If you want something richer, you can stir in a tablespoon of heavy cream during the butter phase to make creamy garlic chicken bites.
If you're looking for a cheesy crust, toss the seared chicken with 1/4 cup of grated Parmesan cheese right before taking it off the heat. The residual heat will melt the cheese into a savory, salty crust.
Adjusting Your Portion Size
Scaling this recipe is simple, but you can't just multiply everything by four and put it in one pan. If you do, you'll end up with a giant pile of steamed chicken.
Scaling Down (Half Batch): Use a smaller 8 inch skillet. Reduce the oil to 1 tablespoon and the butter to 2 tablespoons. The cooking time remains mostly the same, but keep a close eye on the temperature as smaller amounts of meat can overcook faster.
Scaling Up (Double/Triple Batch): Work in batches. This is non negotiable. Sear the chicken in two or three turns, removing each batch to a plate. Once all the meat is cooked, put it all back in for the butter baste. Also, only increase the salt and spices to 1.5x rather than 2x, as the flavor concentrates during the searing process. If you've got a bigger group and need more than just chicken, maybe whip up some Sloppy Joes as a side option to bulk up the meal.
Debunking Cooking Myths
Searing meat does not "seal in the juices." This is a classic kitchen myth. Moisture loss happens regardless of how you sear it. The purpose of the sear is the flavor and the texture created by the heat, not a physical seal.
Another myth is that you must let chicken "rest" for 10 minutes. While a steak needs a long rest, these small chicken bites are so small that they don't hold enough heat to overcook themselves further, but they also don't lose much juice. A quick 2 minute rest is plenty.
Storage and Zero Waste
Store any leftover easy garlic chicken bites in an airtight container in the fridge for 3-4 days. To reheat them without turning them into rubber, avoid the microwave. Instead, toss them back into a hot skillet for 2 minutes with a tiny knob of butter. This restores the crust.
For the freezer, these hold up well for about 2 months. Freeze them in a single layer on a baking sheet before transferring them to a bag to prevent them from clumping together.
Don't throw away your parsley stems! Chop them finely and throw them into a veggie stock or a soup. If you have leftover garlic butter in the pan, pour it over some steamed broccoli or toss it with some pasta for an instant side dish.
Pro Presentation Tips
To make these look like they came from a bistro, start with a wide, shallow bowl or a wooden platter. Pile the chicken in the center to create height.
Drizzle the remaining garlic butter from the pan over the top. The glossy finish makes the dish look high end. Scatter a handful of fresh parsley over the top and serve with a couple of fresh lemon wedges on the side.
For a complete meal, serve these easy garlic chicken bites over a bed of fluffy quinoa or roasted cauliflower. The contrast between the golden chicken and the bright green parsley is what makes the dish pop visually. Just keep the plate simple, and let the golden brown sear be the star.
High in Sodium
850 mg 850 mg of sodium per serving (37% 37% of daily value)
The American Heart Association recommends a daily sodium limit of no more than 2,300 mg, with an ideal limit of 1,500 mg for most adults.
Tips to Reduce Sodium
-
Eliminate Added Salt-25%
Remove the 1 tsp of salt entirely. The chicken will still have plenty of flavor from the garlic, paprika, and lemon juice.
-
Boost Citrus Acidity-10%
Increase the lemon juice from 1 tsp to 1 tbsp. The acidity mimics the taste of salt and enhances the natural flavors of the chicken.
-
Increase Aromatics-5%
Add an extra clove of fresh minced garlic or a pinch more garlic powder to provide a punchier flavor profile without adding salt.
-
Use More Fresh Herbs
Increase the fresh parsley or add fresh thyme or oregano to add complexity and depth to the dish.
Recipe FAQs
Can I use chicken thighs instead of breasts?
Yes, chicken thighs work well. They are juicier and more forgiving during the searing process, though breasts provide the leaner bite intended for this recipe.
Why didn't my chicken develop a golden crust?
The pan was likely too cold or overcrowded. Ensure the avocado oil shimmers before adding the meat and leave the chicken undisturbed for 3 4 minutes to allow the crust to form.
How to reheat garlic chicken bites without them getting rubbery?
Toss them back into a hot skillet for 2 minutes with a tiny knob of butter. This restores the exterior texture and prevents the dryness caused by microwaving.
Is it true that chicken bites must be cooked for at least 15 minutes to be safe?
No, this is a common misconception. Because these are cut into small 1 inch cubes, they cook quickly; simply ensure they reach an internal temperature of 165°F.
How to keep the minced garlic from burning in the butter?
Reduce the heat to medium before adding the garlic. Sauté for only 30 60 seconds until fragrant, then immediately toss the chicken back in to lower the pan temperature.
How long do the chicken bites stay fresh in the fridge?
Store them in an airtight container for 3 4 days. For longer storage, freeze them in a single layer on a baking sheet before transferring to a bag to prevent clumping.
What is the best way to serve these bites?
Serve them as a main protein or a high protein appetizer. If you enjoyed the high heat searing technique used here, see how the same principle creates the golden exterior in our chicken schnitzel.
Easy Garlic Chicken Bites

