Cloudlike Buttermilk Biscuits the Secret to Perfect Flakes Every Time

- Unveiling the Secret to Tall, Flaky Perfection: Why This Homemade Biscuits Recipe Reigns Supreme
- Beyond the Shortcut: Embracing True Baking Prowess for Superior Texture
- Assembling Your Arsenal: Essential Components for Authentic American Biscuits
- The Crucial Role of Cold Fat: Ingredient Preparation Pointers
- The Master Method: Step-by-Step to Biscuit Nirvana
- Achieving the Signature Layering: Techniques for the Perfect Fold
- Troubleshooting and Maximizing Your Homemade Biscuits Experience
- Recipe FAQs
- 📝 Recipe Card
Unveiling the Secret to Tall, Flaky Perfection: Why This Homemade Biscuits Recipe Reigns Supreme
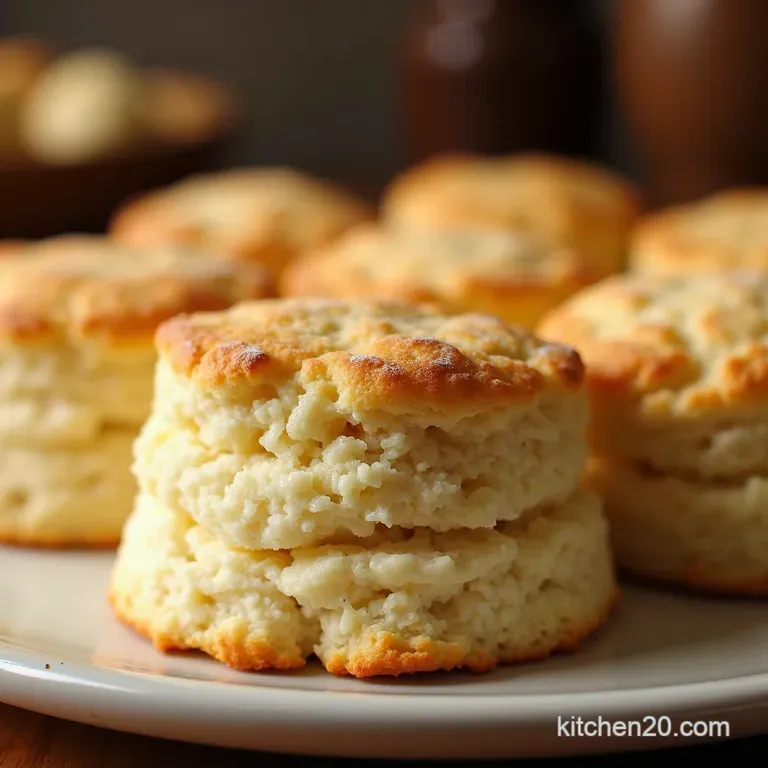
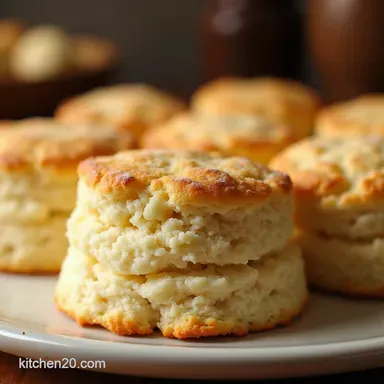
There is a particular joy in mastering a truly classic American staple, and I can tell you with certainty that the humble biscuit is where genuine baking prowess is truly tested. Forget those dense, slightly sad approximations you sometimes encounter; we are aiming for Buttery Homemade Biscuits that are lofty, tender, and shatteringly flaky with every bite.
This Homemade Biscuits Recipe isn't about shortcuts; it's about respecting the process to achieve those sky-high layers that make every meal feel like a celebration.
If you've ever wondered how to achieve those magnificent Tall Flaky Biscuits reminiscent of Southern charm, you’ve arrived at the definitive guide.
Beyond the Shortcut: Embracing True Baking Prowess for Superior Texture
While the lure of a quick fix perhaps using self rising flour or a few convenience ingredients is tempting, it often sacrifices the exquisite texture that defines a superior biscuit. For true baking gratification, we must focus on technique.
This blueprint delivers the quintessential, deeply satisfying American buttermilk biscuit, ensuring a rich flavor profile and a crumb that melts in your mouth.
The Culinary Test: Where True Bakers Prove Their Mettle
Baking biscuits is often seen as the litmus test for any home baker venturing beyond simple cakes. It’s a delicate dance between ingredient science and careful handling. A successful biscuit demonstrates a mastery of incorporating fat without melting it, and mixing wet and dry ingredients just enough to form a cohesive, yet tender, structure.
Setting the Standard: Aiming for Buttery Heaven, Not Dry Doorstops
Our goal is clear: an interior structure reminiscent of delicate pastry layers, achieved through perfectly distributed, cold fat pockets. We are striving for Buttery Homemade Biscuits that are moist and flavorful, never dry or crumbly.
Achieving this requires precise measurement and, critically, temperature control throughout the entire preparation phase.
Why Buttermilk is Non-Negotiable for Maximum Rise
The characteristic tang and magnificent rise of these biscuits are intrinsically linked to buttermilk. The acid in the buttermilk reacts beautifully with the baking soda we introduce, creating an immediate and powerful lift.
While some resourceful bakers manage Homemade Biscuits without Buttermilk by curdling milk, using true cold buttermilk guarantees the predictable, powerful chemical reaction needed for those high, light centers.
Assembling Your Arsenal: Essential Components for Authentic American Biscuits
To create something truly exceptional, we must start with quality components handled correctly. This recipe calls for simple ingredients, allowing their quality to shine through. We will be using standard all-purpose flour, ensuring we use the "spooned and leveled" technique to avoid packing too much into the measuring cup, which can inadvertently lead to a tougher biscuit.
Related Recipes Worth Trying
- Best Homemade Elderberry Syrup Recipe Warming Winter Tonic — Whip up a batch of deeply flavourful Homemade Elderberry Syrup with this easy recipe Perfect for an immune boost its tastier than storebought Find out how...
- Easy Homemade Pickled Beets Recipe Sweet Sour Flavor — Make the best homemade pickled beets This easy recipe uses simple spices for a vibrant tangy flavour perfect for salads and cheese boards Full instructions...
- The King of Southern Spreads Easy Homemade Pimento Cheese — Forget the storebought stuff Learn how to make authentic creamy Pimento Cheese Spread with just 15 minutes of prep Its the ultimate comfort food dip
The Crucial Role of Cold Fat: Ingredient Preparation Pointers
The temperature of your fat is perhaps the single most important variable in achieving Flaky Homemade Biscuits . Cold ingredients interact minimally with the dry ingredients until they hit the hot oven, creating those necessary steam pockets.
Precision Measures: Listing the Dry and Wet Essentials
For the dry elements, we combine 2 cups of all-purpose flour with 1 tablespoon of fresh baking powder, 1/2 teaspoon of baking soda for that necessary boost, and 1 teaspoon of fine sea salt for flavor balance. The wet component centers around 3/4 cup of ice-cold buttermilk.
If you're looking for an Easy Homemade Biscuits approach without compromising the cold temperature, keeping your buttermilk in the freezer for 10 minutes before use is a great trick.
Butter Temperature Tactics: Ensuring Peak Flakiness
You will need 6 tablespoons (or 3 ounces) of unsalted butter, cut into small cubes and kept aggressively cold ideally straight from the freezer or refrigerator for no more than five minutes. This extreme cold is the architecture of your layers.
Any warmth introduced here will result in a denser, less layered result.
Must Have Gear for Flawless Dough Handling
While you can manage with just your hands and a bowl, investing in a pastry blender makes the process of cutting in the butter significantly faster, minimizing the heat transfer from your hands.
A straight edged, 2 inch biscuit cutter is also essential; we avoid fluted edges because they tend to seal the perimeter of the dough, restricting the upward expansion we desperately seek.
The Master Method: step-by-step to Biscuit Nirvana
The process itself is straightforward, provided you respect the mandate for minimal handling. We begin by whisking the dry ingredients thoroughly to evenly distribute the leavening agents.
Next, we cut in the cold butter until the mixture resembles coarse sand with some recognizable pea-sized chunks these chunks are the future steam vents of your Homemade Biscuits .
After a brief 15-minute chill to ensure everything remains frigid, we introduce the cold buttermilk, stirring only until the dough just barely comes together into a shaggy mass.
Achieving the Signature Layering: Techniques for the Perfect Fold
This step transforms a simple dough into a laminated masterpiece, contributing heavily to why these are the Best Homemade Biscuits you will ever attempt.
Cutting the Fat: Achieving Pea-Sized Perfection
When incorporating the butter, do not strive for a uniform meal consistency. Those larger pieces, about the size of small peas, are what create the separation between layers once they melt and release steam during baking. Over processing the butter into fine powder negates this effect.
The Gentle Touch: Mixing Just Until Combined
Once the buttermilk is added, switch from a mechanical mixer to a fork or spatula. Mix only until no significant pockets of dry flour remain. The dough should look ragged and uneven this is good. Overmixing develops gluten, leading to tough, chewy biscuits instead of tender ones.
The Art of the Straight Cut: Maximizing Vertical Ascent
Turn the shaggy dough onto a lightly floured surface. Gently pat it into a thick rectangle, about 3/4 inch high. Now, perform the crucial folding technique: fold the dough into thirds, like a letter. Repeat this folding process two more times. This gentle laminating action creates dozens of potential layers.
After the final fold, pat the dough back to about 3/4 inch thickness and use your biscuit cutter. Press down firmly and lift straight up— never twist the cutter , as this seals the sides and stops the biscuit from achieving maximum height.
Place the raw biscuits close together on the baking sheet; touching biscuits help insulate one another, encouraging them to rise vertically rather than spreading sideways.
Baking Hot and Fast: Ensuring Golden Brown Glory
Preheat your oven to a roaring 425° F ( 220° C). A very hot oven is essential. We want the exterior to set quickly so the internal moisture flashes into steam immediately, forcing the layers apart.
Bake for just 12 to 15 minutes, until they are beautifully golden brown on top and cooked through. A light brush of melted butter immediately upon exiting the oven adds that final touch of richness.
Troubleshooting and Maximizing Your Homemade Biscuits Experience
Even with the best intentions, baking can sometimes present small surprises. Knowing how to pivot ensures your next batch is even better.
Fixing Common Pitfalls: Troubleshooting Flat Biscuits
If your biscuits emerged flat, the primary culprits are usually too much warmth in the butter, overworking the dough (developing too much gluten), or twisting the cutter. If they rose slightly but browned too quickly, your oven temperature might be too high, or you didn't place them close enough together on the sheet.
The make-ahead Game: Storage Tips for Optimal Freshness
These are best served immediately, but they travel well. Once cooled completely, store them in an airtight container at room temperature for up to two days. To refresh them, spritz lightly with water and reheat in a 350° F oven for about 5 minutes.
Flavor Variations: Infusing Herbs, Cheese, and Spice
To move beyond the classic, consider infusing flavor directly into the dry mix. A half cup of grated sharp cheddar cheese or a teaspoon of dried thyme introduced during the dry mixing stage creates delicious savory variations.
Even if you are experimenting with Self Rising Flour Biscuits (though we recommend the method above), folding in herbs works wonders.
Serving Suggestions: Pairing Ideas for Every Meal
These Flaky Homemade Biscuits are the perfect canvas. They are the required foundation for hearty Homemade Biscuits and Gravy , but they are equally wonderful split open and slathered with apple butter or simply paired with a rich berry jam.
They transform any simple meal into a comforting feast.

Recipe FAQs
Why are my Homemade Biscuits flat instead of tall and flaky?
This is usually down to two things: the temperature of your ingredients or overworking the dough. Your butter absolutely must be icy cold to create steam pockets, and you must avoid twisting the biscuit cutter, as that seals the edges and stops the rise. Remember, treat that dough gently!
Can I make Homemade Biscuits ahead of time, and how should I store them?
You certainly can! The best way is to cut the dough, place the raw biscuits tightly together on a baking sheet, and pop them in the freezer until solid. Once frozen, transfer them to an airtight bag for up to a month. Bake straight from frozen, adding 5-7 minutes to the baking time.
My recipe calls for buttermilk, but I don't have any what’s a good substitute?
Don't fret; it happens to the best of us! For a decent substitute, take regular milk (whole milk works best) and stir in one teaspoon of white vinegar or lemon juice per cup of milk needed. Let it sit for about five minutes until it looks slightly curdled; this acidity is what activates the baking soda beautifully.
What’s the trick to getting those gorgeous layers inside the biscuit?
That secret lies in the folding technique, often called 'laminating,' which mimics puff pastry. After bringing the dough together, pat it out and fold it like a business letter a few times, ensuring you are gentle and keep the dough chilled in between folds. This creates thin layers of butter separated by flour.
I prefer a slightly sweeter biscuit can I add sugar to this savory recipe?
Absolutely, feel free to sweeten them up for a teatime treat! You can safely add 1 to 2 tablespoons of granulated sugar along with the dry ingredients. If you want a real showstopper, brush the tops with melted butter and sprinkle with a cinnamon sugar mixture right before they go into the oven.
Flaky Buttermilk Biscuits
Ingredients:
Instructions:
Nutrition Facts:
| Calories | 124 kcal |
|---|---|
| Protein | 1.7 g |
| Fat | 0.4 g |
| Carbs | 16.5 g |
| Fiber | 0.3 g |
| Sodium | 8444 mg |
