Ham and Cheese Sliders: Poppy Seed Butter
- Time: 10 min active + 20 min bake = Total 30 minutes
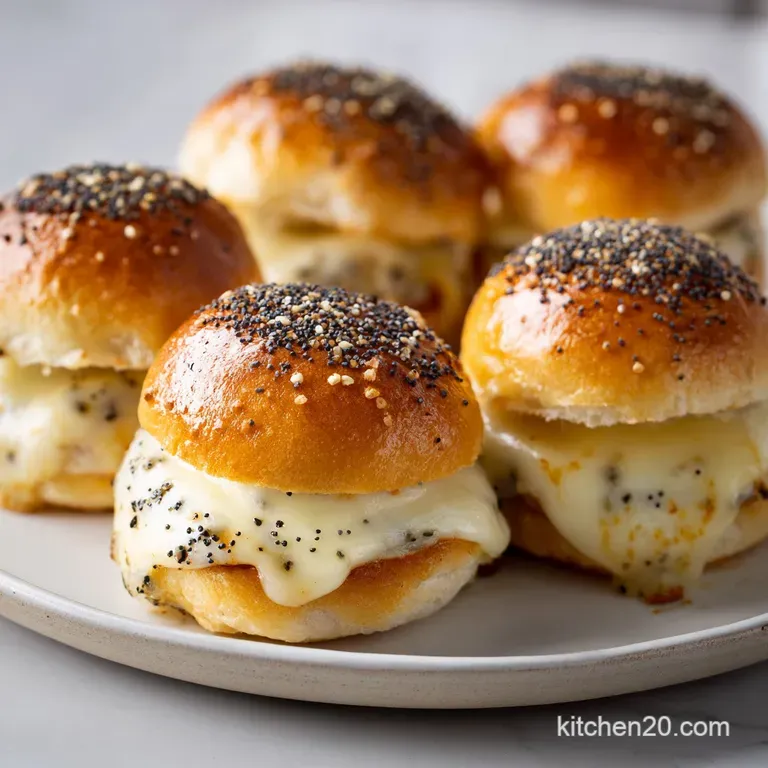
- Flavor/Texture Hook: Sweet salty glaze with a buttery, golden crust
- Perfect for: Game day appetizers, holiday parties, or quick weeknight bites
The smell of melted Swiss and browned butter is basically the official scent of an American potluck. I grew up seeing these at every single family gathering, usually brought by an aunt who knew exactly how to make them "sticky." There is something about the contrast of those sweet Hawaiian rolls and salty deli ham that just feels like a hug in food form.
It is a cultural staple of midwest style entertaining, where the goal is always maximum comfort and minimum stress.
Honestly, I used to overcomplicate these by trying to toast the rolls individually. It took forever and the cheese never melted evenly. Then I realized the "slab method" is the only way to go. You just slice the whole thing once, layer it up, and let the oven do the heavy lifting.
You can expect a result that is crisp on top and gooey in the middle. We are going for a deep golden brown color and a glaze that slightly caramelizes around the edges. Trust me on this, don't skip the poppy seeds - they add a tiny bit of crunch that cuts through the richness.
Easy Baked Ham and Cheese Sliders
Right then, let's get into it. The secret to this dish isn't actually the ham or the cheese, but the glaze. Most people just use butter, but adding brown sugar and Dijon creates a complex flavor profile that makes people ask for your "secret ingredient." It is the difference between a basic sandwich and something that feels curated.
But what about the sogginess? We'll get to that in the troubleshooting section. For now, just know that the order of layering is everything. If you put the ham directly on the bottom bun without a cheese barrier, the bread absorbs the moisture from the meat, and you end up with a mushy base.
I've found that using a 9x13 pan is non negotiable here. It keeps the rolls snug so the cheese acts like glue, holding the whole slab together until you slice into it. It's a fast, creative way to feed a dozen people without spending the whole night in the kitchen.
Why These Work
The Sugar Barrier: The brown sugar in the glaze creates a thin, caramelized shell that prevents the tops from drying out.
Fat Insulation: Melted butter coats the crumb of the roll, acting as a waterproof seal so the ham juices don't soak through.
Cheese Glue: Placing Swiss cheese on both the top and bottom creates a structural bond that keeps the sliders from sliding apart.
Salty Sweet Contrast: The natural sugars in the Hawaiian rolls are amplified by the brown sugar, which balances the brine of the ham.
| Method | Time | Texture | Best For |
|---|---|---|---|
| Oven | 30 mins | Uniformly golden and melty | Large crowds/parties |
| Stovetop | 15 mins | Toasted edges, softer center | Small batches/quick lunch |
The Essential Components
When you are building these, the quality of the ham matters. I prefer a thinly sliced honey ham or a smoked variety to add depth. If you love a pungent flavor, you can even incorporate some roasted garlic into the butter glaze for a more savory kick.
Component Analysis
| Ingredient | Science Role | Pro Secret |
|---|---|---|
| Hawaiian Rolls | Sweet base | Keep them in the bag until the last second to stay soft |
| Swiss Cheese | Melting agent | Use thin slices for a more even, velvety melt |
| Dijon Mustard | Acidity | Provides the "tang" that cuts through the heavy butter |
| Poppy Seeds | Texture | Toast them lightly in a pan first for more aroma |
Necessary Kitchen Tools
You don't need a fancy setup for this. A sharp serrated knife is the most important tool here because it allows you to slice the rolls horizontally without squishing the bread. If you use a chef's knife, you'll likely flatten the rolls, and they won't bake as evenly.
I also highly recommend a pastry brush. While you could just pour the butter over the top, brushing it ensures every single nook and cranny is coated. This is how you get that consistent golden color across the entire batch. A standard 9x13 inch baking pan is a must to keep the structure intact.
Step-by-step Cooking Flow
Let's crack on with the assembly. This is all about the flow - prep the base, layer the fillings, and finish with the glaze.
Phase 1: Prepping the Base
- Slice the entire slab of Hawaiian rolls in half horizontally with a serrated knife. Note: This creates one big top and one big bottom piece.
- Place the bottom slab of rolls into a 9x13 inch baking pan.
Phase 2: Layering for Stability
- Layer the Swiss cheese slices evenly across the bottom bread. Note: This protects the bun from ham moisture.
- Pile the deli ham on top of the cheese, folding the slices to create height.
- Top the ham with another layer of Swiss cheese.
- Place the top slab of rolls over the cheese.
Phase 3: Glazing and Baking
- Whisk together the melted butter, brown sugar, Dijon mustard, poppy seeds, and garlic powder in a small bowl until the sugar is dissolved.
- Brush the butter glaze generously over the tops of the rolls, letting some drip down the sides.
- Bake at 350°F (175°C) for 20 minutes until the cheese is bubbling and the tops are a deep golden brown.
Avoid Common Mistakes

One thing I see people do is overload the ham. It seems like a good idea, but too much meat creates a moisture pocket in the center that prevents the cheese from melting properly. Stick to a reasonable amount of folding to keep the height consistent.
Troubleshooting Common Issues
| Issue | Solution |
|---|---|
| Why Your Sliders Are Soggy | Sogginess usually happens when the ham is too wet or the oven temperature is too low. If the ham is straight from a briney package, pat it dry with a paper towel. A low oven takes too long to melt the |
| Why the Cheese Isn't Melting | This usually happens if the cheese slices are too thick or the rolls are blocking the heat. Make sure your slices are thin and that you've brushed the glaze correctly - the butter helps conduct heat i |
| Why the Tops Burned | Because of the brown sugar, these can go from golden to burnt quickly. If your oven runs hot, tent the rolls with foil after 10 minutes. |
Common Mistakes Checklist
- ✓ Patted deli ham dry before layering.
- ✓ Used a serrated knife to avoid crushing rolls.
- ✓ Ensured brown sugar was fully dissolved in butter.
- ✓ Baked at exactly 350°F (175°C) for 20 minutes.
- ✓ Added the cheese barrier on the bottom.
Customizing Your Batch
If you want to pivot the flavor, you can easily swap the Swiss for Gruyère or Provolone. For a spicy kick, add some sliced jalapeños between the ham and cheese layers. If you are in the mood for something different entirely, you might like these Juicy Lucy Sliders for a more beef centric party option.
For a Smoked Flavor
Swap the deli ham for smoked ham or add a pinch of smoked paprika to the butter glaze. This gives the recipe a "pitmaster" vibe without needing a smoker.
For a Low Sugar Option
Omit the brown sugar and replace it with a teaspoon of maple syrup or just extra Dijon mustard. You'll lose some of the caramelization, but the savory notes will shine.
For an Air Fryer Version
Place the assembled sliders in an air fryer safe dish. Cook at 325°F for about 10-12 minutes. Keep a close eye on them, as the heating element is much closer to the bread and can burn the glaze quickly.
| Original Ingredient | Substitute | Why It Works |
|---|---|---|
| Swiss Cheese | Gruyère | Similar melt point. Note: Adds a nuttier, more complex flavor |
| Deli Ham | Canadian Bacon | Leaner protein. Note: Denser texture, less "fold" |
| Hawaiian Rolls | Brioche Sliders | High butter content. Note: Less sweet, more buttery |
| Dijon Mustard | Whole Grain Mustard | Similar acidity. Note: Adds a rustic texture to the glaze |
Truth About Sliders
There is a common belief that you need to pre toast the buns to prevent them from getting soggy. In reality, if you use the cheese barrier method, pre toasting is unnecessary and can actually make the buns too hard.
Another myth is that you must use a specific brand of "sweet rolls." While the classic ones are great, any enriched dough (like brioche or challah) works as long as you adjust the sugar in the glaze to compensate for the lack of sweetness in the bread.
Keeping Them Fresh
These are best served hot, but they keep surprisingly well. Store any leftovers in an airtight container in the fridge for up to 3 days.
Freezing Guide: You can freeze these before baking. Assemble them, glaze the tops, wrap the whole pan tightly in plastic wrap and foil, and freeze for up to 2 months. When you're ready to eat, bake them from frozen at 325°F for about 25-30 minutes.
Reheating Tips: Don't use the microwave if you can avoid it; it makes the bread rubbery. Instead, pop them in the oven at 350°F (175°C) for 5-10 minutes or use a toaster oven to bring back that shatter crisp top.
Zero Waste Tips: If you have leftover ham, don't let it go to waste. Dice it up into a morning omelet or toss it into a potato soup. Any leftover butter glaze can be brushed onto a piece of toast for a quick, savory snack.
Plating and Serving
When you pull these out of the oven, let them rest for about 5 minutes. This allows the cheese to set slightly so the sliders don't slide apart when you cut them. Use the same serrated knife to cut through the rolls and fillings.
Serve them on a wooden board or a platter with a side of cornichons or a crisp coleslaw to balance the richness. According to USDA FoodData, pairing heavy proteins with acidic or fermented vegetables helps balance the overall palate.
For a real pro move, sprinkle a little fresh parsley over the top just before serving. The pop of green against the golden brown glaze makes them look like they came from a bistro rather than a home kitchen.
Trust me, the presentation is what turns these Ham and Cheese Sliders from a simple snack into the star of the party.
Recipe FAQs
What type of cheese is best for ham and cheese sliders?
Swiss cheese. Its nutty flavor and excellent melting properties perfectly complement the sweetness of Hawaiian rolls.
What goes with a ham and cheese slider?
Fresh salads or fruit. A crisp, acidic side balances the richness of the butter glaze. For other crowd pleasing mains, try our homemade sloppy joes.
What cheese is best with ham?
Swiss cheese. It provides a mild, creamy contrast that cuts through the saltiness of the deli ham.
How long should I leave ham and cheese sliders in the oven?
Bake for 20 minutes. This ensures the cheese is bubbling and the tops reach a deep golden brown at 350°F (175°C).
How to prevent the sliders from becoming soggy?
Pat the deli ham dry with paper towels. Removing excess moisture from the ham before layering prevents steam from softening the bottom rolls.
Is it true I must slice each roll individually before assembling?
No, this is a common misconception. Slice the entire slab of rolls in half horizontally to create two large pieces for faster and more even assembly.
Why is my cheese not melting properly?
Use thinly sliced Swiss cheese. Thick slices may not melt completely within the 20-minute window, especially if they are blocked by the top rolls.
Ham And Cheese Sliders