Pickled Red Onion Recipe: Zesty and Crisp
- Time: Active 10 minutes, Passive 5 minutes, Total 15 minutes
- Flavor/Texture Hook: Zesty, crisp, and tang forward
- Perfect for: Street tacos, fatty burgers, and brightening up grain bowls
- Discover the Magic of This Vibrant Pickled Red Onion Recipe
- Essential Recipe Specs and Cooking Benchmarks
- Gathering Your Essentials for the Brine
- Equipment Needed for Professional Results
- Bringing It Together: Step-by-Step Instructions
- How to Fix Common Problems
- Variations & Substitutions for Every Palette
- Keeping It Fresh: Storage and Zero Waste
- Pairing Ideas for Your Homemade Pickles
- Myths About Refrigerator Pickling
- Recipe FAQs
- 📝 Recipe Card
Discover the Magic of This Vibrant Pickled Red Onion Recipe
Picture a Friday night street food crawl where the air is thick with the scent of charred corn and slow roasted pork. You grab a taco, but it’s missing that final "pop" that neon pink crown that cuts through the richness and makes every bite sing.
That’s exactly what this pickled red onion recipe brings to your kitchen. I remember the first time I realized that these weren't just for garnish in fancy restaurants. I was standing in a tiny kitchen in East London, trying to replicate a carnitas taco I’d had the night before, and the raw onions were just too aggressive.
They lingered, they bit back, and they lacked that capturing brightness I craved.
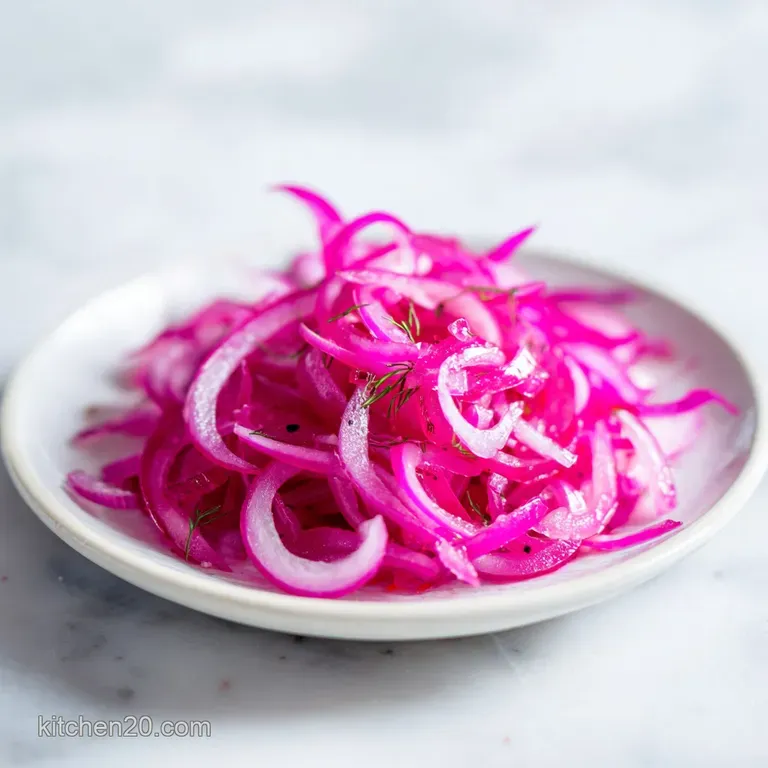
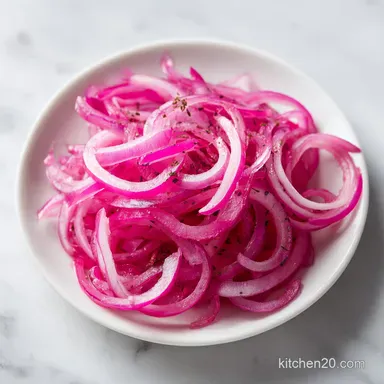
The moment I poured a steaming brine over those purple rings and watched them transform into a vibrant magenta, I was hooked. It’s not just about the flavor, though the balance of apple cider vinegar and sea salt is addictive. It’s about the visual energy they add to a plate.
There is something deeply satisfying about seeing a dull brown bowl of lentils or a heavy grilled cheese sandwich suddenly come to life with a handful of these translucent, tangy jewels. They are the ultimate "fix it" ingredient for the home cook who loves bold, street food inspired flavors.
We aren't just making a condiment here; we are creating a texture experience. When you bite into a properly pickled onion, it should shatter slightly between your teeth, releasing a burst of vinegar that cleanses the palate. It’s the secret weapon I keep in the back of my fridge at all times.
Whether you’re hosting a big backyard BBQ or just trying to make a Tuesday night salad feel a bit more authentic, this recipe is the one you’ll reach for over and over again. Trust me, once you see that color shift in the jar, you'll never go back to raw onions again.
Essential Recipe Specs and Cooking Benchmarks
When we talk about pickling at home, precision matters just enough to ensure that the onions stay crisp rather than turning into a soggy mess. This isn't a long term fermentation project; it’s a quick refrigerator pickle designed for immediate gratification.
To get that street food vibe right, we need to balance the acidity of the apple cider vinegar with the natural sugars in the red onion.
The One Step Most People Skip: Most folks forget to let the onions sit at room temperature before tossing them in the fridge. The warmth of the brine is what actually triggers the color change and softens the onion's harsh sulfur compounds, but chilling it too fast halts that beautiful pink transformation.
| Feature | Stovetop Brining | Oven Roasting (For Contrast) |
|---|---|---|
| Texture | Crisp and snap like | Soft, jammy, and sweet |
| Color | Neon magenta/pink | Deep burgundy/brown |
| Aroma | Sharp, vinegary, and bright | Rich, caramelized, and savory |
I’ve found that using the stovetop method for the brine is the only way to go if you want that classic zing. If you were to roast the onions, you'd lose that acidity that defines a true pickle. We want that sharp contrast. For the best results, keep an eye on your onion thickness.
I aim for roughly 1/8 inch (3mm). If they’re too thick, the brine can’t penetrate the center; if they’re too thin, they lose that satisfying shatter.
Gathering Your Essentials for the Brine
The beauty of this recipe lies in its simplicity. You likely have most of these items in your pantry right now, but the quality of each one dictates the final vibrancy of the jar. We are using one large red onion, which is roughly 300g once peeled.
Look for an onion that feels heavy for its size and has a tight, shiny skin. That's a sign of a fresh, hydrated vegetable that will hold its crunch.
| Component | Science Role | Pro Secret |
|---|---|---|
| Apple Cider Vinegar | Denatures proteins and softens cell walls | Use raw, unfiltered ACV for a fruitier, more complex tang. |
| Sea Salt | Draws out moisture via osmosis | Avoid iodized salt; it can make the brine cloudy and add a metallic taste. |
| Granulated Sugar | Counteracts the harsh acetic acid | It doesn't just sweeten; it creates a glossy finish on the onion rings. |
Beyond the base, the aromatics are where you can get creative. We’re using 2 smashed garlic cloves and 0.5 teaspoon of whole black peppercorns. The garlic provides a mellow, savory undertone that balances the sharp vinegar, while the peppercorns offer a subtle heat that builds in the back of your throat. If you're feeling adventurous, you could even add a sprig of fresh oregano to lean into that Mexican style pickled red onions vibe, which pairs so well with roasted meats.
For the Vegetable Base
The red onion is our star. When you slice it, you'll notice the pungent, eye watering aroma of syn propanethial-S oxide that’s the gas that makes you cry. Don't worry, the vinegar is going to neutralize that entirely, leaving only the sweetness behind. You'll need: - 1 large Red Onion (approx.
300g), peeled and sliced into thin rings
For the Apple Cider Vinegar Brine
The brine is the lifeblood of this dish. We use a 1:1 ratio of water to vinegar to ensure the acidity is sharp enough to preserve and flavor, but not so aggressive that it burns. You'll need: - 0.5 cup (120ml) Apple cider vinegar (5% acidity) - 0.5 cup (120ml) Filtered water - 1.5 tablespoons (18g) Granulated sugar - 1.5 teaspoons (9g) Sea salt
For the Aromatics (The "Better Than Dining Out" Secret)
These little additions are what take a basic onion recipe and turn it into something capturing and professional. The garlic adds a velvety depth to the liquid that builds over time. You'll need: - 2 cloves Garlic, smashed - 0.5 teaspoon Whole black peppercorns
Equipment Needed for Professional Results
You don't need a high tech kitchen to pull this off, but a few specific tools will make the process much smoother. First and foremost, a sharp chef's knife is your best friend. If your knife is dull, you'll bruise the onion cell walls rather than slicing them, which leads to a mushy pickle.
If you have a mandoline, now is the time to break it out for those perfectly uniform rings.
- 16 oz Glass Mason Jar: Vinegar is highly acidic and will react with plastic or certain metals. A glass jar is non reactive and lets you see that beautiful color develop.
- Small Non reactive Saucepan: Stainless steel or enamel coated pans are perfect. Avoid aluminum or unlined copper, which can give the brine an off flavor.
- Mandoline or Sharp Knife: Consistency in your slices means every ring pickles at the same rate.
- Measuring Cups and Spoons: Precision ensures the salt to sugar ratio is balanced.
Bringing It Together: step-by-step Instructions

This process is fast, so have your jar ready before you start the brine. The goal is to move the hot liquid onto the onions while the temperature is high enough to jumpstart the "cook" without actually boiling the life out of the vegetables.
- Slice the red onion as thinly as possible using a sharp chef's knife or mandoline. Aim for uniform rings. Note: Consistent thickness ensures even brining.
- Pack the raw slices tightly into a clean 16 oz Mason jar. Pack them until the jar feels full, as they will shrink slightly once the hot liquid hits them.
- Tuck the smashed garlic and peppercorns into the crevices between the onion layers. Ensure they are distributed so the flavor infuses evenly.
- Combine the water, apple cider vinegar, salt, and sugar in a small non reactive saucepan.
- Place over medium heat, stirring occasionally. Cook until the sugar and salt have completely dissolved and the liquid is steaming. You'll smell the sharp, sweet tang of the vinegar rising from the pot.
- Carefully pour the hot brine over the onions in the jar. Fill until they are completely submerged. If you smell the garlic starting to mellow as the heat hits it, you’re doing it right.
- Press the onions down with a clean spoon if needed to remove air bubbles.
- Let the jar sit uncovered at room temperature for 20 to 30 minutes. Wait until you see the onions turn a bright pink—this is the anthocyanin reaction at work.
- Once cooled, screw on the lid tightly.
- Refrigerate the jar. The flavors will continue to meld and the texture will stay crisp for weeks.
How to Fix Common Problems
Even the simplest recipes can go sideways. The most common issue people face is a lack of "crunch." If your onions feel soft or limp, it's usually a temperature or timing issue. Remember, we are not boiling the onions; we are merely steeping them in hot liquid.
Softening Mushy Textures
If your onions come out mushy, you likely let the brine boil for too long or poured it over the onions while it was at a rolling boil. The heat breaks down the pectin in the cell walls. To fix this in the future, pull the brine off the heat as soon as the sugar dissolves and the first wisps of steam appear.
If they're already mushy, they're still great for blending into a dressing or topping a burger where texture matters less than flavor.
| Problem | Root Cause | Solution |
|---|---|---|
| Dull color | Used white vinegar or old onions | Use Apple Cider Vinegar and fresh, firm red onions. |
| Too salty | Measuring error or table salt | Add a splash more water and a pinch of sugar to the jar. |
| Bitter aftertaste | Garlic sprouted or onions were old | Remove the green germ from garlic before smashing. |
Neutralizing Excessive Sharpness
Sometimes the vinegar can feel a bit too aggressive, especially if your onions were particularly pungent to begin with. If the jar tastes like a punch to the face, you can mellow it out by adding an extra teaspoon of sugar or a few tablespoons of filtered water directly to the jar.
The sugar acts as a buffer for the acetic acid, making the whole experience much more velvety on the tongue.
Common Mistakes Checklist: - ✓ Slicing onions too thick (prevents brine penetration). - ✓ Using a reactive metal bowl or lid (creates a metallic taste). - ✓ Forgetting to smash the garlic (essential for releasing oils).
- ✓ Not washing the onion thoroughly (residual dirt can spoil the brine). - ✓ Skipping the room temperature "steep" (prevents the vibrant pink color).
Variations & Substitutions for Every Palette
While the apple cider vinegar and sugar combo is a classic, you can easily pivot this recipe to match the cuisine you're cooking. If you're out of one ingredient, don't panic pickling is quite forgiving as long as you keep the acid to water ratio roughly the same.
| Original Ingredient | Substitute | Why It Works |
|---|---|---|
| Apple Cider Vinegar | Rice Vinegar | Milder and sweeter; great for Asian inspired bowls. |
| Granulated Sugar | Honey or Maple Syrup | Adds a floral or earthy depth; Note: Slightly changes the clarity of the brine. |
| Sea Salt | Himalayan Pink Salt | Similar mineral content and clean flavor profile. |
If you want to try something a bit different, you can also look into making Zingy quick pickled onions which often lean more into malt vinegar for a heavier, pub style finish.
Infusing Mexican Style Pickled Red Onions
For a true street food experience, add a sliced habanero and some dried Mexican oregano to the jar. The heat from the pepper infuses into the brine, creating a spicy sweet kick that is absolutely capturing when paired with fatty carnitas or grilled fish.
Crafting a Spicy Kick
If habaneros are too much, a pinch of red chili flakes or a few slices of fresh jalapeño will provide a more manageable warmth. The spice helps to cut through the sugar, making the onions feel even more refreshing.
Keeping It Fresh: Storage and Zero Waste
These onions are a gift that keeps on giving. Because of the high acidity and salt content, they stay safe and delicious in the fridge for a significant amount of time. I usually recommend eating them within 2 to 3 weeks for the best texture, but they’ll stay safe for up to a month.
Storage Guidelines: - Fridge: Keep in an airtight glass jar for up to 4 weeks. - Freezer: Not recommended. The freezing process destroys the cell walls, and you'll end up with a pile of mush once thawed.
Zero Waste Tip: When you've finished the onions, do not pour that brine down the drain! It is liquid gold. Use it as the acid component in a salad dressing, or use it to quick pickle sliced cucumbers or radishes.
You can even use a splash of it to deglaze a pan when making a pan sauce for chicken or pork. It has all the flavor of the onions, garlic, and peppercorns concentrated into one vibrant liquid.
Pairing Ideas for Your Homemade Pickles
Now that you have a jar of these neon beauties, where do you put them? The answer is: almost everywhere. Their ability to provide a sharp, acidic counterpoint to rich, savory fats is unmatched.
- Tacos and Tostadas: This is the classic pairing. Whether it's beef birria or sweet potato tacos, the onions provide the necessary brightness.
- Burgers and Sandwiches: Swap out boring raw onions for these. They add a sophisticated tang to a classic cheeseburger or a heavy turkey club.
- Grain Bowls and Salads: A handful of these can make a simple bowl of quinoa and roasted vegetables taste like it came from a high end cafe.
- Charcuterie Boards: They act as a palate cleanser between bites of rich cheese and salty cured meats.
If you want X, do Y: - If you want extra crunch, slice the onions slightly thicker and use cold brine (though the color will take longer to develop).
- If you want a milder flavor, rinse the sliced raw onions in cold water for 30 seconds before putting them in the jar to remove some of the sulfur. - If you want maximum color, make sure you use red onions with deep purple outer layers and don't skip the apple cider vinegar.
Myths About Refrigerator Pickling
There is a lot of misinformation out there about how to properly pickle onions at home. Let's clear up a few of the most common misconceptions I hear.
Myth: You have to boil the onions in the brine. Truth: Doing this will result in a cooked, soft onion. We want the brine to be hot enough to dissolve the sugar and salt and penetrate the onion, but the onions themselves should remain raw to maintain their snap. Pouring hot liquid over them is plenty.
Myth: Any vinegar will give you the same result. Truth: White distilled vinegar is very harsh and lacks the fruity complexity of apple cider vinegar. While it will pickle the onions, the flavor will be one note and overly sharp.
Apple cider vinegar provides a much more rounded, "street food" style flavor profile.
Myth: The onions are ready as soon as the brine hits them. Truth: While they change color quickly, the flavor takes a little time to settle. They are good after 30 minutes, but they are truly capturing after at least 4 hours in the fridge when the garlic and peppercorns have had a chance to really infuse the liquid.

Recipe FAQs
How do you make pickled red onions?
Slice the onions thinly, pack them into a jar, and cover with a hot brine of vinegar, water, sugar, and salt. After sitting at room temperature for 20 30 minutes, they develop their signature bright pink color and tangy flavor.
What vinegar is best for pickling red onions?
Apple cider vinegar is the standard choice because its mild, fruity acidity complements the onion perfectly. If you need a different profile, rice vinegar works as a milder, slightly sweeter alternative.
How long will pickled red onions stay good?
They remain fresh for up to two weeks when stored in an airtight jar in the refrigerator. Always ensure the onions are fully submerged in the brine to maintain their crisp texture.
How do you use pickled red onions?
Add them as a bright, acidic topping to tacos, grain bowls, burgers, or avocado toast. If you enjoyed using the acid to cut through rich flavors here, see how we apply that same principle in our slow cooked chili to balance the savory beef.
Is it true I can use honey instead of granulated sugar?
Yes, this is a great substitution. Swapping in honey or maple syrup adds a slightly floral or earthy depth to the brine while maintaining the necessary balance against the acidity.
Why do the onions turn pink after sitting?
The color change is a natural chemical reaction between the onion's anthocyanins and the acidic vinegar. This process is a hallmark of proper pickling and ensures your onions are ready to eat.
What if I don't have a mandoline for slicing?
Use a sharp chef's knife to slice the onions as thin as possible by hand. Aim for consistency in thickness, as uniform slices will absorb the brine at the same rate for the best texture.
Pickled Red Onion Recipe
Ingredients:
Instructions:
Nutrition Facts:
| Calories | 19 calories |
|---|---|
| Protein | 0.3 g |
| Fat | 0.1 g |
| Carbs | 4.2 g |
| Fiber | 0.4 g |
| Sugar | 2.8 g |
| Sodium | 293 mg |
