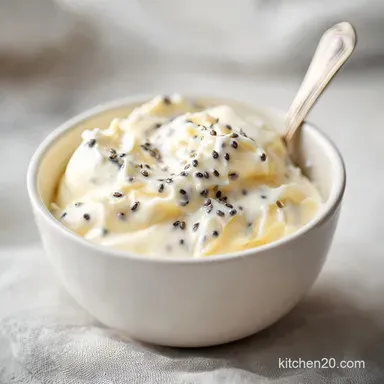
Vanilla Bean Coffee Creamer: Silky and Rich
- Time: 2 min active + 5 min cook = Total 7 mins (plus cooling time)
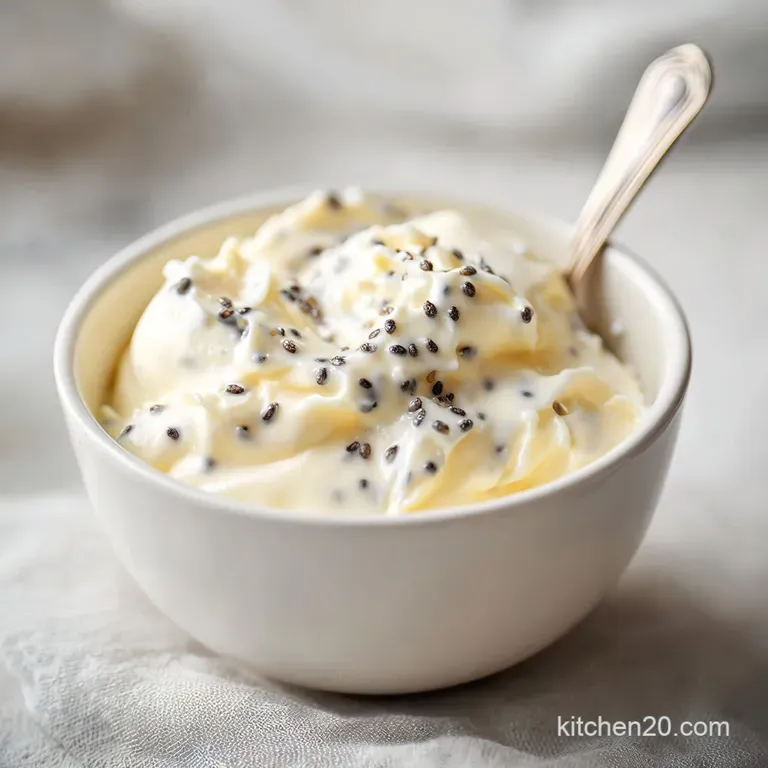
- Flavor/Texture Hook: Silky, lush mouthfeel with visible vanilla specks
- Perfect for: Daily morning routines, meal prep, and budget conscious foodies
Ever wonder why the creamer at high end cafes tastes so different from the bottled stuff? It's usually because they use real vanilla beans, not just a synthetic syrup. I remember the first time I tried this at a boutique shop, and I was obsessed with those tiny black seeds swirling in my latte.
It looked fancy, but it tasted honest.
For a long time, I just bought the pre made versions, but the aftertaste was always too chemical for me. Once I realized I could make my own Vanilla Bean Coffee Creamer in about seven minutes, I never looked back. It's a small change, but it turns a standard caffeine fix into a little morning luxury.
You don't need any fancy skills for this. It's basically just warming things up until they're smooth. I'll show you how to get that professional, silky consistency using a few budget friendly shortcuts that actually work.
Vanilla Bean Coffee Creamer
Getting That Velvety Texture
The secret to the mouthfeel isn't just the fat content, it's how the sugar integrates. When you heat the half and half gently, the sugar doesn't just sweeten the liquid, it changes the viscosity. This creates a thicker, more coating texture that doesn't just vanish into your coffee.
- Fat Emulsification
- The fats in the dairy hold onto the vanilla oils, keeping the flavor consistent from the first sip to the last.
- Sugar Saturation
- Heating the liquid allows the sugar to fully dissolve, preventing that grainy texture you get with cold mixed creamers.
- Vanillin Release
- Warming the bean pod helps release the aromatic compounds that give the creamer its deep, natural scent.
- Thermal Stability
- By cooling it slowly, you prevent the dairy from separating, ensuring a smooth pour every time.
| Method | Time | Texture | Best For |
|---|---|---|---|
| Fast (Extract) | 1 min | Thin/Liquid | Last minute needs |
| Classic (Bean) | 7 mins | Velvety/Rich | Daily meal prep |
Quick Stats and Requirements
This recipe is designed for efficiency. You're not spending an hour over the stove; you're just gently nudging the ingredients until they merge. Because we're using half and half, we get a balance of creaminess and fluidity that works for both hot and iced drinks.
According to the USDA FoodData Central, the fat content in half and half provides a stable base for flavor infusion, making it the ideal mid point between milk and heavy cream.
| Ingredient | Science Role | Pro Secret |
|---|---|---|
| Half and Half | Emulsion Base | Use store brand; the fat ratio is identical |
| White Sugar | Viscosity Agent | Use superfine for even faster dissolving |
| Vanilla Bean | Aromatic Core | Split lengthwise to expose all the seeds |
Ingredients and Budget Swaps
I've kept this list short to keep the cost down. You don't need expensive organic labels here, as the vanilla bean does all the heavy lifting for the flavor.
- 2 cups half and half Why this? Balanced fat for a silky feel
- 1/3 cup granulated white sugar Why this? Clean sweetness that doesn't mask vanilla
- 1 whole vanilla bean, split lengthwise Why this? Provides authentic specks and deep aroma
| Original Ingredient | Substitute | Why It Works |
|---|---|---|
| Half and Half | Whole Milk + 1 tbsp melted butter | Mimics fat content. Note: Slightly less stable emulsion |
| White Sugar | Maple Syrup (1/4 cup) | Natural sweetness. Note: Adds a distinct maple flavor |
| Vanilla Bean | Vanilla Bean Paste (1 tbsp) | Same seeds/flavor. Note: Faster but slightly more processed |
Right then, let's look at the tools. You don't need a fancy kitchen setup, just a few basics.
Simple Tools for Efficiency
I prefer using a small saucepan because it limits evaporation. If you use a wide pan, the liquid reduces too quickly, which can make the creamer overly thick or too sweet.
- Small saucepan (stainless steel is best)
- Whisk or silicone spatula
- 16 oz glass mason jar
- Sharp paring knife (for splitting the bean)
Step by step Guide
Let's crack on with the actual making. Trust me on the heat settings; going too hot is the only way to ruin this.
- Split the vanilla bean lengthwise with a knife and scrape the seeds out. Note: Use the back of the knife to get every seed
- Combine the half and half, sugar, and the scraped seeds (and the pod) in the saucepan.
- Turn the heat to medium low.
- Whisk gently as the mixture warms.
- Heat for 5 mins until the liquid begins to steam and sugar crystals disappear.
- Remove the vanilla bean pod from the saucepan.
- Pour the liquid into a 16 oz glass mason jar.
- Let it cool to room temperature on the counter.
- Seal the jar and transfer to the refrigerator.
Chef: If you're in a rush, you can place the jar in an ice bath for 10 mins to cool it down faster, but never put boiling liquid directly into a cold fridge.
Avoid These Common Mistakes
The most frequent issue people have is the "burnt" taste. This happens when the bottom of the pan gets too hot, scorching the milk proteins. Keep the heat low and keep that whisk moving.
Why Your Creamer Separates
If you notice a layer of fat on top, it's usually because it wasn't shaken before use. Since this is homemade, it doesn't have the stabilizers found in store brands.
To Avoid Scorching
If you see small brown bits forming at the bottom, remove the pan from the heat immediately. Stir vigorously to incorporate those bits back in, or strain the mixture through a fine mesh sieve.
| Problem | Root Cause | Solution |
|---|---|---|
| Grainy Texture | Sugar didn't dissolve | Reheat gently for 2 more mins |
| Thin Consistency | Too much milk/sub | Simmer 3 mins longer to reduce |
| Weak Flavor | Poor bean quality | Add a drop of vanilla extract |
Common Mistakes Checklist
- ✓ Never boil the mixture - it will curdle the dairy.
- ✓ Always scrape the seeds, don't just throw the pod in.
- ✓ Shake the jar well before every single use.
- ✓ Use a glass jar, as plastic can absorb the vanilla scent.
Adjusting Your Batch Size
If you're making this for just yourself, or for a whole brunch crowd, you can easily scale it.
Cutting the recipe in half: Use 1 cup half and half and 2-3 tbsp sugar. Since vanilla beans vary in size, half a bean is usually enough, but you can use a whole one for a punchier taste. Reduce heating time by about 20%.
Doubling the recipe: Double the dairy and sugar, but only use 1.5 vanilla beans. Too much vanilla can actually start to taste medicinal. Work in a larger pot to ensure the heat distributes evenly.
If you love the richness of this, you might also enjoy my classic creamy dark chocolate fudge, which uses a similar slow heat method for that velvety finish.
Debunking Creamer Myths
Myth: You must use heavy cream for richness. Actually, half and half is better for a daily creamer. Heavy cream can be too thick and often separates in cold coffee, while half and half blends seamlessly.
Myth: Vanilla extract is the same as using a bean. Not even close. Extract gives you the scent, but the bean provides the "dark" notes and those beautiful specks that make this a high end Vanilla Bean Coffee Creamer.
Storage and Waste Tips
Keep your creamer in the fridge for up to 7 days. Because there are no preservatives, it won't last as long as store-bought versions. Do not freeze this, as the emulsion will break, leaving you with a clumpy mess.
Zero Waste Tip: Don't throw away the empty vanilla pod! Rinse it, dry it, and stick it in a jar of granulated sugar for two weeks. You'll end up with homemade vanilla sugar for baking.
Perfect Pairings for Coffee
This creamer is a beast on its own, but it loves company. It's incredible in a standard medium roast or a bold espresso. For a treat, try it alongside a slice of classic cherry tart for a balanced breakfast.
If you prefer a frozen treat, this same flavor profile works wonders if you're making vanilla bean ice cream. It's all about that consistent, natural vanilla punch.
Recipe FAQs
What's the difference between French vanilla and vanilla bean creamer?
Vanilla bean uses the actual pod and seeds, whereas French vanilla typically relies on artificial flavorings. This results in a deeper, more complex taste and the characteristic tiny black specks in the liquid.
What is the best coffee creamer for gestational diabetes?
Stick to unsweetened heavy cream or a splash of half and-half. This specific recipe contains 1/3 cup of sugar, which may be too high for those monitoring blood glucose levels.
What are the unhealthiest coffee creamers?
Avoid store-bought versions containing hydrogenated oils and high fructose corn syrup. These processed additives are common in commercial bottles but are completely absent from this homemade version.
Is vanilla bean healthier than vanilla extract?
No, they are nutritionally similar. The bean provides a more authentic flavor profile; if you enjoyed this natural flavor balance, see how we use similar principles in our banana pudding.
How to store homemade vanilla bean creamer?
Pour the cooled liquid into a glass mason jar and refrigerate. Because this recipe lacks preservatives, it will stay fresh for up to 7 days.
Is it true that I can freeze this creamer to make it last longer?
No, this is a common misconception. Freezing breaks the emulsion of the half and-half, leaving you with a clumpy and separated mess.
How to avoid burning the creamer?
Maintain a medium low heat for 5 minutes. Remove the saucepan from the heat as soon as the liquid begins to steam and the sugar crystals completely disappear to prevent scorching.
Vanilla Bean Coffee Creamer