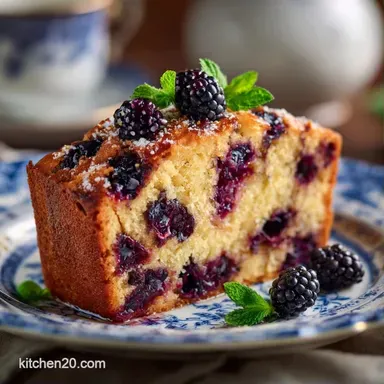
Australian Mulberry Cake: Velvety and Zesty
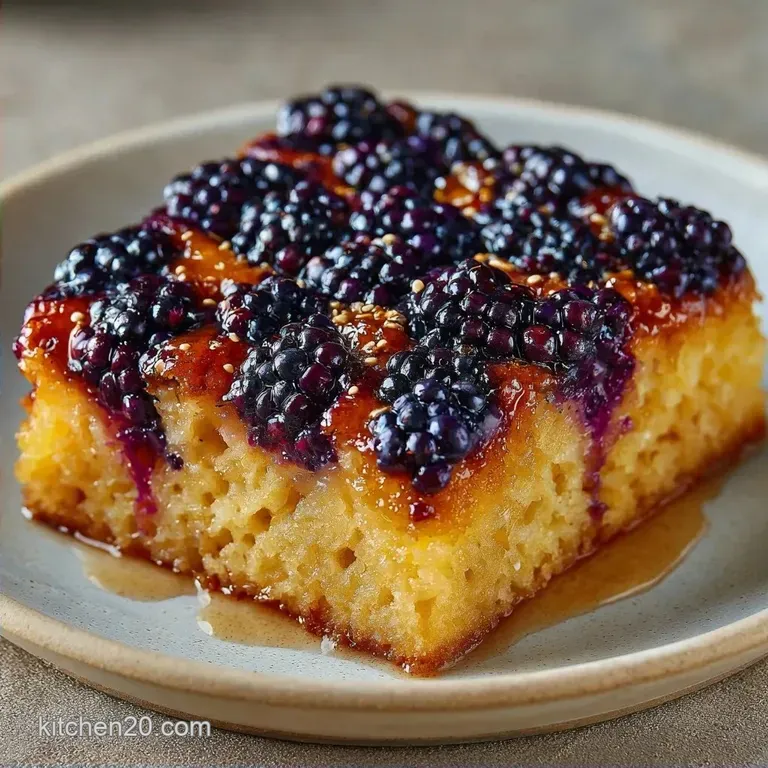
- Time: 20 min active + 45 min baking
- Flavor/Texture Hook: Velvety crumb with a zingy, tart sweet glaze
- Perfect for: Afternoon tea or a weekend brunch crowd
- Australian Mulberry Cake Secret Texture
- The Cake Building Blocks
- The Essential Baking Tools
- The Cooking Process
- Fixing Common Baking Glitches
- Troubleshooting Common Issues
- Tweak Your Ingredient List
- Scaling Your Bake
- Common Baking Myths
- Storage And Freezer Tips
- Pro Presentation Ideas
- Recipe FAQs
- 📝 Recipe Card
The smell of warm, bubbling berries and lemon zest hitting the oven air is enough to wake up the whole house. I remember the first time I tried making a berry loaf, and it was a total disaster. The berries just plummeted to the bottom, leaving me with a layer of burnt fruit and a bland, yellow cake on top.
I thought it was just the nature of the fruit, but that was a huge mistake.
You don't need a professional bakery setup or expensive stabilizers to get that perfect berry distribution. Forget the idea that fresh berries are too unpredictable for a loaf. With a couple of simple tweaks, you can make an Australian Mulberry Cake that looks like it came from a high end cafe but feels like home.
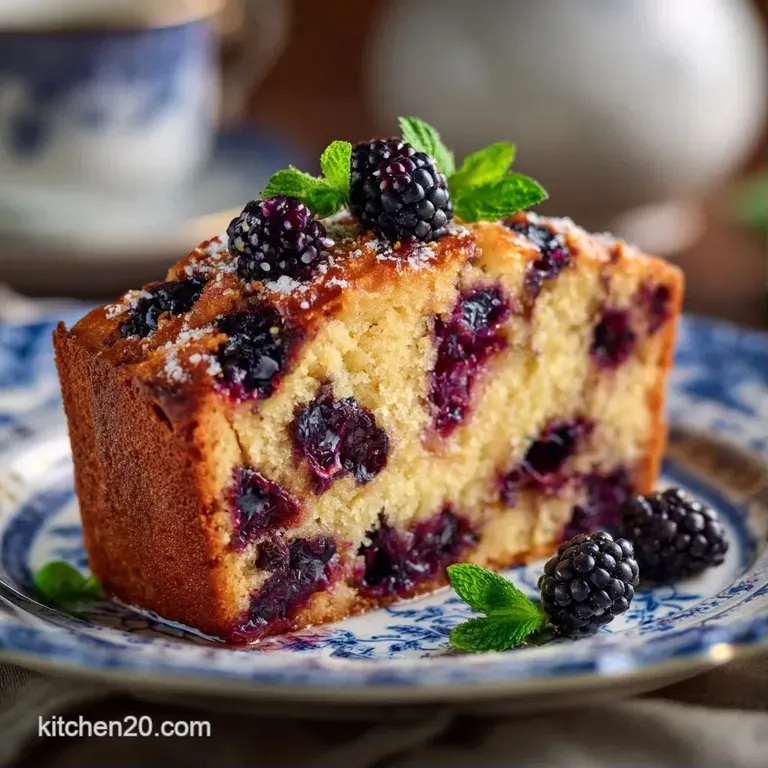
This cake is all about the contrast. You get the dense, juicy pop of the mulberries against a light, aerated sponge, topped with a glaze that cuts through the sweetness. It's a straightforward bake, but the details in the prep are what make it actually work.
Australian Mulberry Cake Secret Texture
Right then, let's talk about why this isn't just another fruit bread. The magic here is in how we handle the fruit and the fat. Most people just fold the berries in and hope for the best, but that's a recipe for a soggy bottom.
The Berry Barrier: Tossing the fruit in flour creates a dry surface that clings to the batter. This friction stops the berries from sliding to the bottom of the pan during the bake.
Air Incorporation: Beating the butter and sugar until pale creates tiny air pockets. These pockets expand in the heat, giving the cake a lift that supports the heavy berries.
Acid Balance: The lemon zest and juice don't just add flavor, they brighten the overall profile. This prevents the sugar from feeling too heavy on the tongue. It has a moisture level that rivals my German chocolate cake, making it feel rich without being greasy.
The Starch Bond: Using all purpose flour provides enough protein for structure but not so much that it becomes chewy. According to King Arthur Baking, the protein content in AP flour is the sweet spot for tender cakes.
Since you might be wondering if you should stick to the long way or take a shortcut, I've put together a quick comparison.
| Feature | Fast Method (One Bowl) | Classic Method (Creaming) | Best For |
|---|---|---|---|
| Mixing Time | 5 minutes | 15 minutes | Time vs Quality |
| Texture | Denser, more like a muffin | Airy, velvety crumb | Occasion |
| Berry Lift | Likely to sink | Stays suspended | Visuals |
| Effort | Low | Medium | Skill Level |
You'll notice the classic method takes a bit longer, but the result is a much more professional Australian Mulberry Cake.
The Cake Building Blocks
I've broken down the main components here. It's not just about following a list, it's about understanding what each part is doing while you're mixing.
| Ingredient | Science Role | Pro Secret |
|---|---|---|
| Unsalted Butter | Tenderizer | Use room temp, not melted, to hold air |
| All Purpose Flour | Structure | Measure by weight (grams) for consistency |
| Fresh Mulberries | Moisture/Flavor | Pat them completely dry before flouring |
| Baking Powder | Leavening | Check the date; old powder means a flat cake |
It's a simple list, but the quality of the butter and the freshness of the berries make a huge difference in the final taste of your Australian Mulberry Cake.
The Essential Baking Tools
You don't need a fancy gadget lab for this. Just the basics will do. I usually use a standard 9x5 inch loaf pan. Lining it with parchment paper is a non negotiable for me, because nothing is worse than a cake sticking to the corners.
I suggest a handheld electric mixer or a stand mixer such as KitchenAid for the creaming step. You can do it by hand with a whisk and a lot of elbow grease, but the electric version ensures you get those air bubbles we talked about.
A rubber spatula is also vital for the folding process, as you want to be gentle with the berries.
Finally, a wire cooling rack is a must. If you leave the cake in the pan too long, the bottom can get steamed and soggy. Getting it onto a rack lets the air circulate, keeping the crust intact.
The Cooking Process
Let's crack on with the actual baking. Follow these steps closely, and pay attention to the sensory cues.
1. Prep and Folding
- Preheat your oven to 350°F (175°C) and line a 9x5 inch loaf pan with parchment paper. Note: Preheating ensures the cake starts rising immediately.
- Put your fresh mulberries in a small bowl and toss them with 1 tablespoon of all purpose flour. Continue until every berry is lightly dusted.
- In a large bowl, cream the softened butter and granulated sugar. Beat them together until the mixture is pale, fluffy, and looks like soft frosting.
- Beat in the eggs one at a time. Stir in the vanilla extract and lemon zest. Note: Adding eggs slowly prevents the batter from splitting.
- In a separate bowl, whisk together the flour, baking powder, and salt.
2. The Bake
- Gradually add the dry ingredients to the wet mixture. Alternate this with the milk, stirring just until combined. Stop as soon as the flour disappears to avoid a tough cake.
- Gently fold in the floured mulberries using a rubber spatula. Do not overmix, or you'll crush the berries and turn the Australian Mulberry Cake purple.
- Pour the batter into your prepared loaf pan. Bake for 40-50 minutes until a toothpick inserted in the center comes out clean.
- Let the cake cool in the pan for 10 minutes. Transfer it to a wire rack to cool completely.
3. The Finishing Touch
- Whisk together the powdered sugar, lemon juice, and vanilla extract. Drizzle this over the warm cake until it runs down the sides in thick, white ribbons.
Fixing Common Baking Glitches
Even the best of us hit a snag sometimes. The most common issue with an Australian Mulberry Cake is the berries moving during the bake. If you see them all at the bottom, it usually means the batter was too thin or the berries weren't floured.
Troubleshooting Common Issues
| Issue | Solution |
|---|---|
| Why Your Berries Sank | This happens when the batter lacks enough viscosity to hold the fruit. If your butter was melted instead of softened, the structure collapses. |
| Why Your Cake Dome Cracked | A big crack on top usually means the oven was too hot or the cake rose too fast. This often happens if you use too much baking powder or if your oven has a "hot spot. |
| Why Your Glaze is Too Runny | If the glaze disappears into the cake instead of sitting on top, you probably added too much lemon juice. The balance of powdered sugar to liquid is key. |
- ✓ Always use room temperature eggs to ensure a smooth emulsion.
- ✓ Pat mulberries with a paper towel before the flour toss.
- ✓ Do not overmix the batter after adding the flour.
- ✓ Measure flour by spooning it into the cup, not scooping.
Tweak Your Ingredient List
Depending on what you have in the pantry, you can swap a few things around. However, keep in mind that some changes will alter the texture of your Australian Mulberry Cake.
| Original Ingredient | Substitute | Why It Works |
|---|---|---|
| All Purpose Flour (190g) | Whole Wheat Flour | Adds nuttiness. Note: Result is denser and heavier |
| Whole Milk (120ml) | Greek Yogurt | Increases tang and moisture. Note: Batter will be thicker |
| Granulated Sugar (200g) | Coconut Sugar | Earthy flavor. Note: Cake will be darker brown |
| Fresh Mulberries (225g) | Fresh Blackberries | Similar tartness and size. Note: Slightly different seed texture |
If you're in a berry mood but want something more rustic, my mulberry pie recipe is another winner. But for a tea time treat, this loaf is the way to go.
If you want a more moist, olive oil style crumb, you can replace the butter with a neutral olive oil. Just reduce the liquid slightly since oil is 100% fat, whereas butter contains some water. This creates a more "Mediterranean" style cake that stays fresh longer.
Scaling Your Bake
Sometimes you just want a small treat, or you're feeding a crowd. Scaling an Australian Mulberry Cake is easy, but you have to be careful with the eggs.
Scaling Down (Half Batch) If you want to use a smaller pan, halve all ingredients. For the egg, crack one into a bowl, beat it, and use half of it by weight. Reduce the baking time by about 20%, starting to check for doneness at 30 minutes.
Scaling Up (Double Batch) When doubling, I recommend making two separate loaves rather than one giant one. This ensures the center cooks through without burning the edges.
Do not double the salt or baking powder fully; use about 1.5x the original amount to avoid a metallic taste or an over inflated cake that collapses.
For the double batch, lower the oven temperature by about 10°C (approx 25°F) and extend the baking time by 10-15 minutes. This allows the larger volume of batter to heat evenly.
Common Baking Myths
There are a few things people tell you about berry cakes that just aren't true. Let's clear those up so you can bake with confidence.
Myth: You must use frozen berries for a better set. Actually, frozen berries release way more moisture as they thaw, which often leads to a gummy center in your Australian Mulberry Cake. Fresh berries, properly floured, provide the best structural result.
Myth: Cold eggs make the cake rise better. It's actually the opposite. Cold eggs can seize the creamed butter, breaking the emulsion. Room temperature eggs integrate smoothly, keeping those air bubbles intact for a better lift.
Myth: Sifting flour is mandatory for every cake. While sifting helps with lumps, for a hearty fruit loaf, a good whisking of the dry ingredients is usually enough. You aren't making a chiffon cake, so don't stress too much over the sifter.
Storage And Freezer Tips
An Australian Mulberry Cake stays moist for a while, but you want to store it right to keep that velvety texture. Keep it at room temperature in an airtight container for up to 3 days. If your kitchen is very humid, move it to the fridge after day two.
In the fridge, it lasts about 5 days. Just be sure to let a slice sit out for 20 minutes or give it a quick 10 second zap in the microwave to soften the butter back up.
For long term storage, this cake freezes beautifully. Wrap individual slices in parchment paper, then seal them in a heavy duty freezer bag. They'll stay fresh for 2 months. To reheat, just pop a slice in the toaster oven for a few minutes until the edges get a little crisp.
As for zero waste, don't throw away any bruised berries. Simmer them with a bit of sugar and a squeeze of lemon to make a quick mulberry coulis. This sauce is a great topper for the cake slices or even over some vanilla ice cream.
Pro Presentation Ideas
Since this is an Australian Mulberry Cake, you want it to look as good as it tastes. The glaze is your best friend here. Instead of just pouring it on, try using a fork to create a zig zag pattern across the top.
Add some fresh, halved mulberries on top of the glaze before it sets. A sprinkle of lemon zest or a few mint leaves adds a pop of green that makes the purple of the berries really stand out.
If you're serving this for a special occasion, slice the cake into thick 2cm pieces. Serve each slice with a dollop of crème fraîche or a scoop of mascarpone. The creaminess balances the tartness of the berries and the zing of the lemon glaze perfectly.
Trust me, the presentation makes people think you spent hours on it, even though it's a simple loaf.
Recipe FAQs
How to make mulberry cake?
Preheat your oven to 350°F (175°C) and prepare a 9x5 inch loaf pan. Cream butter and sugar, beat in eggs and vanilla, mix in dry ingredients and milk, then fold in floured mulberries before baking for 40-50 minutes.
Are mulberries good for baking?
Yes, they provide a unique tart sweet flavor. Their juicy texture works well in dense cakes, though coating them in flour first prevents them from sinking to the bottom.
Can I use frozen mulberries instead of fresh ones?
No, stick with fresh. Frozen berries release excessive moisture and will bleed color into the batter, which can compromise the cake's structure.
What size baking pan should I use?
Use a 9x5 inch loaf pan. Lining it with parchment paper ensures the cake releases easily without sticking to the sides.
Can I substitute the milk with a non-dairy alternative?
Yes, most plant based milks work well. If you enjoyed the moist crumb of our butter pecan cake, you will find that almond or soy milk provides a similar result here.
How do I store the cake after baking?
Place the cake in an airtight container at room temperature. It stays fresh for up to 3 days, or 5 days in the fridge if your kitchen is particularly humid.
Is it true that mulberries from garden trees are unsafe to eat?
No, this is a common misconception. Ripe mulberries from the tree are safe and delicious, provided the tree has not been treated with chemical pesticides.
Australian Mulberry Cake