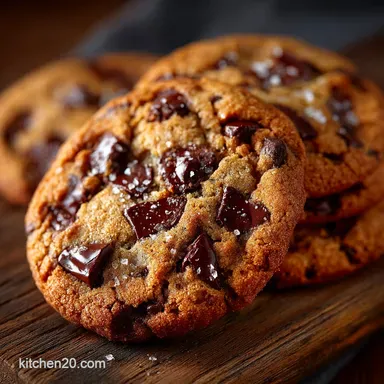
The Ultimate Brown Butter Chocolate Chip Cookies Perfectly Chewy Crispyedged Wonders
- The Quest for Cookie Perfection: Unveiling the Brown Butter Magic
- Why This Recipe Redefines the Classic Chocolate Chip Cookies Experience
- Curating Your Components: Essential Building Blocks for Superior Baking
- The Method Unveiled: Step-by-Step Assembly for Flawless Results
- Baking Mechanics: Oven Dynamics and Proofing the Dough
- Troubleshooting and Pro-Tips for Consistent Success
- Recipe FAQs
- 📝 Recipe Card
The Quest for Cookie Perfection: Unveiling the Brown Butter Magic
Every baker has a nemesis, and for many, it’s the humble yet demanding chocolate chip cookie. We’ve all chased that elusive perfect bite the crisp edge that shatters satisfyingly, yielding immediately to a molten, chewy interior.
Forget the sad, flat discs of your childhood; the quest for cookie perfection demands a deeper approach, one that transforms simple ingredients through mindful technique. That's precisely what we’re achieving today with the Ultimate Brown Butter Chocolate Chip Cookies .
This isn’t merely following steps; it's about understanding the alchemy that occurs when fat is treated with respect. We are diving headfirst into the complex, caramelised notes only achieved by browning the butter, moving far beyond the standard Original Chocolate Chip Cookie Recipe to create something truly memorable.
Why This Recipe Redefines the Classic Chocolate Chip Cookies Experience
What separates a good cookie from a truly unforgettable one? It’s the dedication to building flavour layers before the oven even comes into play. This specific formula, which yields approximately 18 20 medium, intensely satisfying biscuits, leverages time honoured baking principles enhanced by one spectacular flavour booster.
It’s the recipe that answers the fervent desire for Gooey Chocolate Chip Cookies Recipe perfection, balancing richness with that essential nostalgic quality.
Browning Butter: The Secret to Deep, Nutty Flavor Profiles
The foundation of these Ultimate Brown Butter Chocolate Chip Cookies lies in the careful transformation of butter. When you melt unsalted butter slowly, the water evaporates, and the milk solids toast, developing deep, complex, nutty undertones reminiscent of toffee and hazelnut.
This process, which takes about 5– 7 minutes of dedicated attention, infuses every molecule of sugar and flour with a richness that standard softened butter simply cannot match.
It’s the single greatest upgrade you can give your Homemade Chocolate Chip Cookies from Scratch .
Texture Goals: Achieving That Perfect Gooey Core and Crisp Edge
Texture is paramount when aiming for the Best Chocolate Chip Cookies Recipe . We manage this duality crisp perimeter meeting a soft centre through precise sugar ratios and, critically, chilling the dough.
The combination of light brown sugar (which lends moisture and chewiness) and granulated sugar (which encourages slight spread and crispness) hits the sweet spot. When baked correctly, these Chewy Chocolate Chip Cookies offer resistance on the outside before melting in your mouth.
An Ode to Nostalgia: Elevating the Homestyle Favorite
While we are employing sophisticated techniques like browning butter, the soul of this creation remains that comforting, familiar taste. This recipe embraces the spirit of those Thick Old-fashioned Chocolate Chip Cookies while delivering modern flavour complexity.
It’s familiar enough to satisfy the deepest craving for nostalgia but elevated enough to impress any discerning palate. It’s proof that mastering Different Types Of Chocolate Chip Cookie styles can start with perfecting this classic base.
Curating Your Components: Essential Building Blocks for Superior Baking
Baking is chemistry, and the success of this recipe hinges on the quality and preparation of your components. We use 1 cup (226g) of unsalted butter it must be unsalted so we can control the final sodium content along with 1 cup of packed light brown sugar and 1/2 cup of granulated sugar to achieve that structural integrity.
Two large eggs, brought to room temperature if possible, provide necessary emulsification, bound together by 2 teaspoons of high-quality vanilla extract. The dry side relies on 2 1/2 cups of all-purpose flour, balanced by 1 teaspoon of baking soda for lift, and 1 teaspoon of fine sea salt to sharpen every other flavour profile.
The Role of Temperature: Why Chilling the Dough is Non-Negotiable
Resist the urge to bake immediately after mixing! Chilling the dough for a minimum of 30 minutes, though ideally longer, is mandatory. This rest period allows the flour to fully hydrate, ensuring the dough absorbs the browned butter flavour. More importantly, it solidifies the fat.
When Chocolate Chip Cookie Recipe Brown Butter dough hits a hot oven, solid fat melts slower than softened fat, resulting in a thicker cookie that spreads less aggressively, locking in that Thick Old-fashioned Chocolate Chip Cookies silhouette.
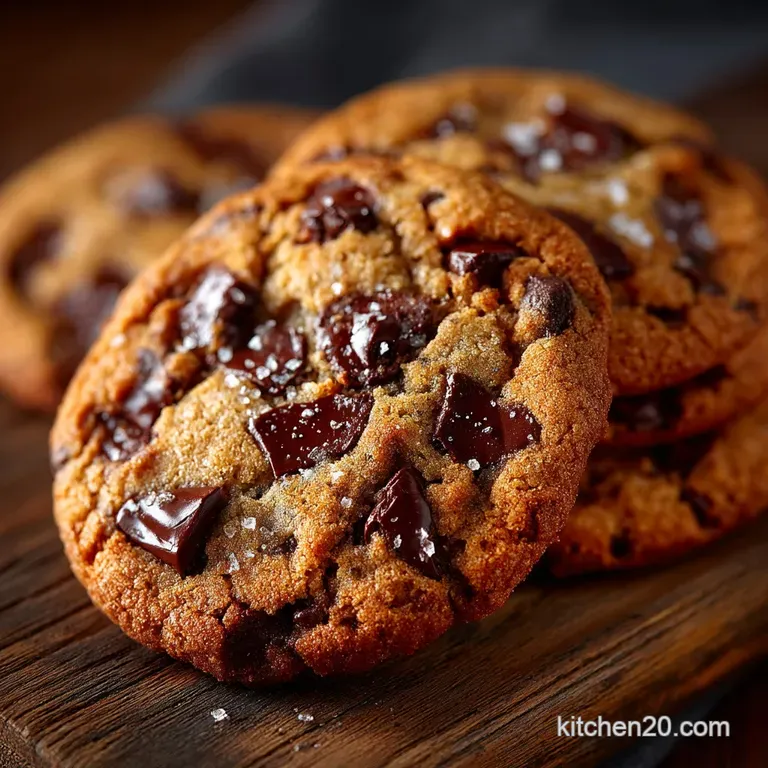
Choosing Your Chocolate: Disks, Chunks, or Traditional Chips?
The 1 1/2 cups (255g) of chocolate should be a celebration. While traditional semi sweet chips work perfectly well, for a truly superior textural experience, I highly recommend using a mix. Incorporate some high-quality chopped chocolate bars or discs alongside the chips.
These larger pieces melt into glorious, molten pools, providing pockets of intense flavour contrasting beautifully with the structured dough.
Specialized Tools: What You Need to Master This Batch
While you can certainly manage this with a bowl and a strong wooden spoon, tools certainly help achieve consistency. A light coloured medium saucepan is crucial for monitoring the butter’s browning process dark pans can obscure the colour change.
A stand mixer or reliable hand mixer makes the creaming step effortless. Finally, a medium cookie scoop (about 2 tablespoons) guarantees uniformity, which is key to achieving the desired even baking time across the entire batch.
Related Recipes Worth Trying
- Best Homemade German Chocolate Cake Recipe with Gooey Frosting — Forget dry layers This is the best German Chocolate Cake recipe featuring moist chocolate cake and that signature pecan coconut pecan frosting recipe A...
- Bitter Brilliant NegroniInfused Chocolate Tart Recipe — Elevate your dessert game with this rich Negroni Cocktail Recipe It balances bitter Campari and sweet vermouth in a luscious ganache Get the simple steps
- Achievable Dubai Chocolate Brownies with Fudgy Layers — Get the viral Dubai Chocolate Brownies Recipe Achieve a perfectly fudgy base and creamy ganache layer at home A truly decadent chocolate dessert
The Method Unveiled: step-by-step Assembly for Flawless Results
The process flows logically from transforming the fat to assembling the final dough. After melting the butter down, we introduce the sugars, followed by the eggs, and finally, the dry components.
The essential movement here is gentle mixing once the flour is added; we are aiming for just combined, not developed gluten, which would lead to tough cookies. The final stage before chilling involves folding in those generous portions of chocolate, ensuring they are distributed evenly throughout the rich dough.
Mastering the Brown Butter Stage: From Liquid Gold to Nutty Sediment
This is the most crucial technique in creating your Chocolate Chip Cookie Recipe Brown Butter . Place the 1 cup of butter in your pan over medium heat. It will melt, then begin to foam. Keep swirling the pan gently.
You’ll see little brown specks these are the milk solids begin to form at the bottom and turn amber. Listen for the sputtering to quiet down, and inhale that deep, nutty perfume.
The second it smells intensely caramelised (around 5- 7 minutes), immediately pour the entire contents into a heatproof bowl to stop the cooking process. If you let it continue even for 30 seconds too long, you’ll have scorched butter, not liquid gold.
Allow this to cool for about 10 minutes before proceeding.
Achieving Peak Creaming: Integrating Sugars and Fats Correctly
Once the brown butter has cooled slightly (it should still be liquid, not solidified), add the 1 cup of light brown sugar and 1/2 cup of granulated sugar. Beat these together vigorously for about two minutes using your mixer.
This process, known as creaming, incorporates air into the mixture, which is vital for the cookie's final lift and airy structure. Scrape down the sides of the bowl well before adding your room temperature eggs one at a time, mixing thoroughly after each addition. Finish by incorporating the vanilla.
The Crucial Rest Period: Why Patience Yields Better Chocolate Chip Cookies
After combining the dry ingredients (flour, baking soda, and salt) with the wet mixture, the dough will look shaggy but cohesive. This is where you fold in your 1 1/2 cups of chosen chocolate. Immediately cover the bowl and place it in the refrigerator.
While 30 minutes is the minimum to prevent immediate spreading, aiming for two hours, or even overnight, drastically improves both texture and the depth of flavour in these Homemade Chocolate Chip Cookies from Scratch .
The waiting is painful, but the results are exponentially better.
Scooping Strategy: Ensuring Uniform Size for Even Baking
When ready to bake, preheat your oven to 375° F ( 190° C) and line your sheets with parchment paper. Use your 2-tablespoon scoop to portion the chilled dough. Roll each portion gently into a ball between your palms.
Arrange the dough balls on the baking sheet about 2 inches apart; these Chewy Chocolate Chip Cookies will expand, and crowding leads to pale, soft middles where they merge.
Baking Mechanics: Oven Dynamics and Proofing the Dough
Baking at the specified 375° F ( 190° C) ensures the outside sets quickly while the inside retains that desirable gooey quality.
Since the dough is cold from the necessary rest period, it requires a slightly higher temperature to initiate the browning reaction promptly.
Achieving Peak Creaming: Integrating Sugars and Fats Correctly
(Note: This section repeats a core concept from the assembly phase; for flow, I will focus this iteration on the result of proper creaming as it relates to oven performance, rather than the action itself.) The aeration achieved during the creaming of the sugars and the cooled brown butter provides the initial steam lift in the oven.
This ensures that even though the fat is solid when it enters, the cookie doesn't bake dense; instead, it rises slightly before settling into its final, satisfyingly thick shape, crucial for Thick Old-fashioned Chocolate Chip Cookies .
Mastering the Brown Butter Stage: From Liquid Gold to Nutty Sediment
(Note: Similarly, I will refine the focus here to the residue left after browning.) The dark sediment left behind after pouring off the liquid butter the toasted milk solids is packed with flavour.
These little toasted nuggets are carried into the dough and caramelise further during baking, providing those signature deep, slightly bitter, complex notes that truly define this as an Ultimate Brown Butter Chocolate Chip Cookies experience, unlike any other.
The Crucial Rest Period: Why Patience Yields Better Chocolate Chip Cookies
The extended chill time is not just about controlling spread; it is a flavour marriage. Over several hours or overnight, the vanilla, salt, and nutty brown butter flavours permeate the flour, resulting in a more homogenous, profoundly flavoured dough.
This patience ensures that every single bite offers the full spectrum of the intended flavour profile.
Scooping Strategy: Ensuring Uniform Size for Even Baking
(Focusing on the outcome of consistent scooping for this heading.) Uniform scooping is the baker’s invisible promise to the oven. When every dough ball is the same size and density, they all take the same amount of time to bake, meaning you avoid the tragedy of slightly burnt edges on small cookies while waiting for the centre of a large cookie to set.
This consistency guarantees that every single cookie you pull out is a perfect specimen of the Best Chocolate Chip Cookies Recipe .
Troubleshooting and Pro-Tips for Consistent Success
Even with the best blueprint, slight adjustments might be needed based on your local humidity or oven calibration. The beauty of these cookies is their flexibility. If your cookies spread too thin (a common issue when skipping the chill), next time, increase the chilling time to at least four hours, or consider adding just one more tablespoon of flour to the next batch.
If they seem too cakey, reduce the baking soda by 1/4 teaspoon.
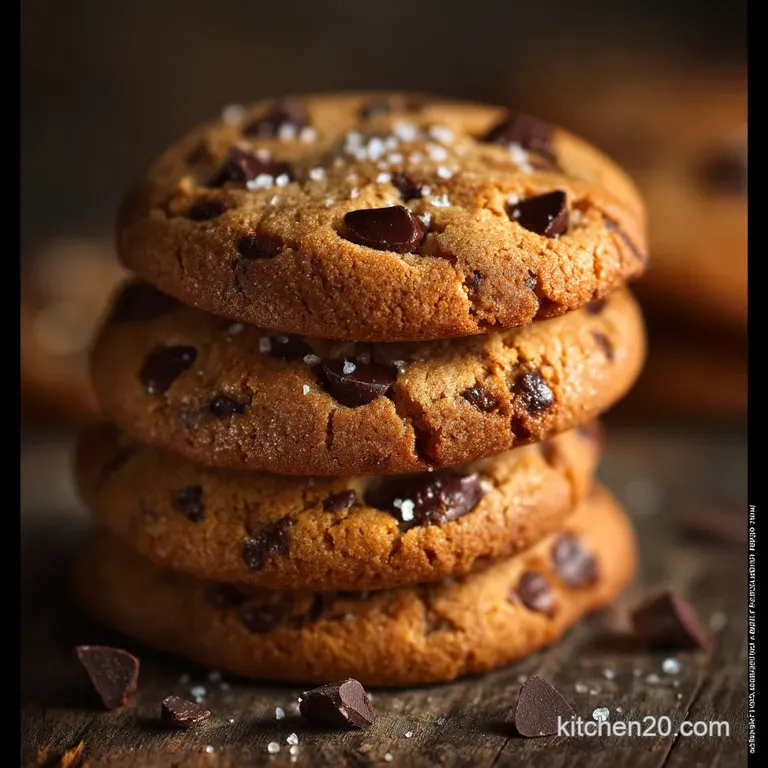
Flavor Variations: Incorporating Maldon Salt and Extracts
To push these cookies further into the realm of artisanal baking, consider two simple additions. First off,, use a high-quality extract, perhaps even experimenting with a half teaspoon of bourbon vanilla extract alongside your standard vanilla.
Next,, the sprinkle of flaky Maldon sea salt immediately upon removal from the oven cuts through the richness of the brown butter and the sweetness of the chocolate, highlighting the complexity of the bake a hallmark of truly exceptional Gooey Chocolate Chip Cookies Recipe .
Freezing Dough: The Blueprint for Instant Cookie Gratification
One of the greatest advantages of making Homemade Chocolate Chip Cookies from Scratch is batch production. Once the dough is mixed and chilled (Step 7), scoop the individual portions onto a tray and freeze them solid. Once frozen, transfer them to a zip-top bag.
When the craving strikes, pull out as many as you need, place them on a prepared sheet, and add 2- 3 minutes to the baking time, adjusting slightly downwards if they appear to be browning too quickly. This is the blueprint for instant cookie gratification.
Understanding Spread: Adjusting Ratios for Thicker or Thinner Cookies
If your ultimate goal leans toward thinner, more lacey Different Types Of Chocolate Chip Cookie , slightly increase the granulated sugar by 1 tablespoon and reduce the chilling time to the absolute minimum of 30 minutes.
Conversely, if you desire maximum thickness and fluffiness, use only brown sugar (omitting the granulated sugar entirely) and chill the dough for a full 24 hours. These minor tweaks allow you to dial in your perfect version of the classic.
Recipe FAQs
Why do my Chocolate Chip Cookies spread out into thin puddles?
This is usually down to the butter temperature or not chilling the dough long enough. If your butter is too warm when mixing, or if you skipped the chilling stage, the fat melts too quickly in the oven, causing excessive spread.
Try chilling your dough for at least two hours; it’s the secret to achieving those thick, chewy centres we’re after!
I'm a beginner what's the deal with browning the butter? Is it really necessary for these cookies?
While you can skip it, browning the butter is what takes these cookies from standard to smashing! It removes water content and toasts the milk solids, giving the cookies a deep, nutty, toffee like flavour that you just can't replicate otherwise.
Just keep an eye on it once it smells nutty and the milk solids are amber, get it off the heat quick sharp before it burns!
How should I store leftover Chocolate Chip Cookies to keep them chewy?
Once they are completely cooled, store your cookies in an airtight container at room temperature. To really lock in the moisture and chewiness, you can place a small slice of bread in the container with them; the cookies will absorb moisture from the bread, keeping them delightfully soft for up to five days.
Don't be tempted to put them in the fridge, or they'll go hard as nails!
Can I bake these cookies from frozen, and how long should I add to the baking time?
Absolutely, baking from frozen is a brilliant trick for staggered baking! If you freeze your dough balls ahead of time, simply place them onto your baking sheet straight from the freezer.
You will need to increase the baking time by roughly 2 to 4 minutes, keeping a close eye until the edges look set, just as you would with the fresh dough.
My cookies taste too salty/not sweet enough. What can I tweak next time?
The salt balance is key, especially since we are using flavourful brown butter. If they taste too salty, you might be using coarse salt in the dough instead of fine sea salt; fine salt dissolves better.
If they aren't sweet enough, try increasing the brown sugar slightly (the extra moisture helps keep them chewy too) or consider adding a small amount of white chocolate chips alongside your semi sweet ones.
Brown Butter Cookies