Classic Sunny Side Up Eggs: a Perfect Start to Your Day!
Whisking Up Some Sunshine: The Magic of Sunny Side Up Eggs!
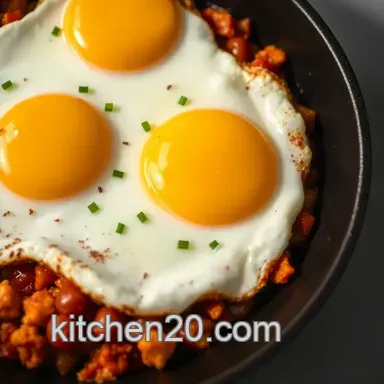
Oh my gosh, let me tell you about sunny side up eggs ! there’s something oh-so-good about cracking open an egg and seeing that golden, runny yolk just waiting to spill out like liquid sunshine.
I remember the first time i made them my mom wasn’t in the kitchen, and i just thought, “why not give it a go?” it was like magic.
Seriously, nothing brightens your morning quite like this dish.
These eggs come to life with simplicity and a cozy flair, pulling from breakfast traditions from around the world, especially the classic austrian breakfast .
Kind of cool, right? even if you’re not a culinary whiz, this recipe is a total breeze. easy at home meals don’t get better than this perfect sunny side up eggs are yours in just 10 minutes!
Makes 2 servings , so it's perfect for a quick brunch with a friend or just yourself (who are we kidding, sometimes you just need a solo brunch moment).
Now, here’s the real kicker. these eggs not only taste buttery and rich, but they also pack a health punch.
A great source of protein while being low in carbs? sign me up! whether you’re hosting a weekend brunch or just treating yourself to a cozy breakfast, sunny side up eggs are always a good idea.
Plus, they're an easy way to impress guests without breaking a sweat.
Honestly, what makes this recipe special is the experience. picture it: the delightful aroma of melting butter, the sound of eggs gently sizzling in the pan, and the sheer joy of cutting into that beautiful yolk.
It’s pure food magic that brings a smile to your face!
So, now that we've got your mouth watering, let’s get into the nitty gritty of how you can whip up your very own sunny side up eggs recipe .
Trust me; it’s about to become one of your favorites! all you need are a few simple ingredients. ready? let’s go!
Ingredients & Equipment for Sunny Side Up Eggs
Main Ingredients
Okay, let’s get into what you need for those perfect sunny side up eggs . Here’s the breakdown:
For the Eggs:
- 2 large eggs (about 100g each)
- 1 tablespoon unsalted butter (that's 14g – if you use salted, just be careful with the salt later)
- Salt, to taste (don’t go crazy here)
- Freshly ground black pepper, to taste (this is key for flavor!)
Optional Garnishes:
- Chopped fresh chives (to make it pretty)
- A sprinkle of red chili flakes (for a little kick)
Quality tips: look for eggs that are fresh. they should feel heavy for their size and have clean, uncracked shells.
Trust me, fresh eggs taste way better like a dream come true on your breakfast plate!
Seasoning Notes
Let’s chat seasonings. You'll want that buttery goodness to shine. Here’s the scoop:
- Essential spices: Salt and pepper are non-negotiables.
- Flavor enhancers: A bit of fresh chives adds a pop, and chili flakes can spice things up.
- Substitutions: If you don’t have chives, grab some fresh parsley. No chili flakes? Try paprika for a different flair.
Equipment Needed
Now, onto the tools. You don’t need a lot of fancy stuff. Here’s what works like a charm:
- Non-stick skillet: You need this for handling those delicate eggs.
- Spatula: Gentle, gentle no one wants to break a yolk!
- Small bowl: Perfect for cracking your eggs without making a mess.
- Plate for serving: Because, duh, presentation matters!
Common alternatives: if you’re in a pinch, a regular pan works, but you’ll need a bit more oil to prevent sticking.
Both a regular spatula or even a wooden spoon can do the trick. just be careful!
So there you have it! with these simple ingredients and tools, you can whip up sunny side up eggs that will take your breakfast game to the next level.
Imagine sinking your fork into a warm, buttery egg, and voila it’s breakfast bliss! whether you're having a relaxed sunday morning or a quick weekday bite, these eggs fit right in.
Remember, cooking can be as chill as a saturday morning cartoon binge!
Whip Up Classic Sunny Side Up Eggs: Your Go-To Breakfast!
Oh my gosh! if you want a breakfast that’s both super easy and downright delicious, you hit the jackpot with sunny side up eggs ! seriously, there's nothing better when the morning calls for a quick bite before you tackle the day.
Let me walk you through how to make the perfect sunny side up eggs , so you can join the ranks of breakfast wizards everywhere!
Prep Steps: Get Your Stuff Together
First, let’s chat about mise en place . this fancy term just means getting everything ready before you start cooking. trust me, it saves time and makes the whole process smoother.
For this easy at home meal, gather up:
- 2 large eggs
- 1 tablespoon of unsalted butter
- Salt and pepper to taste
- Dainty optional garnishes (chopped chives, maybe?)
Time saving tip: Crack the eggs into a small bowl first this way, if you break a yolk, you've saved the skillet from disaster. Plus, you’ll impress the heck outta your friends!
Safety alert: Always be cautious when handling raw eggs. Clean surfaces and hands afterward. We don’t want anyone getting sick!
Step-by-step Process: Let’s Get Cooking!
Heat the skillet: Toss a non-stick skillet over medium low heat. Add the butter and give it a swirl until it’s fully melted.
Crack those eggs: Crack each egg into your little bowl one at a time, keeping those yolks intact. Easy does it!
Slide ‘em in: Gently let the eggs glide into the skillet, keeping them spaced apart.
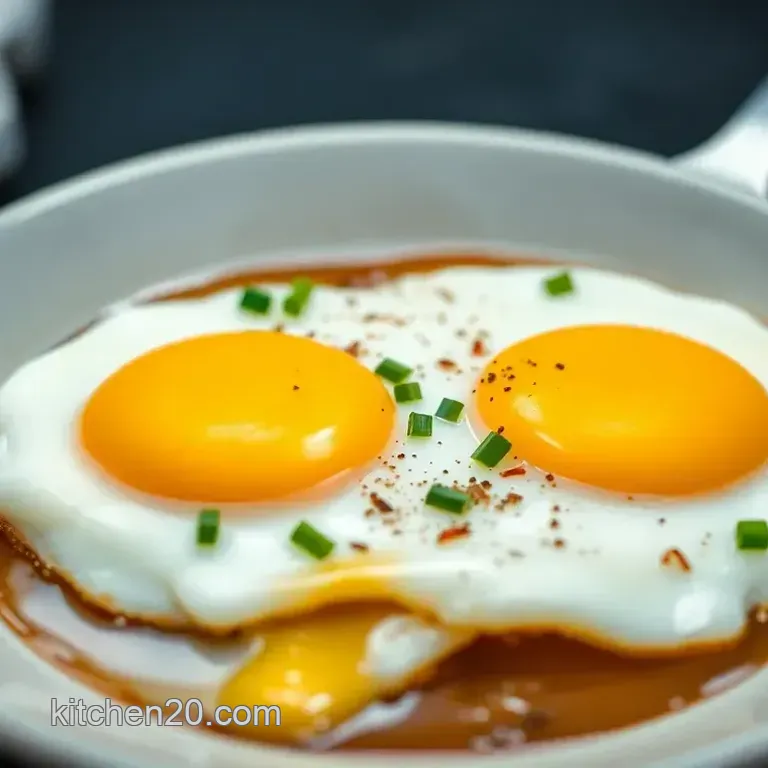
Cook it low: Let them cook for about 3- 4 minutes . You want the whites set and the yolks gloriously runny no flipping needed!
Season to taste: Sprinkle on salt and pepper. If you’re feeling extra fancy, add chives or chili flakes now.
Serve hot: Carefully lift those babies onto a plate and admire your work!
Pro Tips: Perfect Every Time
- Patience pays off! Cooking at lower heat means you’ll get those perfectly runny yolks, which is what we’re all after!
- A sneaky trick: Cover your skillet for the last minute of cooking. It’ll help everything cook evenly without flipping.
- Common mistake: Don’t rush it! Keep an eye on those eggs; they’ll go from glorious to overcooked in a snap.
And hey, if you want to make this ahead? you can cook the eggs, let them cool, and gently reheat them in the microwave on low while you toast your bagel.
Boom breakfast in a flash!
So next time you’re craving that perfect morning lift, whip up these sunny side up eggs . Pair them with some warm toast or, if you're wild, serve them alongside oatmeal biscuits or even pancakes oatmeal for a breakfast that’ll have you feeling like a champ!
Enjoy cooking these creative egg recipes, and watch them brighten your day, one yolk at a time!
Recipe Notes
When it comes to making the perfect sunny side up eggs , you want to nail those little details that take your breakfast from basic to brilliant! so let’s dive into some recipe notes that’ll have you slinging those eggs like a pro.
Serving Suggestions
Oh my gosh, presentation matters! serving your sunny side up eggs on a plate that pops can make a big difference.
Think vintage plates or bright colored dishware. want to make it feel like an austrian breakfast in your kitchen? pair those eggs with a slice of rye bread or a soft pretzel.
For a drink, how about a fresh squeeze of orange juice or even a smooth cup of coffee to wash it down? trust me; it elevates your breakfast game!
Storage Tips
If you find yourself with leftovers (and honestly, i’m not sure how that would happen with these delicious gems), here’s what to do.
Store your sunny side up eggs in the refrigerator in an airtight container for up to 2 days . but here's the kicker: they really taste best fresh, so you might want to give those delicious eggs a good home right away.
Freezing isn't really an option here, so just plan to whip up a fresh batch when the craving strikes! to reheat, pop them back into a hot skillet briefly, so they don't overcook.
Variations
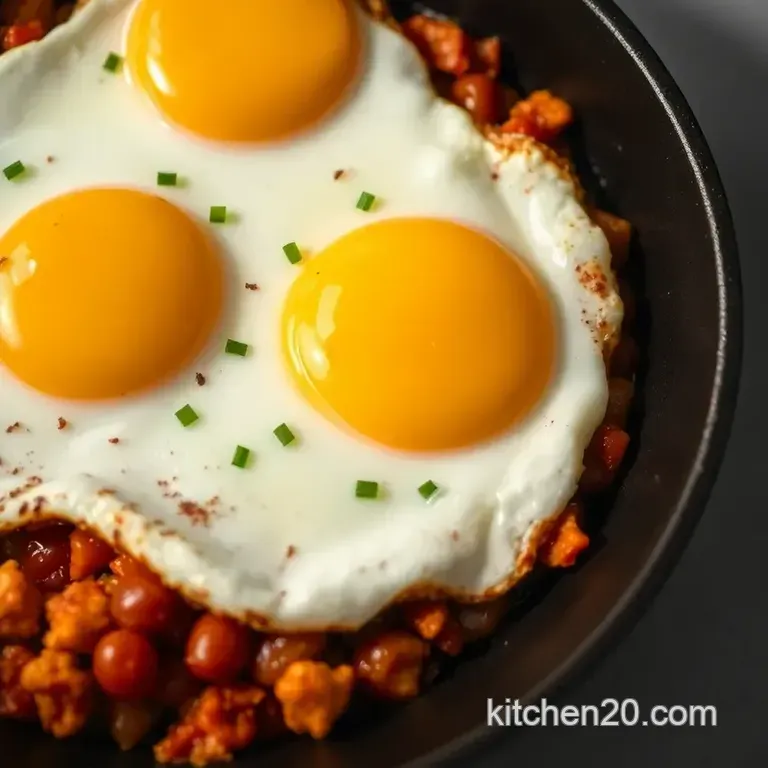
Feeling a little creative? there are so many fun ways to jazz up your sunny side up eggs recipe . for a diary free twist, you can use olive oil instead of butter.
Or, if you’re diving into the veggie realm, toss in a few chopped bell peppers or spinach right before cracking your eggs.
The bright green adds lovely color and hey, a little health boost never hurts!
Nutrition Basics
Now let’s talk nutrition, because we love a guilt free breakfast! each serving of your sunny side up eggs offers about 180 calories , with 12g of protein packed into those lovely yolks.
Plus, you’re getting healthy fats that help keep you feeling full. eggs are not just rich in flavor; they also contain vitamins like b12 and d, which are fantastic for your overall health.
Who knew breakfast could be so good for you?
So, whether you're making these easy at home meals for yourself or for a lazy brunch with friends, sunny side up eggs are a classic choice that'll never steer you wrong.
Toss a bit of freshness into your mornings with these little golden nuggets of happiness. you got this, and trust me, you’ll be on your way to mastering those perfect sunny side up eggs in no time! enjoy!
Frequently Asked Questions
What are sunny side up eggs exactly?
Sunny side up eggs are eggs that are cooked on one side only, leaving the yolk runny and bright yellow, resembling the sun! They’re often featured in a traditional English breakfast, and their simplicity and rich flavor make them a beloved choice for any morning meal.
How do you ensure perfect sunny side up eggs?
To achieve perfect sunny side up eggs, cook them on medium low heat and be patient! Use the freshest eggs and let the butter fully melt before adding them to the skillet. Covering the pan for the last minute can help set the whites without flipping, ensuring those glorious yolks stay runny.
Can I make variations of sunny side up eggs?
Absolutely! You can add cheese on top while cooking for a gooey twist, or throw in some spinach or chopped tomatoes for extra flavor and nutrients. If you prefer a lighter version, simply use egg whites. The options are endless!
How should I store leftover sunny side up eggs?
Since sunny side up eggs are best enjoyed fresh, leftovers aren’t ideal. However, if you need to store them, allow them to cool, then place them in an airtight container in the fridge. They can last for about 1-2 days but may lose their loveliness and texture.
What can I serve with sunny side up eggs?
Sunny side up eggs pair beautifully with buttered toast, sautéed mushrooms, or a fresh side of fruit like berries or sliced avocado. They also shine on a breakfast sandwich with bacon or ham for a more filling option think of it as a posh breakfast treat!
Are sunny side up eggs healthy?
Sunny side up eggs are a good source of protein and healthy fats. With just a couple of eggs, you can have a nutritious breakfast that keeps you satiated throughout the morning. Just keep in mind portion control and balance it with whole grains or veggies for added benefits!
Classic Sunny Side Up Eggs A Perfect Start To Yo