Classic Chocolate Dream Pie
- The Ultimate Chocolate Indulgence: A Slice of Heaven
- Why You'll Fall Head-Over-Heels for This Pie
- Ingredients & Equipment: Your Chocolate Pie Arsenal
- Prep Steps: Getting Your Chocolate Pie Ducks in a Row
- Step-by-Step to Chocolate Pie Perfection
- Pro Tips for a Pie That Wows
- Recipe Notes: Your Chocolate Pie Survival Guide
- Bake On, Buttercup!
- Frequently Asked Questions
- 📝 Recipe Card
Alright, let's talk chocolate pie . seriously, is there anything more comforting? i still remember my nan making hers. it was, without a doubt, the best homemade chocolate pie in the world.
I'm going to share how to make something pretty darn close!
The Ultimate Chocolate Indulgence: A Slice of Heaven
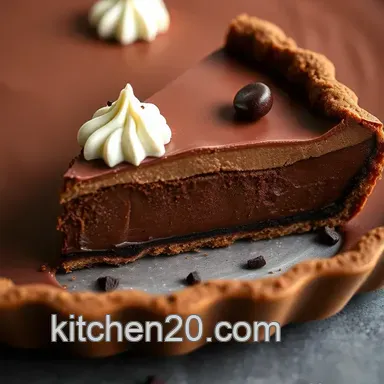
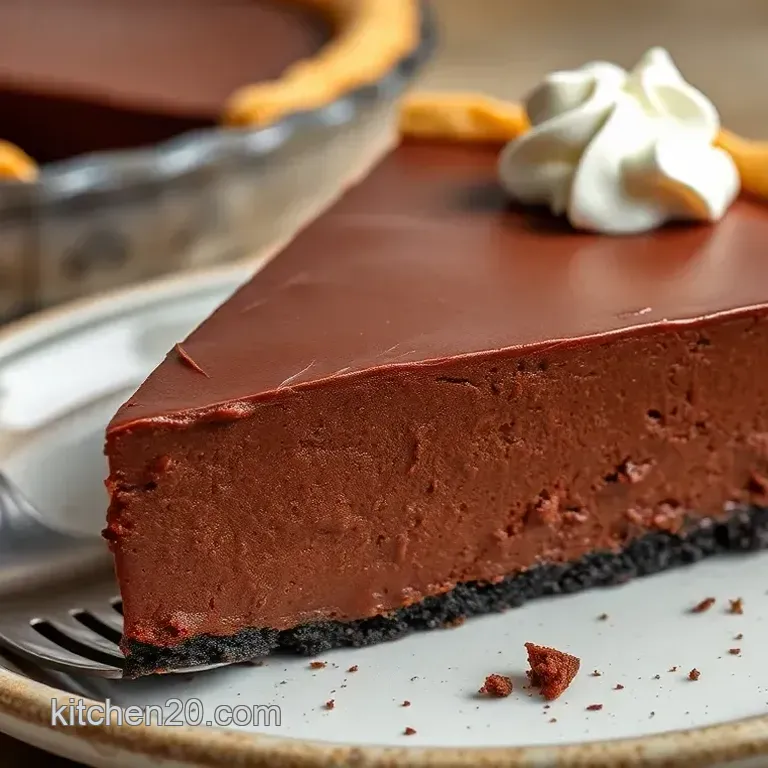
Think silky chocolate pie taste of home , that is just nostalgic. this recipe brings you that classic dessert. it’s got a rich, dreamy filling.
It's sitting inside a flaky, golden crust. inspired by southern chocolate pie from the help traditions, it’s simpler than you think.
This easy chocolate pie recipe is all about that comforting chocolate hug. it's perfect for after sunday roast, or a midweek treat.
My version yields about 8 servings. so, enough to share...or not! it takes around 2 hours 10 minutes in total, including chilling time, so plan accordingly.
Why You'll Fall Head Over-Heels for This Pie
The real win here? well, chocolate. jokes aside, it’s about mood boosting. the cocoa in grandma's chocolate pie may improve your mood.
It’s perfect for those days when you need a pick-me-up. it's super simple to make. if you want a chocolate cream pie recipe this works too.
But what really makes this recipe is it being grandma's chocolate pie recipe , is it is a trip down memory lane, as well as the flaky crust and the whipped cream.
So, what do we need to make this Easy Homemade Chocolate Pie ? Let's dive into the ingredients!
Okay, let's dive into what you'll need to make this easy homemade chocolate pie a reality. i can't wait to share this easy chocolate pie recipe .
I promise, it’s easier than finding a decent parking spot on a saturday.
Ingredients & Equipment: Your Chocolate Pie Arsenal
First, let’s gather the troops the ingredients. You know, the stuff that makes the magic happen.
Main Ingredients for Chocolate Pie Bliss
Alright, for the chocolate pie itself, you'll need:
- For the crust: 1 1/4 cups (150g) all-purpose flour, 1/2 teaspoon salt, 1/2 cup (113g) very cold unsalted butter (cubed, please!), and 1/4 cup (60ml) ice water, plus extra if needed. The butter needs to be cold, like you're keeping it in the Arctic.
- For that dreamy filling: 1 cup (200g) granulated sugar, 1/4 cup (25g) cornstarch, 1/4 teaspoon salt, 3 cups (720ml) whole milk (full fat is best, trust me), 4 large egg yolks, 4 ounces (113g) semi sweet chocolate (finely chopped), 2 tablespoons (28g) unsalted butter, and 1 teaspoon vanilla extract.
Quality Check: The chocolate is key! Go for a good quality semi sweet stuff. Something that you'd happily snack on.
Seasoning Notes: Spice Up Your Chocolate Pie
This isn't just about chocolate; it’s about layers of flavor!
Vanilla extract is crucial! Don’t skip it. I always think good vanilla brings out the chocolate.
A tiny pinch of cinnamon or cayenne? Whoa that changes the entire game.
If you're feeling adventurous, a splash of coffee liqueur can do wonders in your Grandma’s Chocolate Pie .
Equipment Needed: The Bare Essentials
Don’t stress if you don’t have every fancy gadget.
- You will need a 9 inch pie plate . That's non-negotiable.
- A food processor really helps with the crust. If not, get ready to get your hands dirty!
- Rolling pin? Yep. Parchment paper and pie weights? Super helpful for blind baking.
- Whisk, double boiler (or a heatproof bowl), and a mixer (stand or hand held) for the whipped cream. That's essential to make the Chocolate Cream Pie Recipe.
Household Hacks: No pie weights? Dried beans or rice work great!
Honestly, this homemade chocolate pie isn't rocket science. it's a slice of comfort, pure and simple. getting this silky chocolate pie taste of home will be amazing! now go forth and bake.
You will make the best chocolate pie from the help .
Alright, let’s talk about baking. Specifically, Easy Homemade Chocolate Pie . I've tried all sorts of desserts but this one really hits the spot.
Prep Steps: Getting Your Chocolate Pie Ducks in a Row
Honestly, the secret to a stunning chocolate pie is all in the mise en place . Essential, I tell you!
First, gather every single ingredient. measure everything out. trust me, it saves time. cold butter is key. also get all your equipment ready.
This includes your pie dish, rolling pin, and whisks. organize your stuff. it will help big time!
A quick safety reminder: Don't burn yourself! Oven mitts are your best friends!
step-by-step to Chocolate Pie Perfection
This is where the magic happens. Here's how to make your Easy Chocolate Pie Recipe :
- Make the crust. Mix flour, salt, and cold butter. Add ice water until a dough forms. Chill for 60 minutes .
- Roll out the dough. Place it in a pie plate. Crimp the edges. Chill again for 30 minutes .
- Blind bake the crust. Line with parchment paper and pie weights. Bake at 375° F ( 190° C) for 20 minutes . Remove weights and bake another 10 minutes , or until golden brown.
- Mix the filling. Whisk sugar, cornstarch, and salt. Slowly whisk in milk.
- Temper the egg yolks. Whisk a bit of the hot milk mixture into the egg yolks. This prevents scrambling.
- Cook the filling. Return it to the pan. Cook until thick, stirring non-stop.
- Add chocolate and butter. Remove from heat. Stir in chocolate and butter. Add vanilla.
- Pour the filling into the crust. Chill for at least 4 hours , or overnight.
Visual cue? The filling should be thick and glossy. Remember 160° F ( 71° C) is what you are looking for!
Pro Tips for a Pie That Wows
Want to take your Grandma’s Chocolate Pie to the next level? Here are some tips!
Pro Tip: Use high-quality chocolate. This elevates the taste. Also, don't overbake the crust! Nobody likes a burnt pie.
One common mistake is not chilling the pie enough. this makes it runny. make-ahead option? prepare the crust a day in advance.
Keep it in the fridge. you can also try to make chocolate pie from the help by adding meringue topping for a fancy finish.
I promise the result will be a silky chocolate pie taste of home .
So, there you have it a Homemade Chocolate Pie guaranteed to impress! The next time you are looking for Chocolate Pie Recipes or Chocolate Cream Pie Recipe , you know what to do!
Alright, buckle up, buttercups! we're diving deep into the world of chocolate pie , and i'm about to spill all my secrets.
I remember the first time i tried making grandma’s chocolate pie recipe . let's just say it involved a soggy crust and a slightly burnt filling.
But hey, we live, we learn, and we bake! this part is all about making sure your pie turns out picture perfect.
Recipe Notes: Your Chocolate Pie Survival Guide
Serving like a Pro
Okay, so you've got this gorgeous chocolate pie . how do you make it look like something you'd see at a fancy patisserie? first, presentation is key! a simple dusting of cocoa powder or some chocolate shavings can elevate your pie.
Slice that pie with finesse. you know? then, serve each slice on a pretty plate. a dollop of homemade whipped cream none of that canned stuff, please and a fresh raspberry or two will make it sing.
Need some ideas for what to serve with it? honestly, a simple glass of cold milk or a steaming cup of coffee is perfect.
For a little something extra, try a scoop of vanilla ice cream. it's the perfect complement to that silky chocolate pie taste of home .
Storage is King
Let's talk storage. This Easy Homemade Chocolate Pie is best enjoyed fresh, but let's be real, leftovers happen.
Refrigeration: Keep your pie in the fridge, covered, for up to 3 days.
Freezing: Freezing the pie is an option, but the texture of the filling might change slightly. Wrap it tightly in plastic wrap and then foil. It should last for about a month.
Reheating: Honestly, I prefer it cold. But if you must, a few seconds in the microwave will do the trick.
Let's Get Creative! Variations Time
Feeling a bit adventurous? Let's try something a little different.
Dietary Adaptation : Need a dairy-free option? No worries! Swap the milk for almond or coconut milk and use dairy-free chocolate. Use a gluten-free pie crust if you need to!
Seasonal Ingredient Swap : Try adding a few drops of peppermint extract in winter. Trust me; you can't go wrong!
Nutrition 101
Alright, let's be real, chocolate pie isn't exactly a health food. But life's too short to skip dessert, right?
Calories: About 550-650 calories per slice.
Key Health Benefits: Well, chocolate can boost your mood!
Bake On, Buttercup!
So, there you have it! all my easy chocolate pie recipe secrets. don't be scared to experiment. the chocolate pie from the help may look intimidating, but with a little love and patience, you can totally nail this.
And remember, even if it's not perfect, it's still homemade chocolate pie and that's what counts. go on, get baking and remember to have fun!
Frequently Asked Questions
Why did my chocolate pie filling turn out lumpy? It's like a custard gone wrong!
Lumpy chocolate pie filling is usually down to the eggs curdling. Make sure you temper the egg yolks properly by slowly whisking a little of the hot milk mixture into the yolks before adding them to the entire pan. This gradually raises their temperature and prevents them from scrambling.
Also, keep the heat on medium low and stir constantly while cooking to avoid hot spots.
How do I stop my chocolate pie crust from getting soggy? Soggy bottom, anyone?
Ah, the dreaded soggy bottom! The key is blind baking your crust properly. Dock the crust (poke holes with a fork) before lining it with parchment paper and pie weights (or dried beans if you're feeling thrifty). Bake until lightly golden, then remove the weights and bake for a few more minutes until the bottom is set.
This pre-baking process creates a barrier against the moist filling. You can also brush the crust with melted chocolate after blind baking for extra insurance.
Can I make this chocolate pie ahead of time? I'm trying to channel my inner Monica Geller and be super prepared!
Absolutely! This chocolate pie is actually better when made ahead of time. The flavors meld together and the filling sets up beautifully in the fridge. You can make the pie a day or two in advance and store it, covered, in the refrigerator.
Hold off on adding the whipped cream topping until just before serving to prevent it from getting soggy. Consider this your secret weapon for stress free entertaining.
I'm looking for a richer flavor. What are some chocolate pie variations or additions I can try?
For a deeper chocolate flavor, use dark chocolate with a higher percentage of cocoa solids in the filling. You could also add a tablespoon of instant espresso powder to the milk mixture for a mocha twist. A splash of Kahlua or other coffee liqueur would also add a lovely depth of flavor.
If you're feeling adventurous, try adding a pinch of cinnamon and cayenne pepper for a Mexican inspired chocolate pie!
How should I store leftover chocolate pie, and how long will it last?
Leftover chocolate pie should be stored in an airtight container in the refrigerator. It will last for 3-4 days. The crust might soften a bit over time, but the flavor will still be delicious.
If you are making this recipe from scratch, it should be noted that most pies are best the day of/the day after they are made, and can then start to degrade over time, especially homemade crusts.
How can I make this chocolate pie suitable for dietary restrictions like gluten-free or dairy-free diets?
For a gluten-free version, use a gluten-free pie crust recipe. There are many available online, or you can find pre-made gluten-free crusts in the freezer section of most supermarkets. For a dairy-free version, substitute coconut milk for the whole milk and use dairy-free chocolate and margarine in the filling.
You can also make a vegan whipped cream using chilled coconut cream whipped with powdered sugar and vanilla.
Classic Chocolate Dream Pie